Windows comes with thousands of utility services. Behind the scenes, it processes different utilities to accomplish various tasks at a time. Killer Network Service is one of those utility services that runs in the background.
Although the utility tool isn’t available on all regular Windows, you will find it on systems with Intel processors. It has been designed to monitor network connections and enhance the gaming experience.
Unfortunately, it has been a cause of high CPU and RAM usage for many users, which is a matter of concern. Therefore, we have some proven troubleshooting methods to fix Killer Network Service’s high CPU usage.
What is Killer Network Service?
Killer Network Service (KNS) is a utility service that works in the background of the Windows system. Its primary objective is to provide an excellent online experience.
KNS is integrated with a series of Intel Killer Wi-Fi cards, commonly seen on high-end PCs and gaming laptops. It helps to analyze network connections and reduce latency. Also, it comes in very handy to eliminate network lag.
Is KNS Bad for Our PC?
Absolutely not, Killer Network Service isn’t bad for our PC. It’s a fine service by Intel WiFi cards that helps improve our network connection in various ways: it reduces network latency, provides maximum bandwidth & minimizes lags.
When it eats the CPU, people start panicking about something bad happening inside the system, in reality, it’s totally the opposite. During periods of high CPU usage, KNS analyzes network traffic and optimizes the network accordingly.
Is Killer Network Service a Virus?
Killer Network Service is not a virus. As I already stated, it’s a network utility that you can find working silently on Task Manager to provide a good network service.
Since different types of viruses and malware mirror their name as KNS, people take it as a virus. If you have the curiosity to check whether it is a virus or not, you should fully scan the system using Virus and Threat protection tools.
Even if you don’t have an Intel WiFi Card, and showing KNS on the Task Manager, then it’s a matter of concern. Here is how you can check that KNS is not a virus:
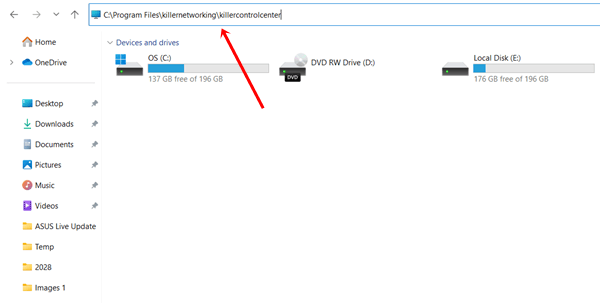
- Open File Explorer, and click on This PC.
- Now copy the below file path, and paste it into the Path bar.
C:\Program Files\killernetworking\killercontrolcenter
 Point to remember you can’t reach the destination if your system doesn’t have Killer Network Service.
 Point to remember you can’t reach the destination if your system doesn’t have Killer Network Service.
Right-click on the file named KNS, and select Properties. Now check the file to see whether the path is the same or not. If any file path doesn’t match, delete the file immediately because it’s a virus.
How to Fix High CPU Usage of Killer Network Service
When KNS chews your CPU and memory, disabling its service surely improves performance. However, we have several ways to stop the service completely.
1. Perform DISM Scan
This method is pretty much basic and worthy. KNS is not harmful at all, if it interferes with anything or its files have been corrupted, the DISM scan might help to restore system health once again.
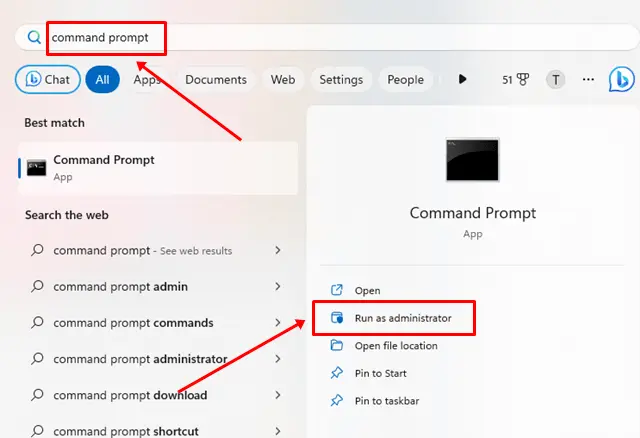
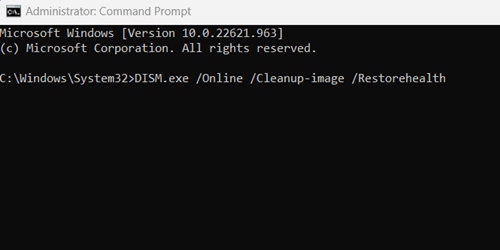
- Press Windows, and search for Command Prompt, click on Run as Administrator.

- Then Copy the following command and Paste it into CMD and hit the Enter button.
DISM.exe/online/clean-image/Restorehealth
 2. Stop Killer Network Service Using Services
 2.
2. If KNS takes too many resources from the CPU, stopping its services entirely is one of the most effective ways.
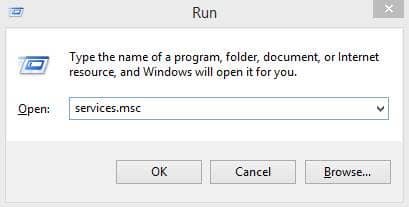
- Press the Windows + R on the keyword simultaneously, it will open the Run tool dialog box.
- Type services.msc and hit the enter button.

- Next, find Killer Network Service from the available list of services, and double-click on it.
- Now simply click on Stop and then the Ok button to stop its service right away.
3. Stop Killer Network Service using Resource Monitor
Here is another handy method to stop Killer Network Service and save your system from high CPU usage.
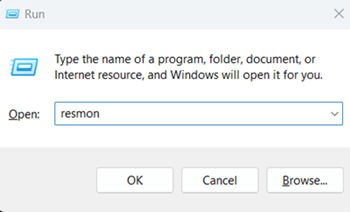
- Press the Windows Button, type Run on the search box, and open it.
- Now type resmon on the run tool, and hit the Enter button.

- Resource Monitor will appear; find Killer Network Service, right-click on it, and now select End process to stop services.
4. Uninstall Killer Network Service
Eliminate the root cause of the issue within the system rather than merely stop its services, ensuring that the problem does not reappear. Therefore, uninstalling Killer Network Service kills all the problems.
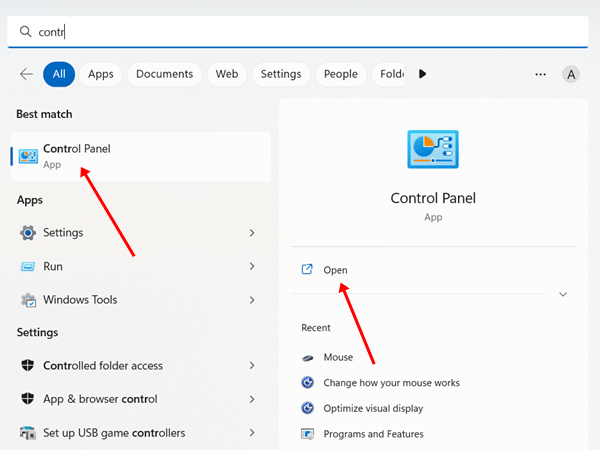
- Press the Windows start, search for Control Panel, and open it.

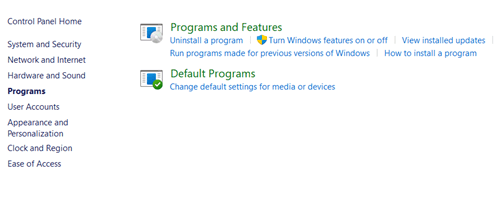
- Then, click on Programs and Features.

- As usual, find Killer Network Service Manager Suite.
- Now right-click on it, and simply click on Uninstall – very simple.
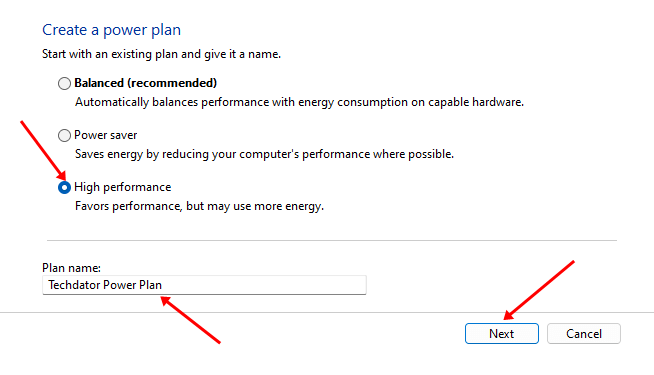
5. Switch to High Performance
If you don’t want to uninstall KNS from your devices, there is a way to prevent high CPU usage: switch your system to the high battery performance plan. It directly impacts CPU and system performance. Here is what you need to follow:
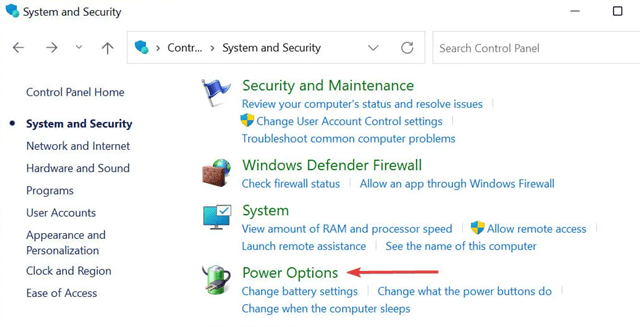
- Open the Control Panel > Power option.

- Here you have to select High Performance. Although this will drain the battery faster, it provides excellent performance.

6. Use of Restore Point
Windows has an excellent feature called Restore Point that allows you to go back to the previous settings of the OS if your system isn’t working properly.
If you have no clue about restore points, this guide assists you on how to use a restore point.
After creating or having a restore point, you have to open the Recovery drive and use the restore point to roll back the previous OS settings.
Needless to say, it doesn’t interfere with your data, so don’t worry about losing data.
Final Words
I hope you have gathered enough information on what is Killer Network Service and how to fix high CPU usage in the simplest way that you can perform easily. However, if you’re facing any difficulties, let us know in the comment section.


