The launch of Windows 11 has excited everyone. And the main reason behind this is the up-gradation of system UI. From the general windows theme to default elements and even the icons, Microsoft has refreshed most sections of Windows 11 OS.
While this seemed good, as the overall experience looks modern now, few customers aren’t happy with the change. And this is normal, as many have accustomed to the good old design, and changing all of it suddenly can be hard.
Thus, Microsoft has given users options for most elements to be changed back, and have them run as usual. One among them is the Start Menu, which is a critical section of the OS.
Previous, until Windows 10, the Start Menu is supposedly set at the left bottom corner of the screen, and a dedicated button on the keyboard will open it up instantly. But, this was now moved to the center in Windows 11 by default.
Though this made it look like mimicking the macOS, it looked good for many. But for those who aren’t interested in having the Start Menu at the center of Taskbar, here’s a way to move it back to its original left-side position of the screen.
Also Read- How To Roll Back Windows 11 to Windows 10
Steps to Move Windows 11 Start Menu From Center to Left
As said, Microsoft has given users the choice of shifting some elemental designs to old-style, and Start Menu’s position is one of them. For this,
- Go to the Settings app in your Windows 11 OS.
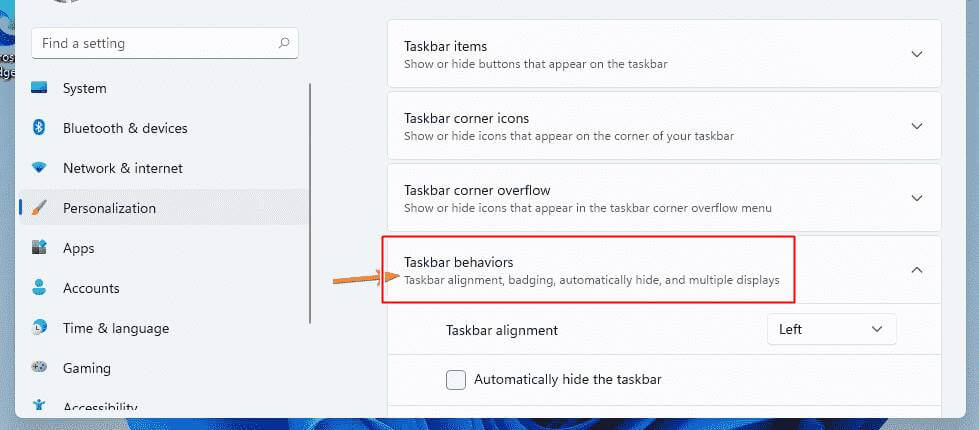
- Here, go to the Personalisation section from the left bar, and then proceed to the Taskbar section.
- Here, under the Taskbar section, you’ll see Taskbar Behaviours, and clicking on it open the tweakable settings.

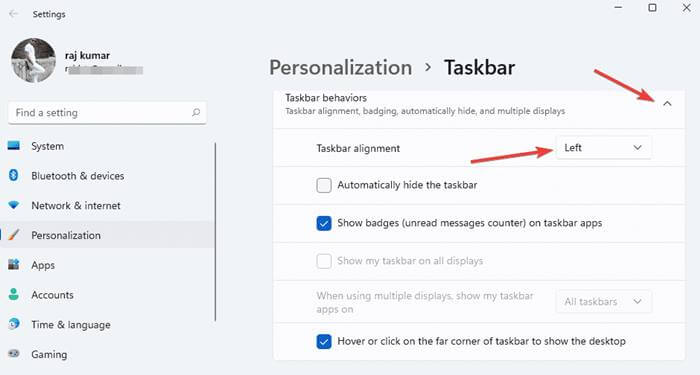
- Under it, you should see the Taskbar alignment option with a drop-down menu, and clicking on it will have only two options – Left and Center.

- As the Start Menu position is at the center of the Start Menu by default, change it to Left and close the settings to see the change.