Many institutions are using Microsoft’s RDP to set up remote workers. Remote Desktop Protocol or RDP is a built-in feature that comes with almost every modern Windows device. However, it allows you to connect to a machine as long as that machine accepts connections.
In the meantime, people are on work from home, and they always need to gain access to machines in the office, and they fail to do it because they are not familiar with the RDP.
Well, this brings us to a conclusion to bringing up a guide to explain the methods to open RDP Port to allow Remote Desktop Access to the system. So, now let’s move ahead to check out the related aspects.
Also Read- TeamViewer Alternatives
List of Best Methods To Open RDP Port to Allow Remote Desktop Access to Your System
It isn’t a tough task to do as simple clicks are required to allow the Remote Desktop Access to your system. So, let’s take a look at the different methods that you can follow:
Method 1: Use Windows Firewall
You can use the Windows Firewall to open the RDP port that will allow remote desktop access on windows 10/11 PC. But, in case you don’t know how to follow the steps mentioned below:
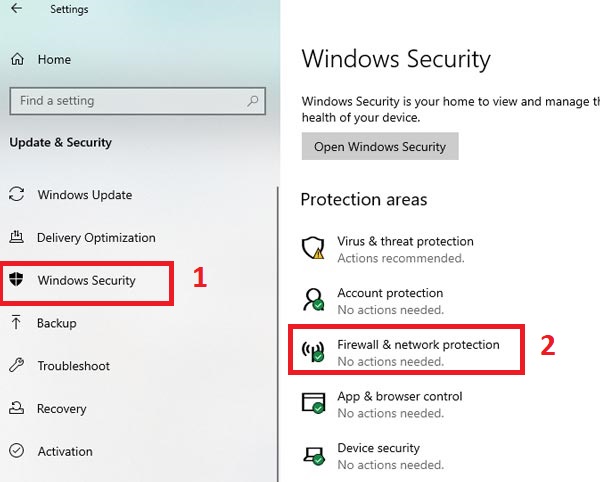
- First of all, open Windows Settings by pressing the Win+I button altogether.
- Then, follow the path: Update & Security> Windows Security > Firewall & network protection.

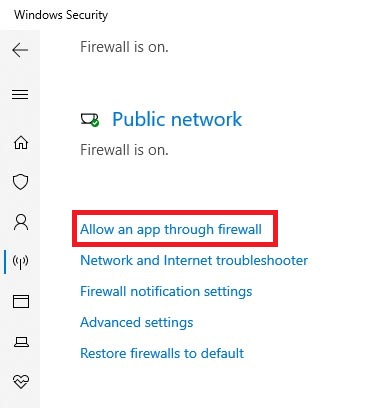
- Now, click on the Allow an app through the firewall followed by Change Settings.

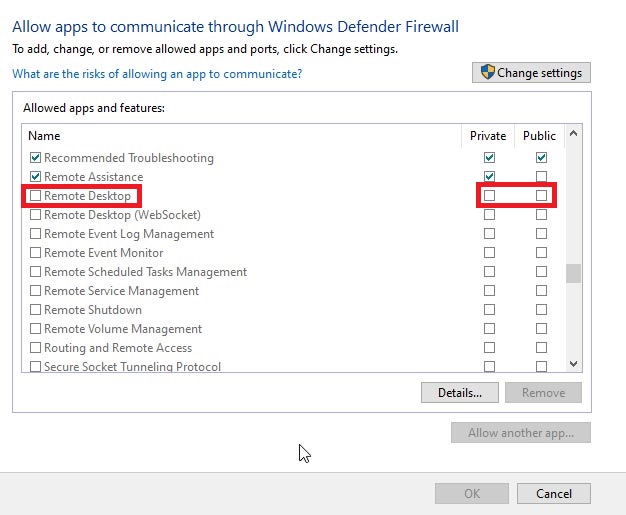
- Next, locate the Remote Desktop and checkmark the box located in front of the private and public options as per your need.

- Finally, hit the Ok button, and that’s it. Now, you have enabled the RDP on your PC.
Method 2: Change The Default Port of RDP
Well, this is a quite complicated method, but you need not worry because we are here to make it easier for you in a few simple and easy steps:
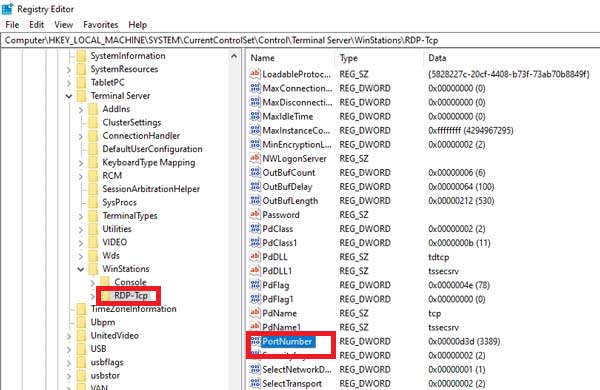
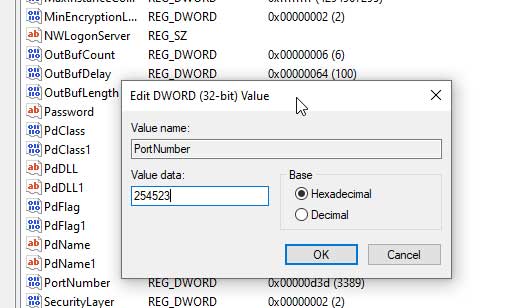
- First of all, you need to open the Run. Then, copy and paste regedit.
- Then, navigate to the following:
HKEY_LOCAL_MACHINE\System\CurrentControlSet\Control\Terminal Server\WinStations\RDP-Tcp\
- After that, you have to double-click on PortNumber.
- Then, change the port number between 1001 to 254535.

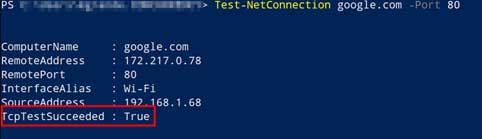
That’s it. Now, once done, you need to check if port 3389 is open and listening. So, here are the steps to do so:
- Initially, go to the Windows Search menu and search for PowerShell and run it as administrator.
- Then, run the following command: tnc 172.217.0.78 -port 3389 (you can change the with your’s).
- That’s it. Now, run the command and make sure the value of TcpTestSucceeded should be True.

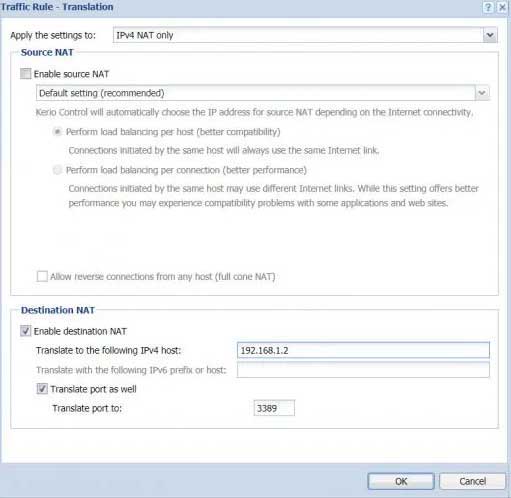
Method 3: Use Router’s NAT Translation
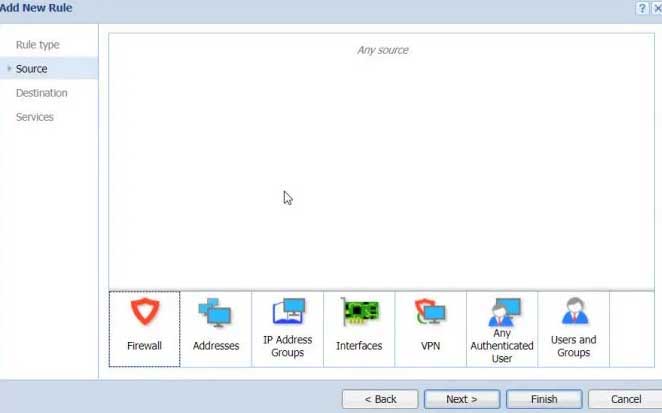
- Firstly, you have to open the router’s configuration page. The address will be given at the back of your router.
- Then, log in using your admin credentials. Then, switch to the Traffic Rules and click on the Add New button.
- After that, give it a name and, in our opinion, keep it a generic option to allow position.
- Then, make sure to set the Source to any. That’s it. Now, hit the next button.

- After that, add the Windows Firewall to the Destination.
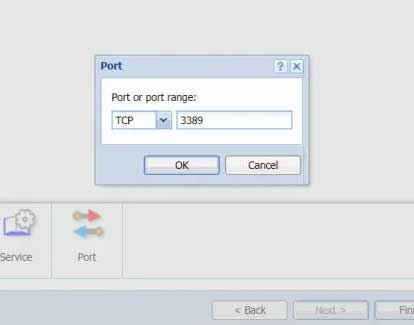
- Now, under the services option, select Port and give it a value 3389.

- That’s it. Finally, enable the destination NAT, specify your PC’s IP address, and hit the Finish button.

Setup Remote Desktop from Anywhere & Change Secure RDP Port Access [VIDEO]
From Editor’s Desk
So, these were some methods that you can use to open RDP Port to allow Remote Desktop Access to the system. I hope this guide has helped you. However, if you find complexity while performing the methods mentioned above, let us know in the comment section.


