Do you remember your wifi password? Most of us don’t because we don’t need to enter the password again once connected to the device. Or if you have kept a complicated password and forget, you need to find out the Wifi password.
There are a few different ways that help you to find out your WiFi Password from your system. These methods will help you to find passwords for different networks to which your device was connected earlier.
Best Ways to Find Out WiFi Password on Windows 10 PC
You can check out the password if you are the PC administrator and do not have any restrictions. Here are some useful methods through which you can find out the Wi-Fi password on your PC.
Also Read- 100 Windows 10 Run Commands You Should Know
Method 1: Using Windows Settings App
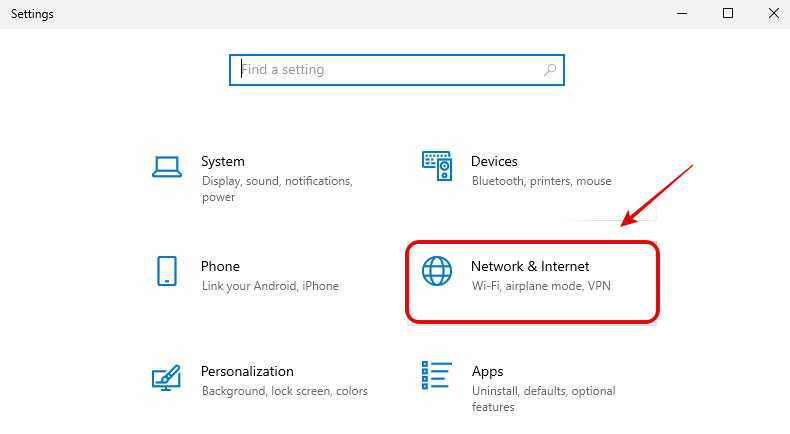
- Click on Start Menu and go to Settings.
- Tab on Network & Internet option. OR
- On the toolbar, do right-click on the Wifi icon and select the Network & Internet option.
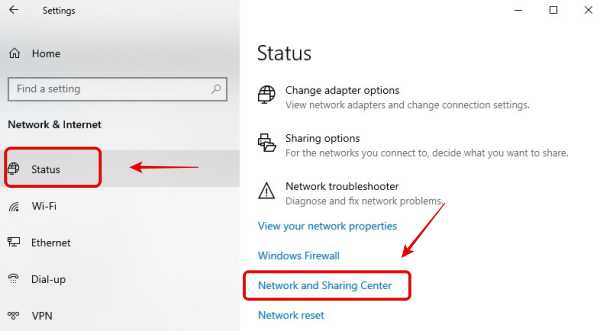
- From the left side, click on Status.
- Now, click on the Network and Sharing Center.
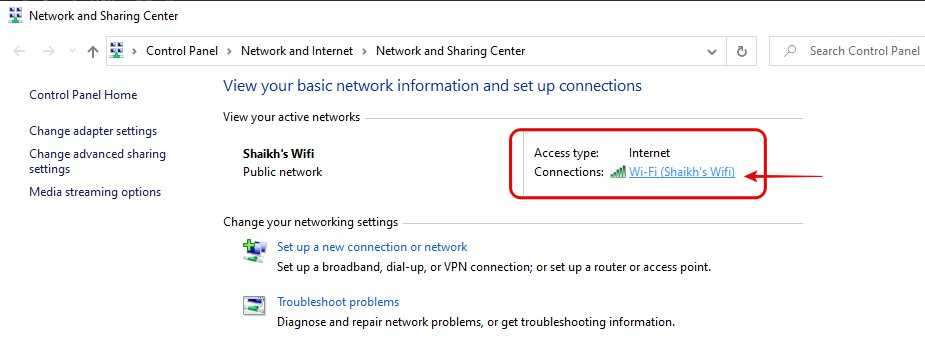
- In the next window, you will see active internet connections.
- Click on your Wi-Fi name.
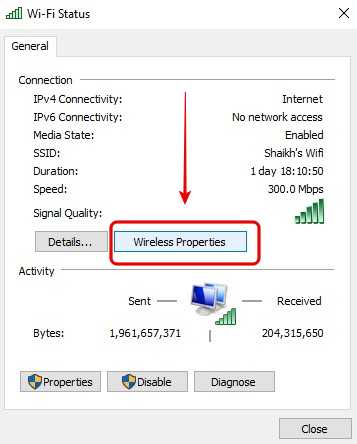
- Now, the Wi-Fi status window will be opened; there, click on Wireless Properties.
- In the next window, move to the Security tab.
- Finally, click on the show characters box and check your Wi-Fi network password.
Method 2: Use Control Panel to View Wifi Password
This method can be used when you are unable to access Windows Settings. Here you will use the Run Command to check your Wi-Fi password directly.
- Open Run dialogue box by pressing Windows + R keys on Keyboard.
- In the box, type a command ncpa.cpl and click on OK.
- Once you hit on OK, directly network connections will be opened.
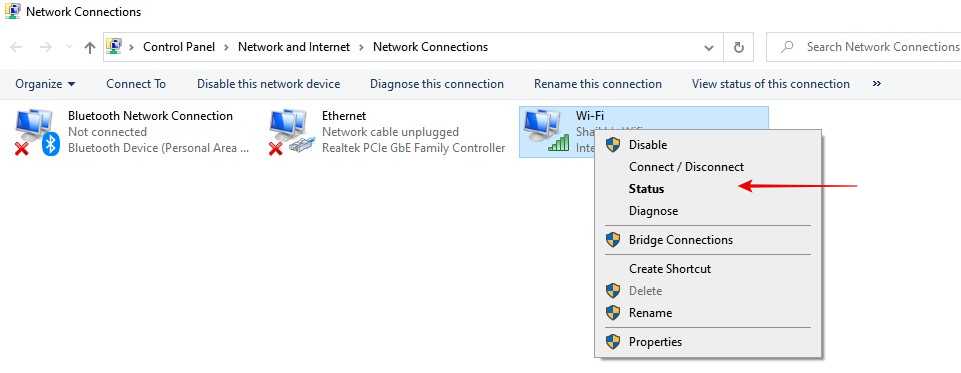
- You will see your Wifi Network there do right-click on it.
- Now, click on Status, and you will see the Wifi status window.
- Click on Wireless Properties
- Go to the Security tab and click on the show characters box.
This method is very straightforward and can be done by anyone. But, if you want a more advanced method to find out your network’s password, then use the Power Shell command.
Method 3: Using Power Shell Command
The above two methods will only show you the Wi-Fi network’s password on which you are connected. But if you want to get passwords of all the previous networks, then you must use the Power Shell command or Command Prompt.
If you are using these command lines, you don’t need to get any third-party apps to find your Wifi Password.
Use Power Shell to find out Wifi Password:
-
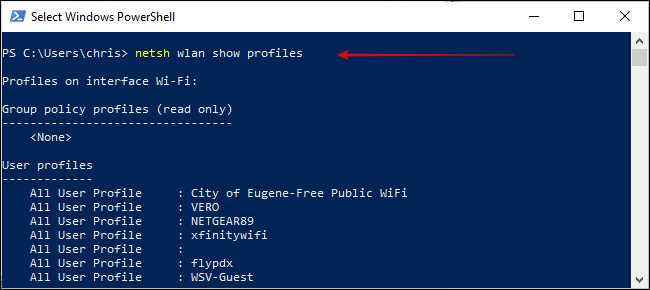
- Open Power Shell by pressing Windows + X keys together or do right-click on the start button.
- In the Window, type in the Command.
netsh wlan show profiles
- You will see all the saved network profiles on your system.
- Search for the name of the network of which you need a password
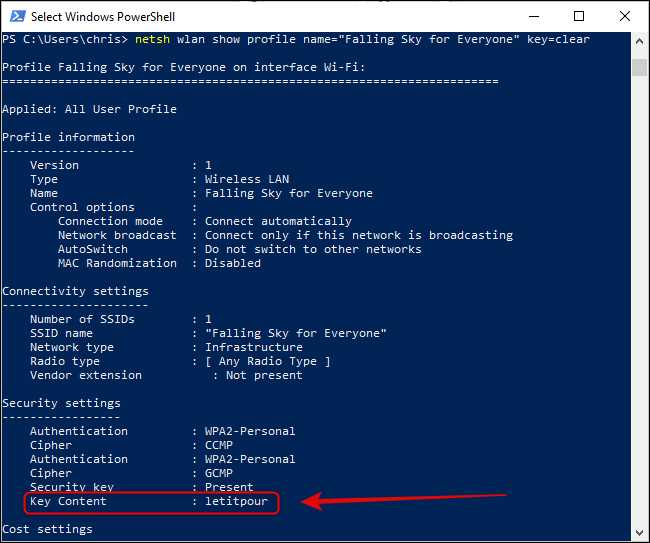
- Run the following command by entering the name of that network
netsh wlan show profile name="name of the network" key=clear
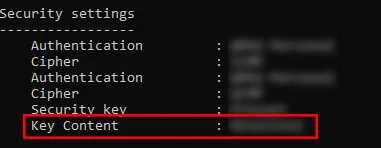
- Run the command and look for Security Settings
- Under that, you will see Key content filed, which shows the password of that Wi-Fi.
Using CMD
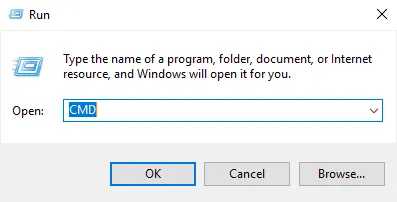
- Press Windows + R keys to open Command Prompt
- Type CMD and click on OK.
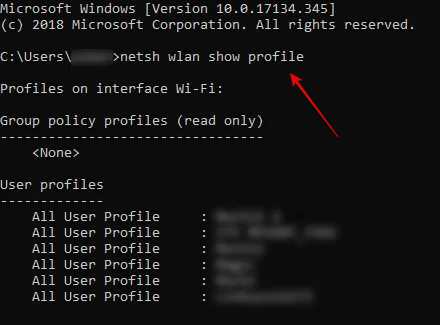
- Type in the Command
NETSH WLAN SHOW PROFILE
- A list of Wi-Fi network profiles will be shown.
- Look for the network name of which you want to know the Password.
- Type in the given Command by entering the name of that network
NETSH WLAN SHOW PROFILE name of the network KEY=CLEAR
- Under Security Settings, look for Key Content.
- Beside Key Content, you will see the password.
Method 4: Use Third-Party App
Apart from all this, you can also use third-party apps to find out your Wifi Password. There are many apps available on the internet, but we recommend using the WirelessKey View app. It has a simple user interface and is completely free to download.
To use this app, you need to first extract the zip file and then launch the program. You will see the list of all the network profiles with their passwords under Key (Ascii).
Also Read- Best WiFi Analyzer For Windows 10

