This Covid19-pandemic has changed the lives of all of us in the last two years. Many of us are doing office work from our homes today. However, our internet bill has increased a lot these days, just because of this.
Although we have the option of WiFi, many people still use their mobile hotspot for doing their work on Windows 11 PC. However, if we do not take concrete measures to save our internet data, our pockets will empty while paying the bill. Meanwhile, we know that Microsoft recently launched the new Windows 11 with many new features, including a data capping.
Using this feature, you can set a data usage limit in Windows 11. But, it seems like not many users are familiar with this feature even though it is also available in the previous versions of Microsoft’s Windows. Anyway, If you don’t know how to enable the data usage limit, you can simply follow this detailed guide. So, let’s start with it.
Also Read- Increase Your Internet Speed in Windows 11
Steps to Set Data Usage Limit in Windows 11
Similar to Windows 10, you can also set or use the data usage limit feature to save your data in Windows 11. So, if you don’t know how to do it, simply follow the steps given below:
- Initially, you have to press and hold the Win+I button simultaneously to open the Windows Settings. Alternatively, you can also search for it using the Windows Search bar.

- After that, simply click on the Network & Internet tab, and on the next screen, tap on the Advanced network settings.

- Now, navigate to the More Settings and click on the Data Usage.

- Then, you will see all the network adapter’s names connected to your device on the next screen. For example, you’ll see the WiFi name if you are connected to a WiFi network. So, click on it and choose the connected network adapter to change the data usage limit.
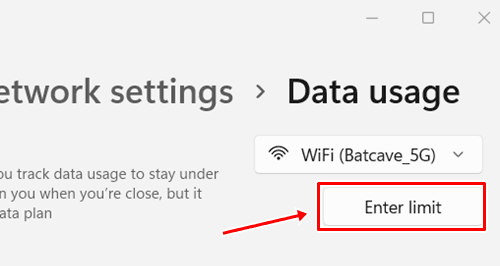
- After that, tap on the Enter Limit button below your network name.

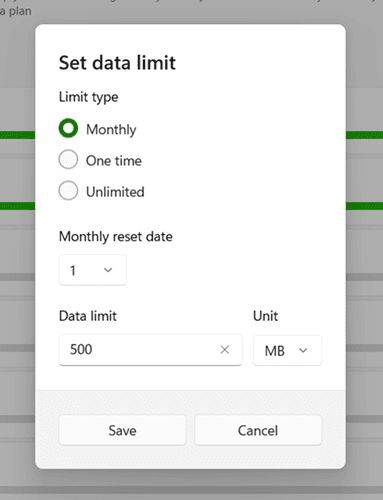
- Now, enter the data limit in numbers as you want to depend upon your usage and hit the Save button.


That’s it. Now, you will get to see a screen with a graph showing you how much data you’ve already used. So, you can always look up this screen to know about your usage.
How To Modify Data usage Limit?
So, now you know how to set up a data usage limit on your Windows 11 PC. But, what if you want to modify the settings that you have previously set up? Well, don’t worry! We are here to help you, simply follow the steps mentioned below:
- First, you need to follow this path again: Settings > Network & Internet > Advanced network settings.
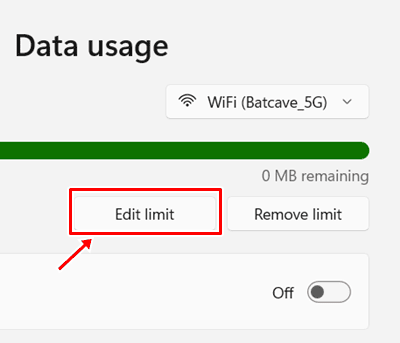
- After that, click on the data usage and hit the Edit Limit button.

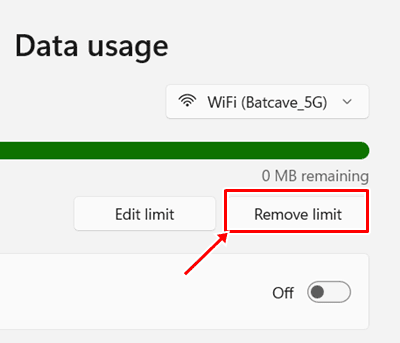
- Then, change the previously set limit to a new one. However, to completely remove it hit the remove limit button.
- You can also enable the metered connection option below the above setting. If you enable this option, then Windows will automatically limit your usage and won’t update the Windows.


If you set your Internet connection as metered, Windows won’t install an update or update background apps. However, it is helpful if you are using a limited data plan. So, setting up the data usage is very helpful in that way. Therefore, we always recommend using it if you do not have a powerful PC and a WiFi connection.
From Author’s Desk
So, that’s all we have for you to set up data usage in Windows 11. We hope that the steps we have mentioned in this article have helped you. Furthermore, if you have any doubt while performing the above steps, please let us know in the comment section.


