Most of the time, you are required to forward messages from another Gmail account. For example, if you have a different business, you may need to do this process as many do. Nevertheless, trying to log in and check various Gmail accounts becomes cumbersome, and that’s why Google introduced the forwarding technique in their Gmail app.
Well, this feature redirects all your emails to a single email address. Therefore, this feature looks really promising, especially when you own more than one business. So, we are here with a guide in which we explain some steps that you need to follow to set up a forwarding email address in Gmail. Therefore, make sure to read it till the end.
Also Read: How To Do Strikethrough Text in Gmail and Other Gmail Tricks
Steps to Set Up a Forwarding Email Address in Gmail
You need to follow a few simple and easy steps to enable the forwarding email address in Gmail. But, in the case due to any reason, you don’t want to use this feature anymore, then follow the same steps, but rather than enabling it, toggle the button to disable it. So, here are the precious steps that you need to follow:
- First of all, open Gmail on your PC and log in using the account you wish to forward messages from.
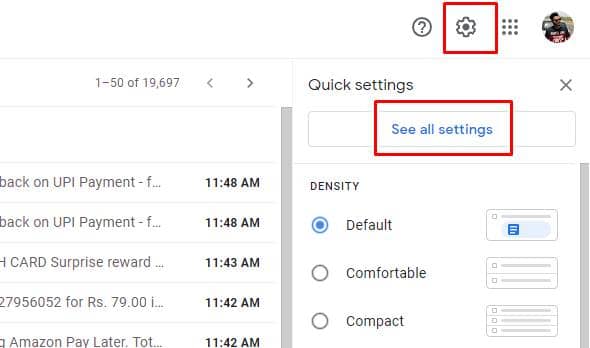
- After that, click on the Settings option followed by the See all settings.

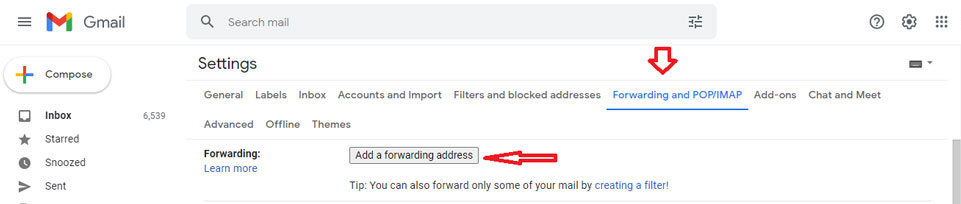
- Then, select the Forwarding and POP/IMAP tab and click on Add a forwarding address.

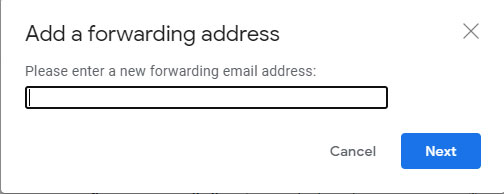
- Now, enter the exact email address to which you wish to forward messages and hit the Next button.

- After that, click on Proceed followed by OK.
- That’s it. Now, Google will send a verification link to your given email address. So, click on that link for confirmation.
- Now, hover over to the settings page and refresh your browser.
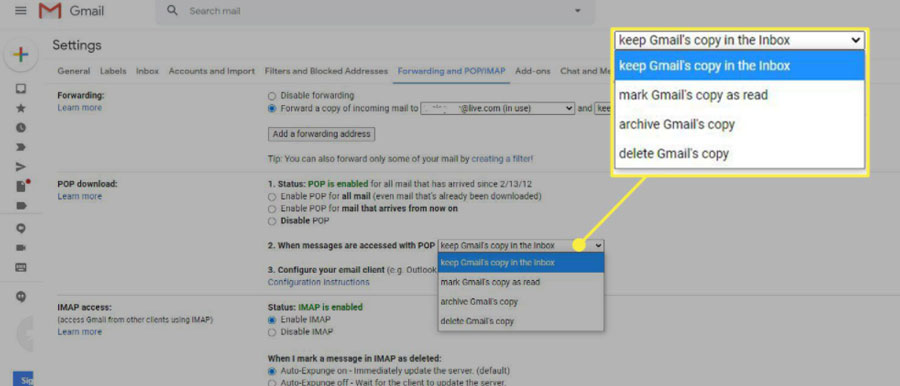
- Then, switch to the Forwarding and POP/IMAP tab and click on the Forward a copy of incoming mail to.
- Finally, choose your action that what you want to do. We suggest you select the option to keep Gmail’s copy in the Inbox.

- Choose what you want to happen with the Gmail copy of your emails. We recommend keeping Gmail’s copy in the Inbox. Then, click on Save Changes.
Note: Always keep in mind that you are only allowed to forward messages for a single Gmail address and not an email group.
So, these are some easy steps that you need to follow. We hope you are now able to enable the Forwarding Email Address in Gmail. If you still find the steps mentioned above a bit complicated, feel free to contact us. Our team will surely help you do this.


