Windows 11 is the brand new operating system from Microsoft. Best of all, it’s previous versions. Now, you can experience a whole new way to use your PC. It doesn’t just bring you closer to the specification you require, and it brings you closer to everything you love. However, there are many new privacy features in Windows 11. One of them is hiding your files and folders as it also comes in Windows 10.
But many times, we enable this feature (Hide your files & folders), but after that, we have to reaccess the same File, then we get confused. However, keeping this in view, we decided to bring a guide to help you. So, we are here with the guide on how to show hidden files and folders in Windows 11. Therefore, you just need to make sure to follow us till the end.
Also Read- How To Restart Windows Explorer in Windows 11
Multiple Ways To Show Hidden Files & Folders in Windows 11
Here you can get all the necessary steps that you need to follow to show hidden files and folders on your Windows 11 PC. So, make sure to follow them carefully:
Method 1: Use View Menu in File Explorer
If you don’t know how to use the View menu in your file explorer to show all the hidden files and folders on your Windows 11 PC, then make sure to follow the steps we have mentioned below:
- Firstly, open File Explorer and click on the View menu located at the command bar.

- After that, bring the cursor to the Show option and click on the Hidden Items.

- That’s it. Now, all the hidden files on your PC will be shown up, and you’ll recognize them easily as they had a bit of faded icon.


Method 2: Use Registry Editor
You can use the Windows Registry Editor to show the hidden files on your Windows 11 PC. But, in case you don’t know how to do this, simply follow the instruction carefully as you are going to edit the registry:
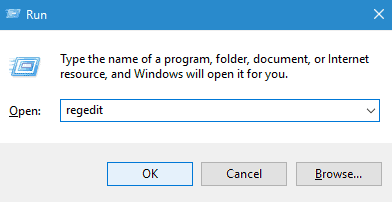
- First of all, you have to press Win+R and search for regedit.

- Then, hover to the path:
HKEY_CURRENT_USER\SOFTWARE\Microsoft\Windows\CurrentVersion\Explorer\Advanced\
- After that, locate the Hidden option and double-click on it.

- Now, change the Value data from 2 to 1. So, once you change the value to 1, the hidden files will appear on your PC.

- After that, if you want to see all the hidden system files, simply locate the ShowSuperHidden and double click on it. Then, do the same as above mention.


Method 3: Use File Explorer
Now, if the above two methods won’t work in your case, then we recommend you try this method to bring back your hidden File on your Windows 11 PC. So, here are the steps that you need to follow:
- Firstly, open the Windows File Explorer and navigate to More > Options.

- Now, switch to the View tab. Then, locate and click on the Hidden files and folders.
- After that, select the Show hidden files, folders, and drives option and hit the Ok button once it gets expanded.

- Then, next to the same windows dialog box, find and untick the option Hide protected operating system files (Recommended) > Yes > Ok.
")


")
So, that’s all we have for you to show hidden files and folders on your Windows 11 PC. We hope you find this guide helpful while searching for hidden files or hiding any of your files and folders. Furthermore, if you have any doubts regarding the methods discussed above, feel free to ask us in the comment section.


