When Windows 11 was launched, Microsoft said that users must have Secure Boot and TPM 2.0 on their PC to install Windows 11. This feature is a part of the Unified Extensible Firmware Interface (UEFI), which defines the relationship between the OS and the BIOS. This is to ensure your PC is safe from all kinds of malicious infections.
As TPM 2.0 and Secure Boot were made a requirement for installing Windows 11, you will get an error message saying ‘This PC Must Support Secure Boot’ if you do not have this feature enabled. In this article, we will guide you through the complete process of fixing the ‘This PC Must Support Secure Boot’ message in Windows 11.
Why Should I Enable the Secure Boot in Windows 11?
The Secure Boot helps users protect their device from malware attacks that the Antivirus Software cannot detect on your device. It validates the files’ digital signatures and identifies the unwanted modifications of the boot loaders in the system.
If anything suspicious is detected by it, it will automatically be blocked before it impacts the system. To ensure the PC is more secure, Microsoft required users to have TPM 2.0 and UEFI Secure Boot to install Windows 11.
Fix ‘This PC Must Support Secure Boot’ Message in Windows 11
If you are using an older PC, then there are chances that your PC might not have TPM 2.0 and you may keep getting this error at the time of Windows 11 installation.
However, if you’re using a new PC/Laptop, but still facing this issue, it might be because this feature is not enabled on your PC by default. You can follow the steps given below to fix this issue.
1. Check if Secure Boot is Enabled
Firstly, check if the Secure Boot is enabled before you enter the BIOS to fix ‘This PC must Support Secure Boot’. To do so, follow the steps given below-
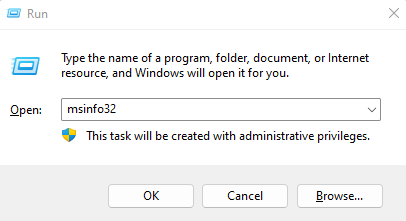
- Press the Windows+R key combo, type msinfo32, and press Enter.

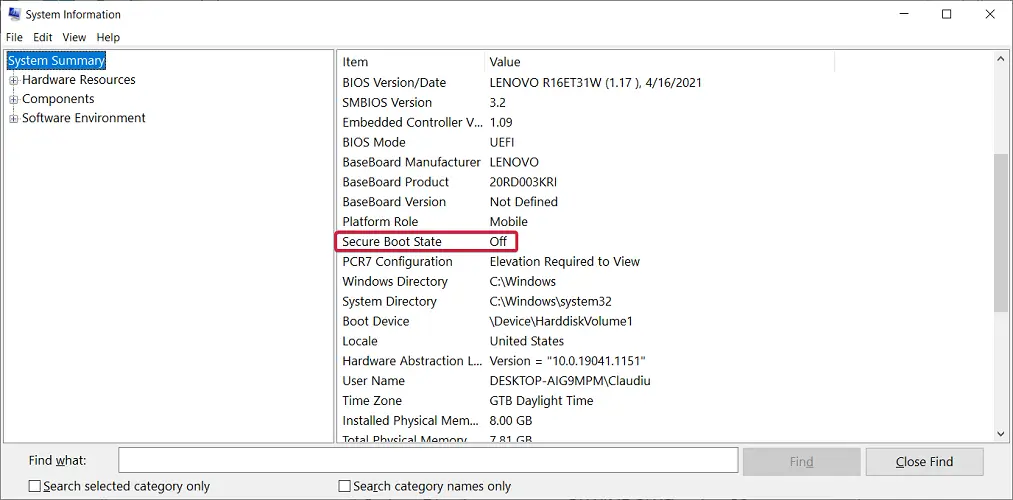
- Under the System Summary, look for Secure Boot State and check whether it is Off or On.

- If it is Off, enable it by following the instructions and the next steps for enabling the Secure Boot.
2. Enable Secure Boot Using BIOS
Now, you will have to enable Secure Boot on your PC. You can do this by following the steps given below-
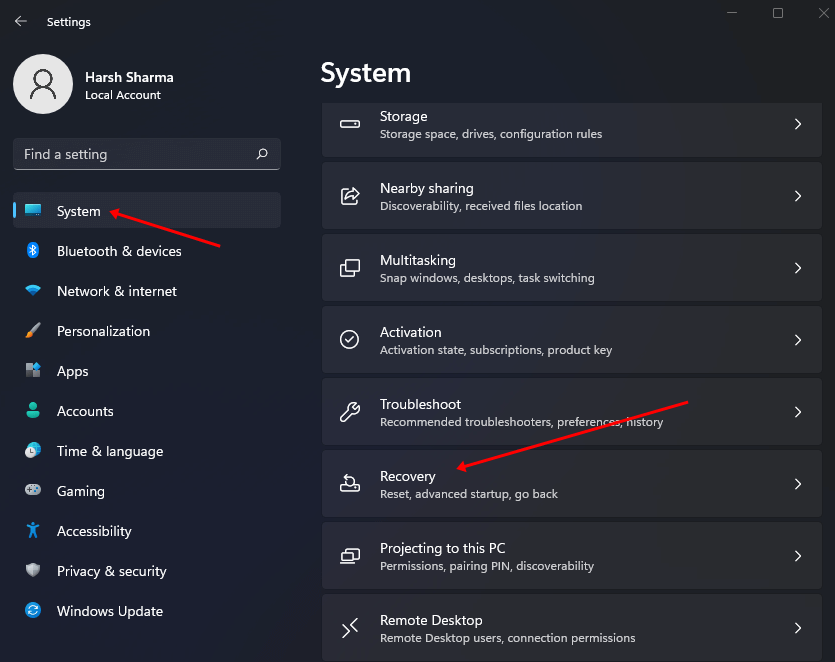
- Go to the Start Menu, search for Settings and open it.
- Here, click on System > Recovery.

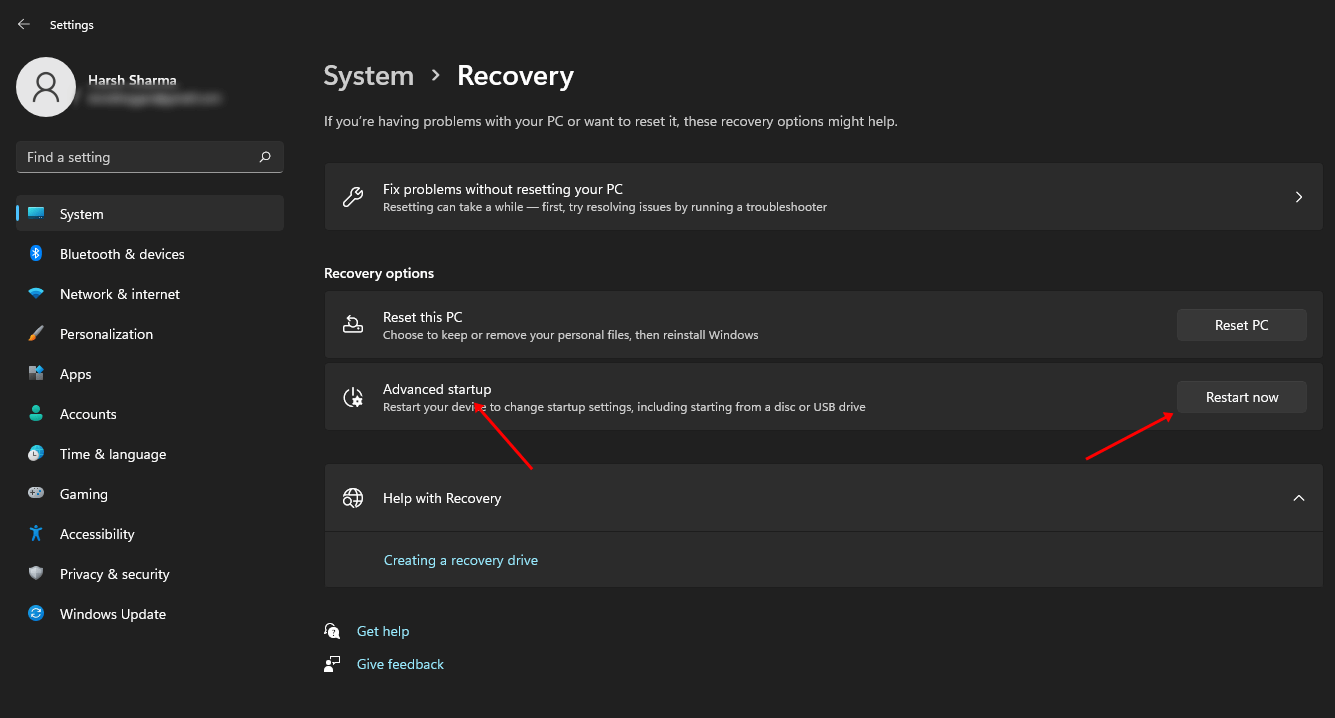
- Then under the Advanced Startup section, click on Restart Now button.

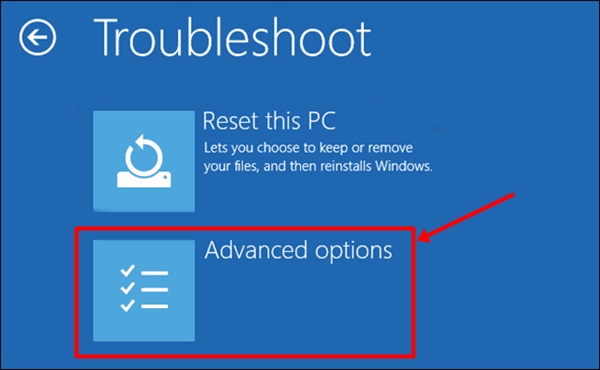
- Next, click on the Troubleshoot option and then click on Advanced Options.

- Now, click on the UEFI firmware settings option. You will be headed to the BIOS Menu.

- Under the Security tab, look out for the Secure Boot option. Turn on the toggle for it.
- To save the changes made, press the F10 key on your keyboard.
- Once the system gets rebooted, restart the Windows 11 installation process and you will no longer face the issue.

Is it Possible to Install Windows 11 Without Secure Boot and TPM 2.0?
No, it’s not possible to install Windows 11 without Secure Boot and TPM 2.0. The users must have TPM 2.0 and Secure Boot for the Windows 11 installation. If you are using an older PC, then this feature might not be available.
You will have to check your motherboard or laptop’s guide for it. If you are using a new PC, your PC will have TPM 2.0 and Secure Boot, but you will have to enable it if it is not enabled by default.
Conclusion
That’s how you can fix the ‘This PC Must Support Secure Boot’ message while installing Windows 11. If you have been facing this error, it might be because your PC does not support secure boot or the feature is not enabled. You can follow the above steps, and you will be able to fix this error.


