A Touchpad is one of the essential devices on any laptop. It becomes challenging to navigate through your device without a functional touchpad. Recently some users have complained about the Touchpad not working in Windows 11. If you are also among those, keep reading to know how to fix it.
Although laptop touchpads have a special protective coating, they can still malfunction due to the wear and tear over time. Errors like these mainly occur due to some software errors or a faulty touchpad. However, there are many other reasons to be blamed. We have compiled a list of some troubleshooting methods that may help you fix this error in this post.
Also Read- Fix Device Manager Keeps Refreshing
Fix Touchpad Not Working in Windows 11
Below mentioned are some troubleshooting methods that may help you fix this error:
Fix 1: Reboot Your PC
The Touchpad on your device could stop working due to a background process or a minor glitch. To fix minor bugs and errors like these, rebooting your device always helps.
Fix 2: Enable Touchpad from Settings
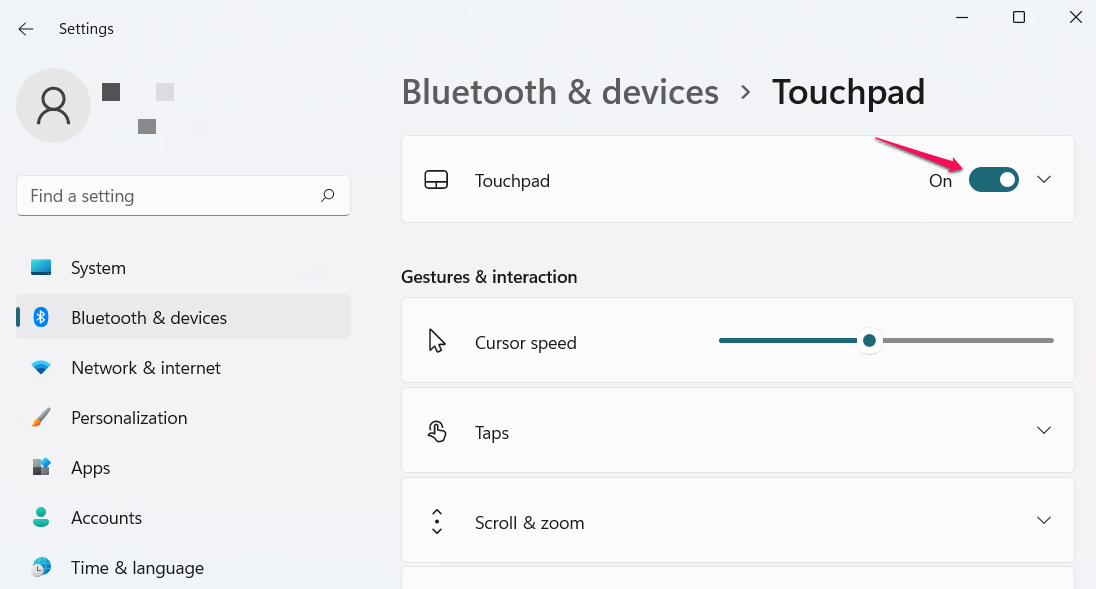
This usually happens after you have recently updated your device. Sometimes the system shuts down some settings while downloading and installing an update. Check if the Touchpad is turned off in the settings. Here is how you can do it:
- Open Settings by pressing Windows key + I.
- Navigate to Bluetooth & Devices > Touchpad and then toggle the switch to turn it ON.
Fix 3: Update Touchpad Drivers
In many cases, this issue arises if the touchpad drivers are outdated or corrupted. Updating the touchpad driver might help you fix it. Here is how you can do it:
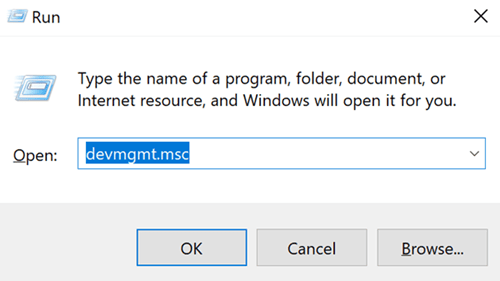
- Press Windows key + R to open the Run dialogue box.
- Type the following and hit enter.
devmgmt.msc
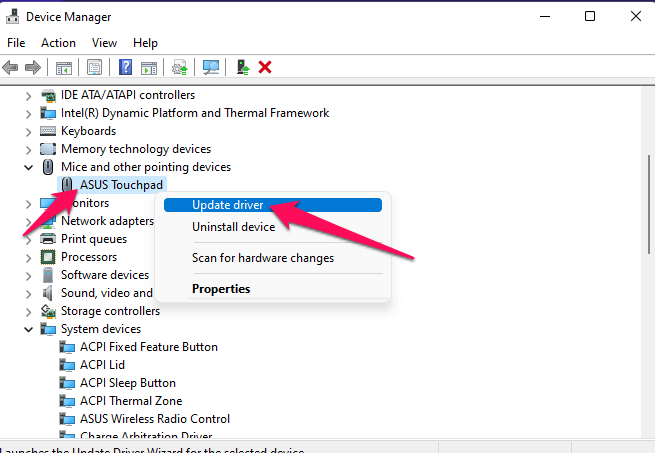
- Once the Device Manager opens, expand the option Mice and other pointing devices.
- Right-click on your Touchpad and select Update Driver.
Fix 4: Run Hardware Troubleshooter
Touchpad not working on your Windows device could be due to a hardware issue. Run the windows hardware troubleshooter to check any hardware faults on your device. Here is how you can do it:
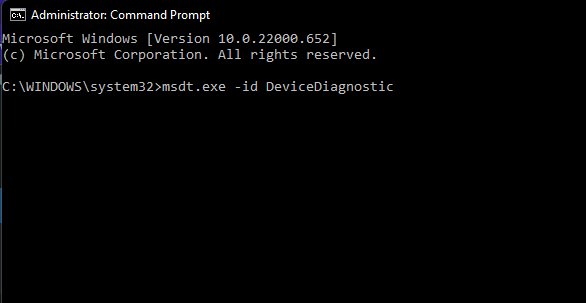
- Click on Start, search for the Command Prompt and click on Run as Administrator.
- Type the following command and hit enter.
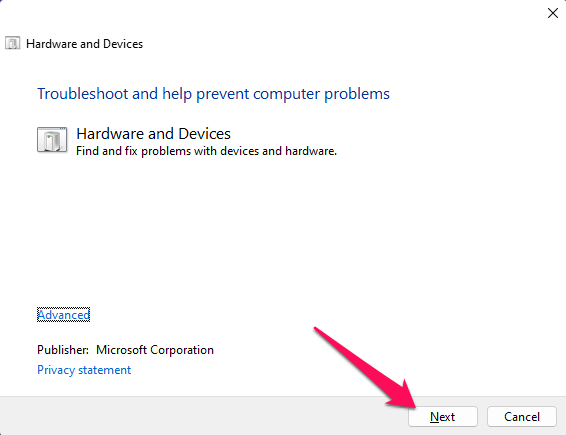
msdt.exe -id DeviceDiagnostic
- A troubleshooting window will now pop up. Click on Next and follow the instructions on the screen.
- If the hardware troubleshooter finds something wrong, an automatic repair option will appear, click on it, and Windows will automatically fix it.
Fix 5: Disable Third-Party Antivirus.
Third-party antivirus software installed on your device could also be why Touchpad may not work. Disable the antivirus software and check if the issue is fixed. If disabling the antivirus didn’t work, try uninstalling it temporarily.
Fix 6: Rollback Touchpad drivers
If the Touchpad of your device started malfunctioning after the recent update, try rolling back the Touchpad drivers of your device. Here is how you can do it:
- Press Windows key + R to open the Run dialogue box.
- Type the following and hit enter.
devmgmt.msc
- Once the Device Manager opens, expand the option Mice and other pointing devices.
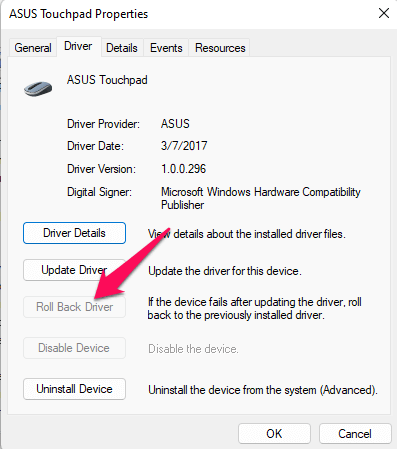
- Right-click on your Touchpad and select the Properties option.
- Navigate to the Driver tab and click on Roll back driver.
- Once done, restart your device and check if the Touchpad starts working.
Fix 7: Update Windows
If you haven’t updated Windows in a long time, bugs and errors like these can occur. Update Windows and check if the issue is fixed.
Fix 8: Reset Windows
If youre still unable to fix this issue, factory reset your PC. Sometimes, the error is in the Windows core files that cannot be repaired manually. Here is how you can factory reset your PC:
- Open Settings > Windows Update > Advanced Options > Recovery.
- Finally, click on Reset this PC and follow the instructions on the screen.
Fix 9: Visit the Nearest Repair Shop
If none of the above-mentioned steps could help you, it could be a hardware issue. If that is the case, visit the nearest repair shop and get the Touchpad fixed.
Wrapping Up
This was how you can fix Touchpad not working in Windows 11. We hope that the troubleshooting methods mentioned above were able to help you. If this post did help you, don’t hesitate to share a review in the comments below.

