Who wants to check the Wifi signal strength when it works perfectly fine? But weak performance and unstable connection speed somehow lead you to take care of its signal strength and other things.
With the help of a router, a LAN distributes as the wireless connection. After determining several things, the network maintains speed efficiency. And the signal strength is one of them. So dropping signal strength directly impacts the speed and performance.
However, if you are experiencing low-speed internet, therefore checking its WI FI signal strength is the best practice in the first place. But want to know how? Here’s the tutorial on how to check Wifi signal strength in Windows 11 to follow.
How to Check WIFI Signal Strength in Windows 11
Though checking WIFI signal strength is the easiest thing to do in Windows 11, it is as easy as setting a new wallpaper. Here are the best ways to view WIFI signal strength in Windows 11. So without any further ado, let’s begin the process.
1. In Taskbar
Taskbar is a long bar from left to right, mainly found at the bottom, where you can view and manage apps as per choice.
It will show you currently working apps, programs, and a few shortcuts, including the WIFI, features shortcut.
So take a closer look at the right corner of the taskbar. You will see WIFI signal strength metrics on curve lines. The more filled curve lines you have, the more stability you will get.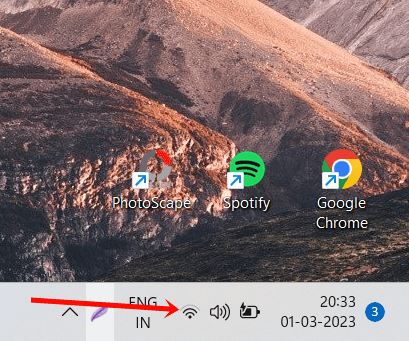
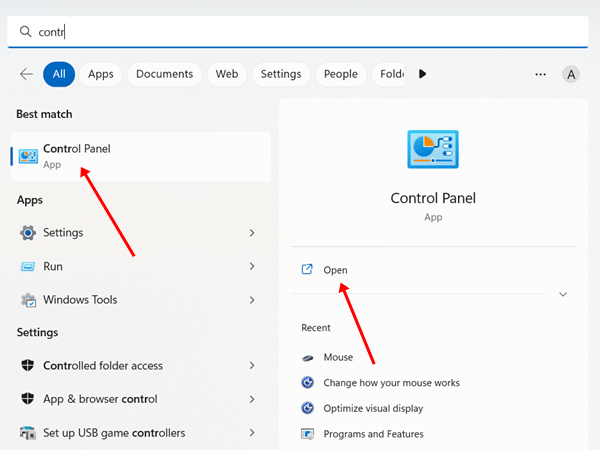
2. In Control Panel
Control Panel is a feature-rich program or tool in Windows devices to make changes and view system settings. However, you can view the strength of your network in the control panel.
- Press Windows > search for Control Panel > click on Open.

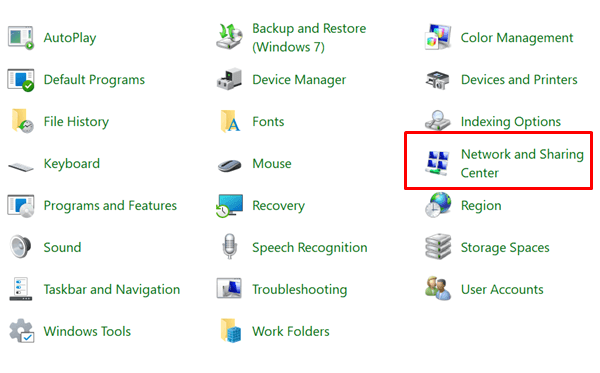
- Next, select the Network and Sharing Center.

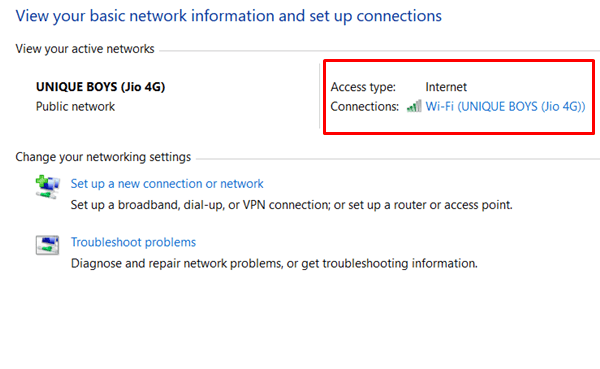
- In the next Windows, it will show you the WIFI signal strength.

3. In Settings App
Windows Settings app is previously known as PC Settings, a utility app that will help us to customize functions. It also lets you know the network connectivity strength.
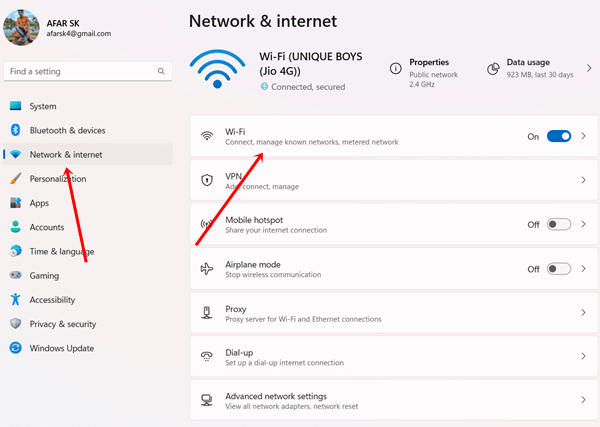
- Press Windows > Settings > Network & internet.
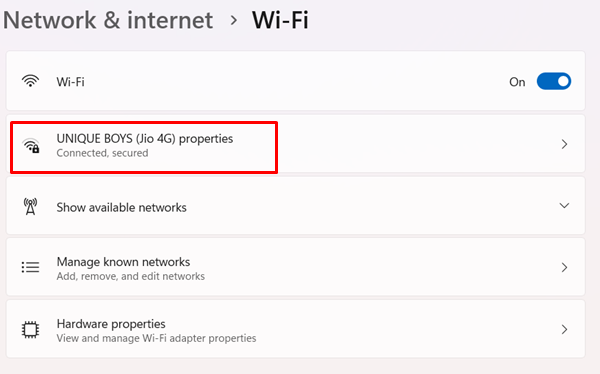
- Keep your WIFI On and click on WIFI.

- you can see the WIFI signal strength.

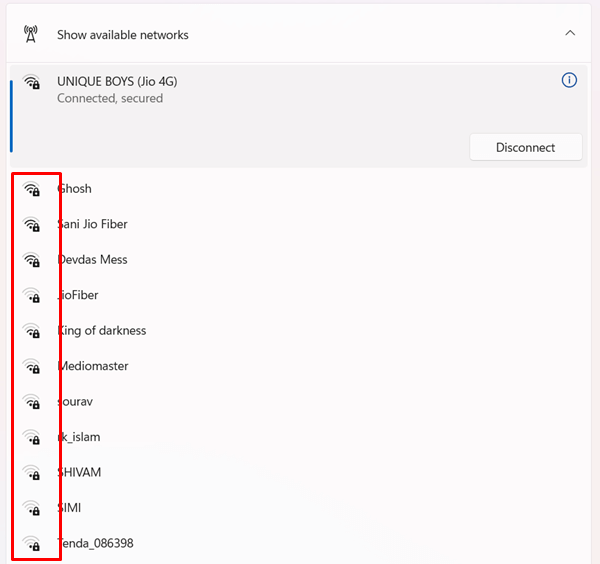
- If you want to check all nearby available connections, it will show you other nearby network connections with signal strength.

4. Using PowerShell
PowerShell, task management, and automation tool are useful when checking Wifi signal stabilities. Here’s what you need to follow.
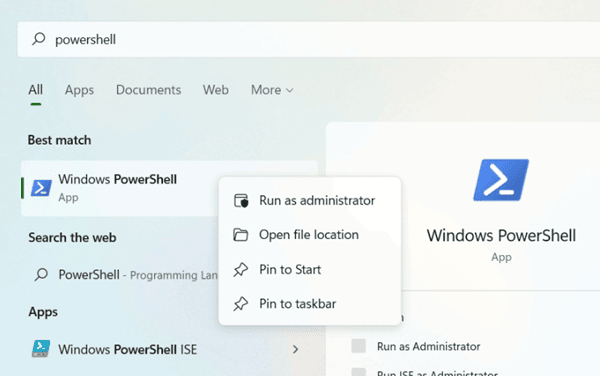
- Press Windows > search for PowerShell > click on Run as administrator.

- A new window will show up; click on the Yes button there.
- Now type this command on PowerShell, and hit the enter button.
(netsh wlan show interfaces) -Match '^\s+Signal' -Replace '^\s+Signal\s+:\s+',''
- It will show you the internet signal strength next to you.


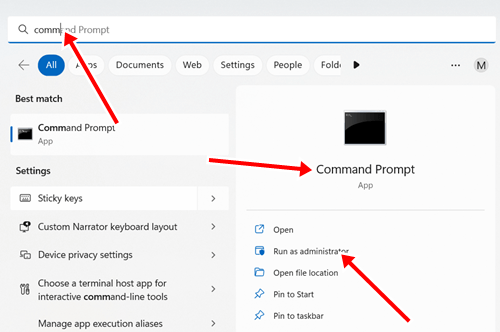
5. Using Command Prompt
When looking for WIFI signal strength, you must take the help of the Command Prompt tools. Now let’s follow the process.
- Press Windows > search for Command Prompt > click on Run as administrator.

- Again, click on Yes when the system asks for confirmation of using the app.
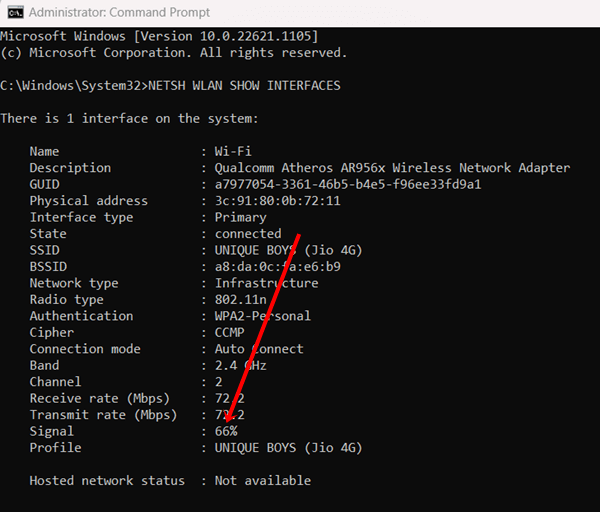
- Here you need to type this command and click on the enter button.
netsh wlan show interfaces
- Now you can see the signal strength.

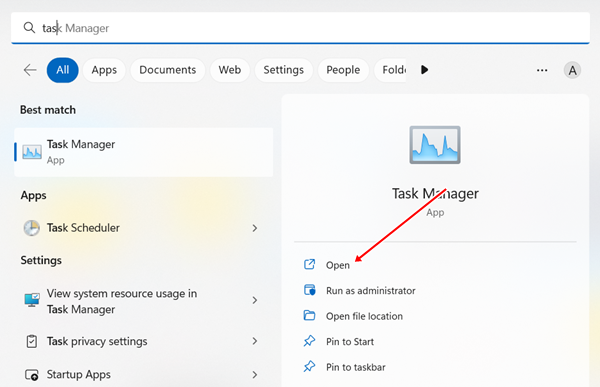
6. In Task Manager
Like any other utility app in Windows, Task Manager solely provide adequate information about running apps and programs. Therefore, Task Manager also provides internet connectivity strength.
- Click on Windows > search for Task Manager> click on Open.

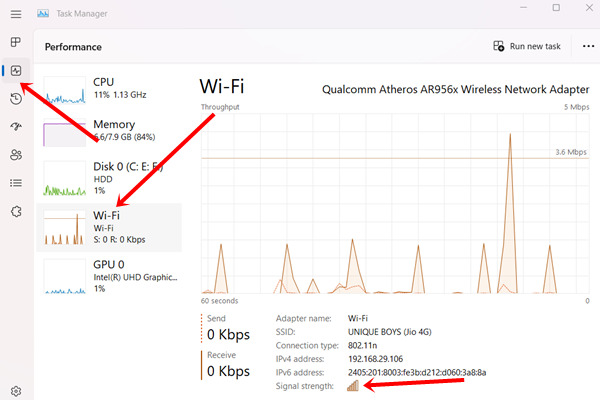
- Next, select Performance.
- And then, click on WIFI to know everything about WIFI signals and other information.

Final Words
That’s it. I hope you enjoyed this tutorial on checking WIFI signal strength. Most of these methods are very simple and easy to follow. In this case, if you have any issues related to this, let us know in the comment section.


