People have very diverse reasons for doing many things, and most of the things might be having to schedule a timer to restart or entirely shut down your PC for any given reason. However, it is possible that you often forget to shut down your computer; there is an easy way to make auto shutdown timer Windows 11 using cmd or Task Scheduler without software.
So, in case you don’t know how to use the Windows shutdown timer on Windows 11, then you have landed in the right place. Yes, here we have mentioned some easy methods that will help you do so; therefore, read the guide until the end.
Also Read- How to Run CHKDSK in Windows 11
Methods to Use Windows Shutdown Timer on Windows 11
Now, there are two situations using which you can use the Windows Shutdown timer on Windows 11. So, let’s take a look at them:
Steps to Windows 11 Shutdown Timer for a Single Instance
There are several tricks available using which you can shut down your Windows 11 PC for a single instance using an automatic timer. Therefore, let’s take a look:
1. Use Custom Shortcuts
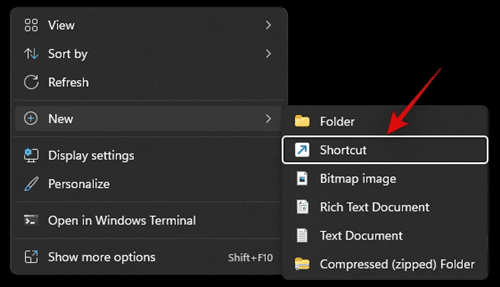
- First of all, hover over to the desktop and right-click on it. Now, select New and click on the Shortcut.
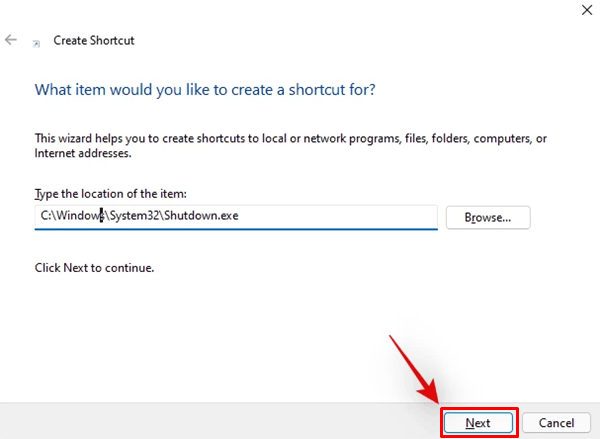
- Then, go to the: C:\Windows\System32\Shutdown.exe
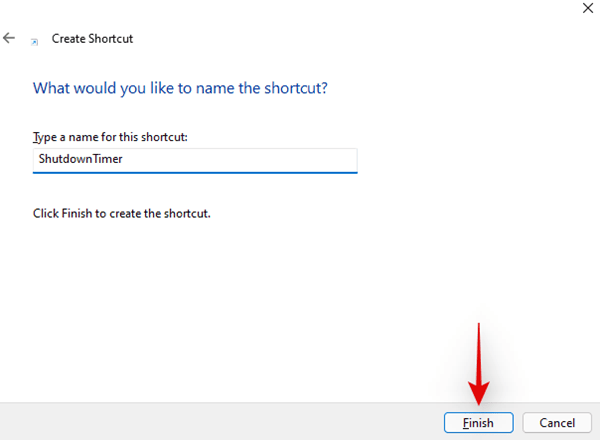
- After that, hit the Next button and use Shutdown Timer in its name. Then, click on the Finish button.
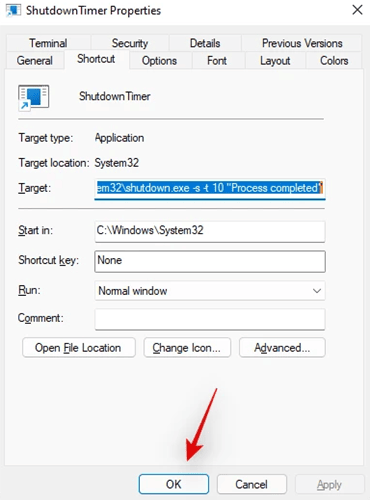
- Now, go to your desktop and select the shortcut icon. Then, press Alt+Enter.
- After that, use the given code on your Target. Also, replace NNNN with the desired time in seconds: -s -t NNNN -c “Process completed”
- Now, your Target path will look like this and then hit the Ok button: C:\Windows\System32\shutdown.exe -s -t NNNN -c “Process completed”
2. Use Command Prompt
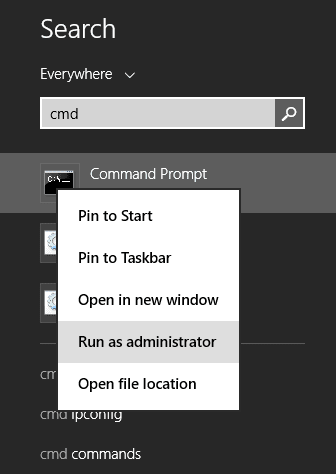
- First of all, open the CMD using admin privileges.
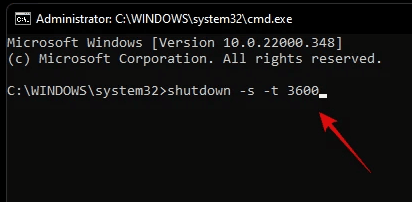
- Then, execute the code by replacing the NNNN with the desired time: shutdown -s -t NNNN
3. Use Run Prompt
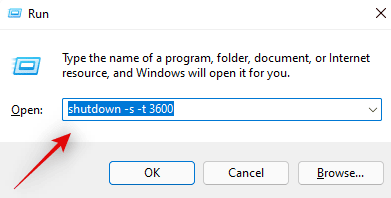
- Initially, open the Run Dialog box by pressing the Win+R keys altogether.
- After that, search for and replace the NNNN with the desired time: shutdown -s -t NNNN
Steps to Schedule Windows 11 Shutdown With a Timer
Well, you are now familiar with the steps on setting a schedule Windows 11 shutdown with a single instance. But, what if you want to turn off your PC at a scheduled routine depending on your requirements? Don’t worry! You can follow the guidelines as mentioned:
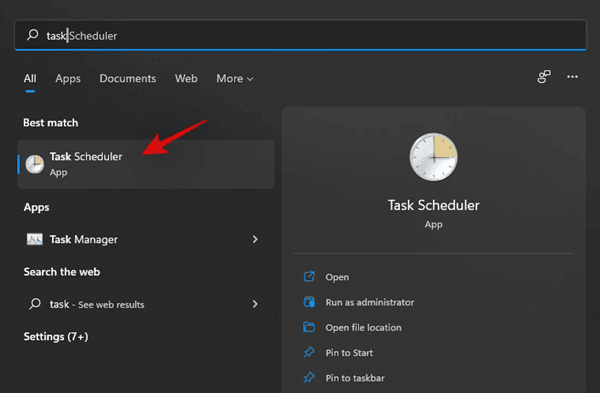
- First of all, search for Task Scheduler using your Windows Search bar.
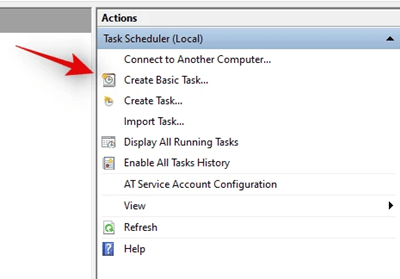
- After that, tap on the Create Basic Task. Then, on the next page, select a name and hit the Next button.
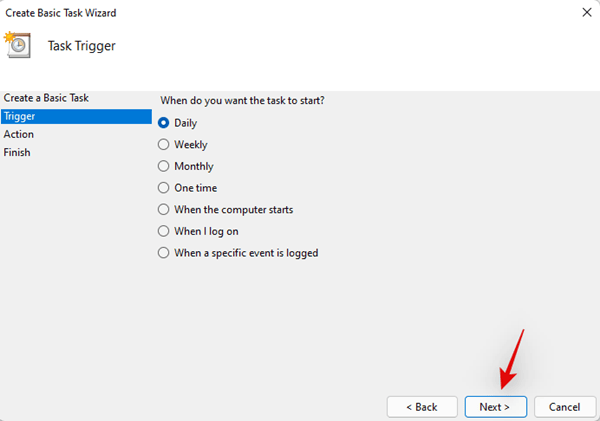
- Then, select when you want to schedule the daily, weekly, or monthly timer and hit the Next button.
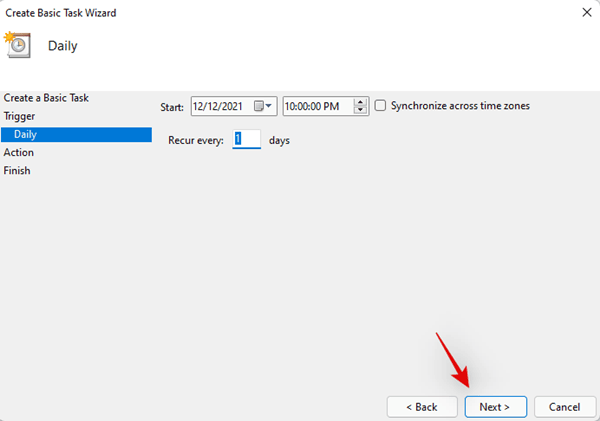
- After that, select the date and time for the schedule. Then, hit the Next button.
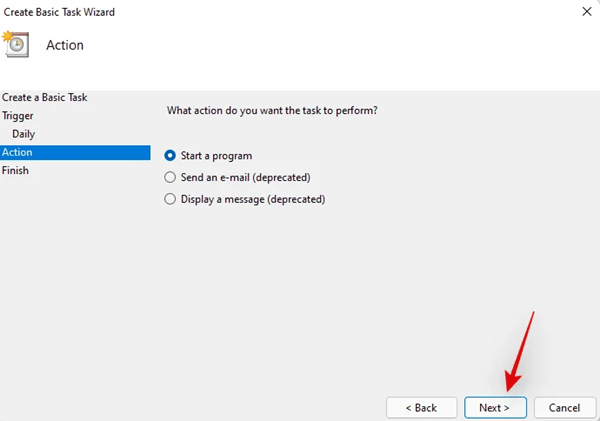
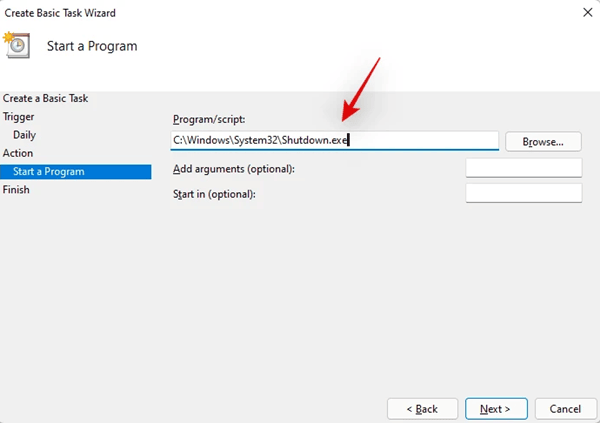
- Now, choose the Start a Program from the Action tab and hit the Next button.
- Then, use the following path under the Program/Script and hit the Finish button: C:\Windows\System32\Shutdown.exe
So, that’s how you can use the Windows shutdown timer on Windows 11. We hope this guide has helped you. However, if you find the above methods quite difficult, you can use third-party applications that take care of these things. Also, if you need more information, comment below.

