It is obvious to find problems while you are working with anything technical. However, in this article today, we will discuss the error saying, “Windows was unable to complete the format.” You might have often come through this while trying to format your Storage Disks, SD Card, or any other external drive.
It is very disturbing, especially when you are trying to make things go smoother. And this error prevents you from using your USB driver or any other means of media transfer. Luckily, we have got a few solutions that might help you fix the issue.
Also Read- FIX: The Remote Computer Requires Network Level Authentication
List of Best Methods to Fix “Windows was unable to complete the format” Error
Below are the handpicked ways to fix Windows that was unable to complete the format issue. Go through these ones by one and you can easily get your problem solved.
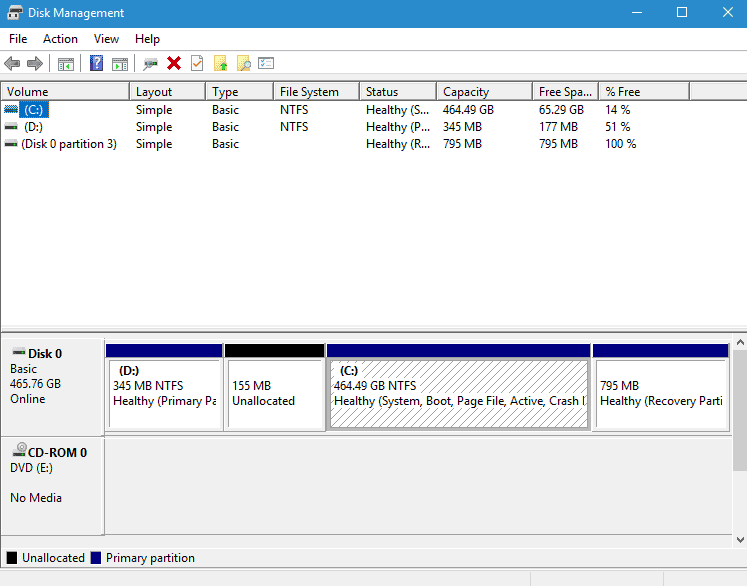
1. Using Disk Management
Among the best effortless solutions, seeking Disk Management can be a relatively easier option. The Disk Management program helps you to manage the different drives on your system.
To fix the issue through Disk Management, follow the steps below:
- First, open the Disk Management Program from the Windows Menu.

- Next, select the specific drive where you came up with the error message. Next, right-click on it and click on format.

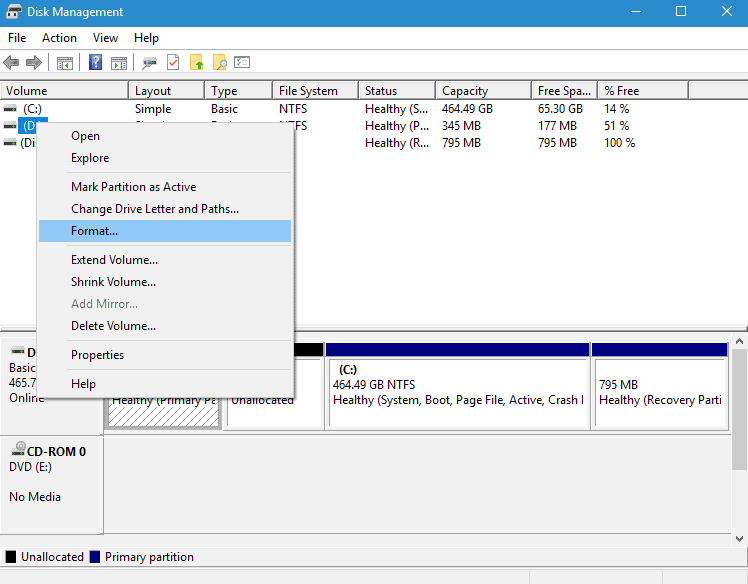
Hopefully, these easy steps will work out and help resolve your problem.
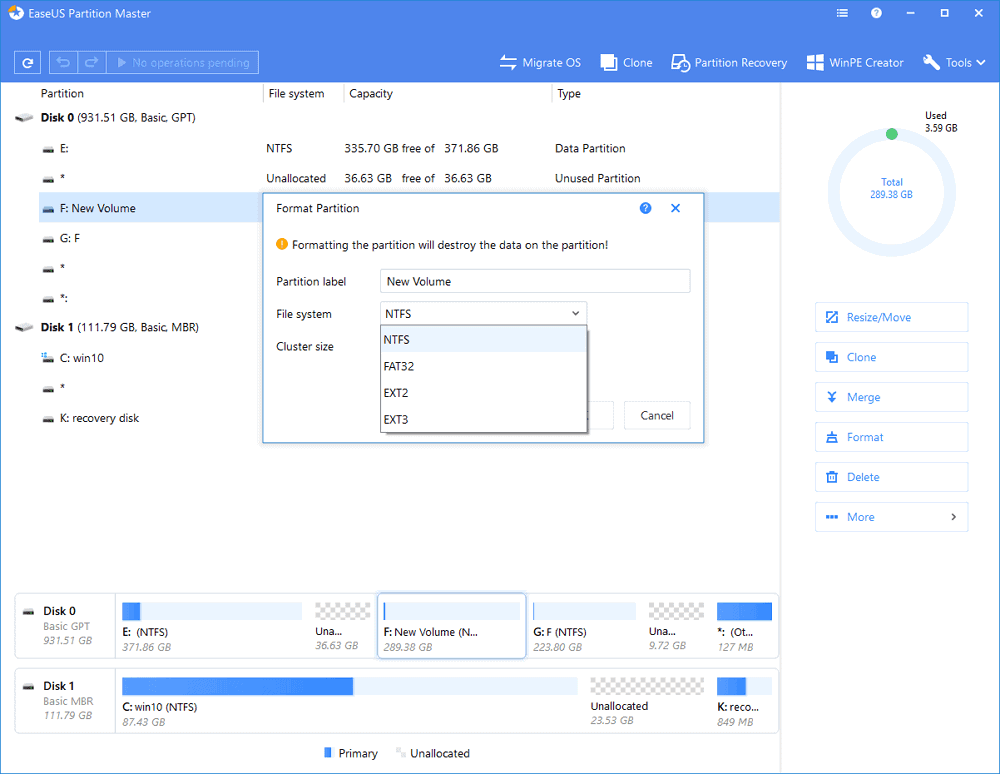
2. EaseUS Partition Master
Applying the EaseUS Partition Master to your “Windows was unable to complete the format” can be a practical option. It is a Disk Management program available for both Windows as well as Mac.
Even the free version of this software can be a great solution to your problem. It allows you to format your Disk into any of your preferable file systems like exFAT, NTFS, and more.
- To turn with this option, firstly, run the EaseUS application.
- Now right-click on the drive you want to format. And choose the ‘Format’ option.

- Next, select your preferred file system and Cluster size to format the partition. Then, finally, click, “OK.”
- On clicking “OK,” you will then see a warning pop-up. Click “OK” again and continue the process.
- Finally, click on the Execute Operation option and select “Apply” to start formatting your drive.

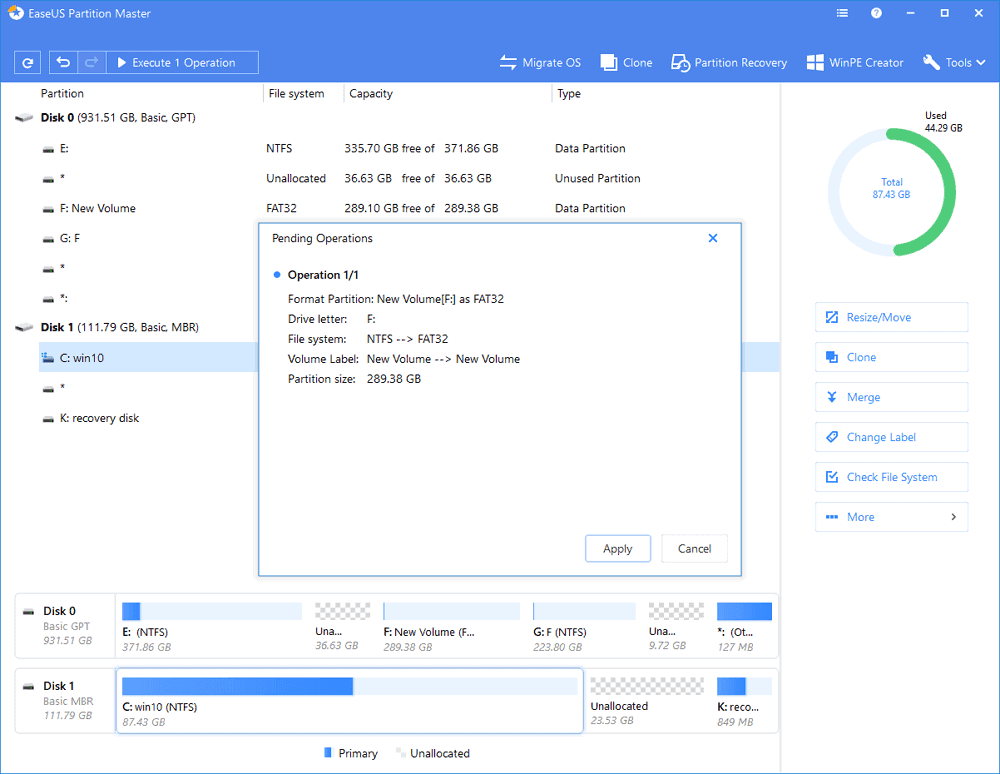
This Disk Management software runs effective formats on your hard drive. It is an easy way to overcome such Windows issues.
3. Using Command Prompt
The Windows Command Prompt is much of a basic to format your Hard Drive. In this case, just a few lines of command must do your job. The simple steps mentioned below will guide you throughout the process.
- First and foremost, launch the Windows Command Prompt from the menu.

- Next, type the command “format C: /fs.ntfs. And finally, hit the enter button to format your preferred Disk.

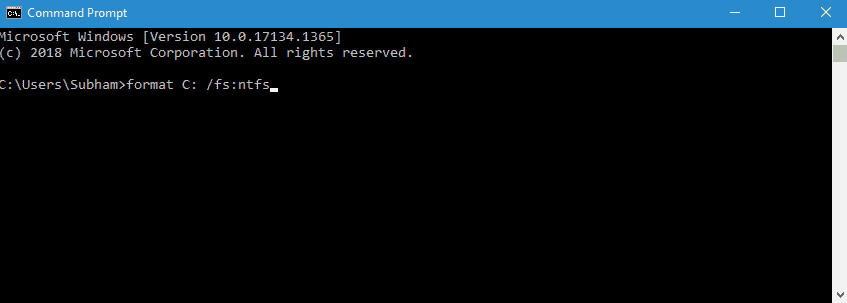
In this command line, “format C: /fs.ntfs,” the letter “C” signifies which drive to be formatted. If you are having a problem with the D Drive. Then, the code becomes “format D: /fs.ntfs,” where D denotes the D Drive. This is the easiest yet accurate way through which you can formate your Storage Disks.
4. Removing Write Protection And Reformatting The Target Device
If your device is locked or password-protected, Windows is unable to format your storage device directly. As a result, you would at first need to unlock the device before starting the formatting process. But, no worries, it’s nothing like rocket science. The steps are pretty much simple and not even time-consuming.
- Firstly, you need to connect the device to your PC.
- Unlock and then remove the password from the particular device.
- Now, reformat the device using any of the methods discussed above.
5. Using AOMEI Partition Assistant
Last yet another friendly way of managing Disk Partitions efficiently. This tool can be beneficial and works just fine with different versions of Windows. Moreover, you can even use it as some migrate OS and effortlessly convert the MBR/GPT Disks that, too, without losing data. To begin, you can download the freeware from the given link.
Download AOMEI Partition Assistant
Once you are done with the download, follow the steps below to get over with it:
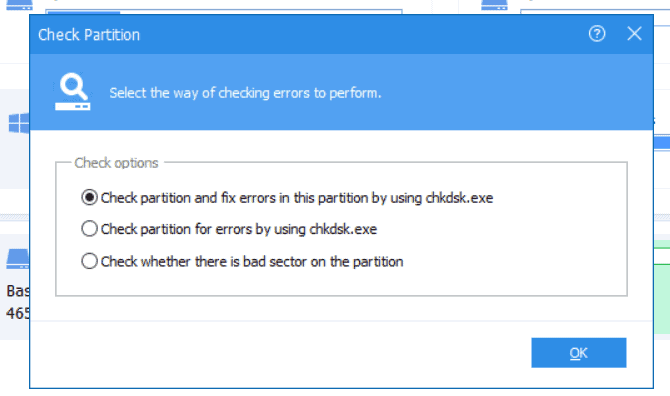
- First, select the Disk you want to format.
- Right-click on it, choose the Advanced option. Next, go to the Check Partition on the sub-menu.
- Lastly, fix all the errors by selecting the “Check partition and fix errors in this partition by using the chkdsk.exe” option.

From Editor’s Desk
While working with any software or hardware, errors are mostly expected. However, there is always a solution to every problem. Thus, these were some of the solutions to our problem today. Let us know which method worked for you.


