AutoPlay is a feature that detects media devices you plug into your PC. It detects all the media devices such as memory cards, USB drives, and DVDs/ CDs. This feature automatically performs the tasks like playing the media or opening the folder when the media device is detected. This feature has been there in Windows for a very long time, and it is there on Windows 11 as well.
Due to some instances, you may face problems with AutoPlay. Users running Windows 11 on their PC have reported that AutoPlay is not working on their PC. This issue can be due to various reasons such as faulty settings, device not properly connected, services not working, etc.
If you are looking for the steps to fix AutoPlay not working on Windows 11, this article will be your guide. In this article, we will be listing some working methods to help fix the issue with AutoPlay.
Also Read- How to Disable AutoRun / AutoPlay for USB Drive
Fix Autoplay Not Working in Windows 11
Given below are steps to help you fix AutoPlay not working in Windows 11-
1. Reconnect Media Devices
You may face the issue when the media device is not properly plugged into your PC. The possible fix for this will be to remove the media device you are facing a problem with and try reconnecting it to your PC. Check if you still face the issue or not.
If you still encounter the issue, remove the media device and restart your PC. Plugin the device again after restarting your PC and see if AutoPlay is working or not. If you still face the issue, you should move to the next troubleshooting step in this article.
2. Reset the AutoPlay Settings
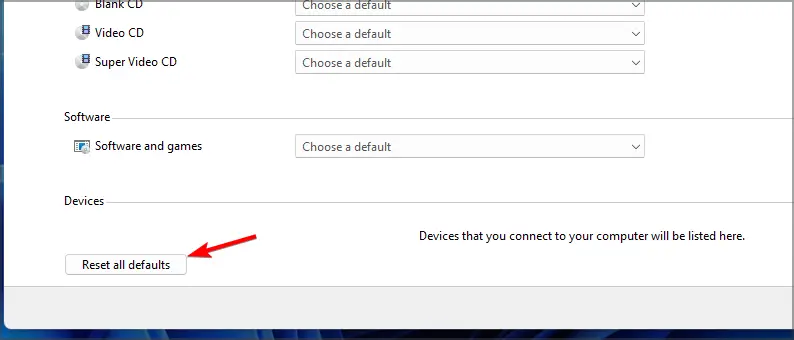
If this problem is encountered on your PC, you should try resetting the AutoPlay settings. This will fix the error with the AutoPlay feature and allow it to be restored. To do so, follow the steps given below-
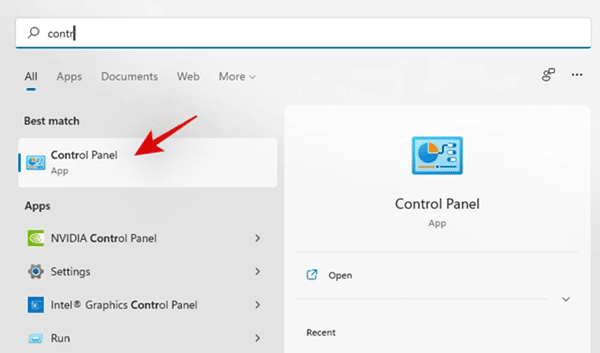
- Press Windows + R, type Control Panel, and press Enter.

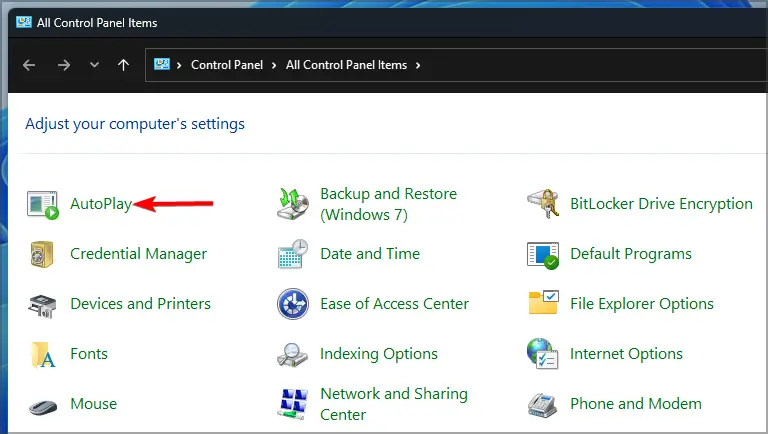
- Here search for AutoPlay and click on it.

- Tap Reset All Defaults at the bottom of the window, and then click Save.

3. Change AutoPlay Notification Settings
Another troubleshooting step to follow is changing the AutoPlay notification settings. You can do so by following the steps given below-
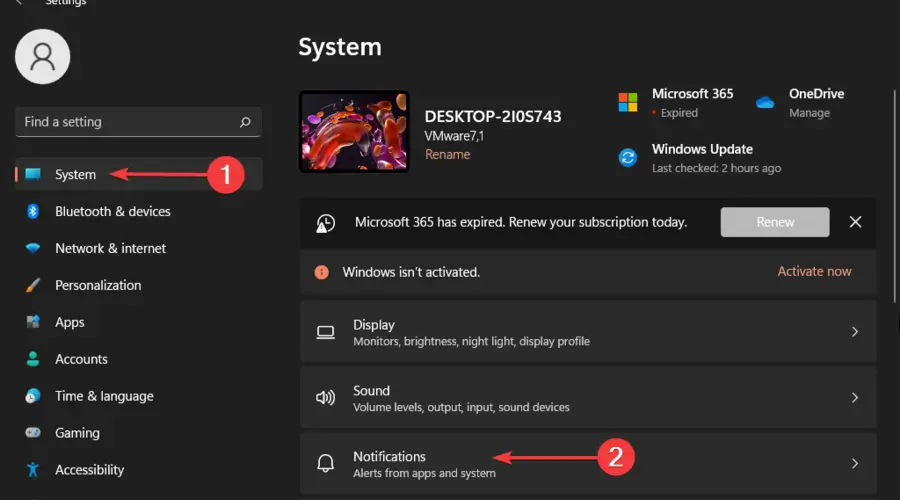
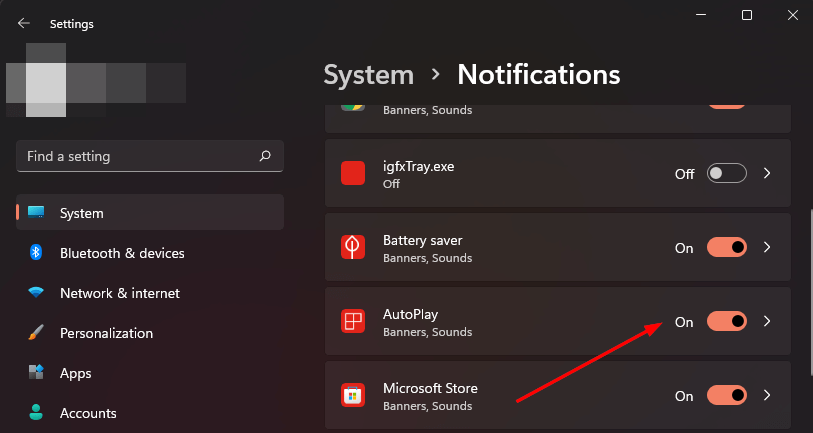
- Press Windows + I key combo to open the Settings app.

- In the System tab, click on Notifications.

- Here search for AutoPlay and enable the toggle for it.


4. Set Startup Type to Automatic
If the Shell Hardware Detection Service is disabled/turned off, then also you may face the issue. Enable the service to fix AutoPlay not working in Windows 11. Follow the steps given below to do so-
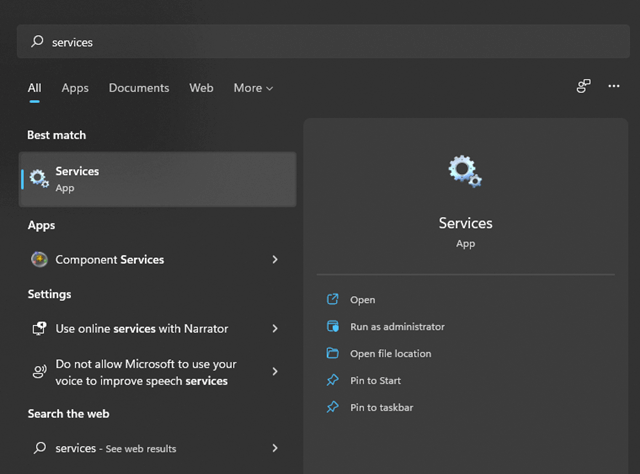
- Press the Windows key, type Services, and press Enter to open it

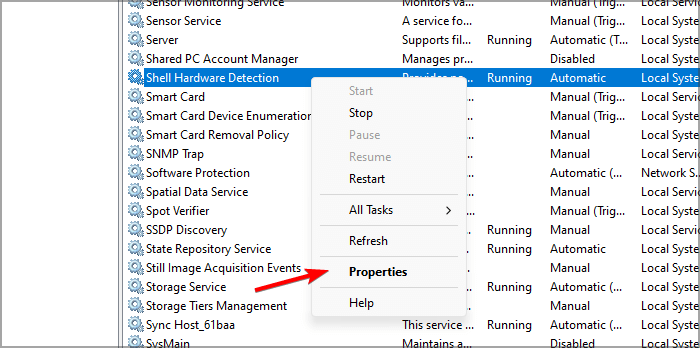
- Here search for Shell Hardware Detection. Right-click on it, and then click on Properties.

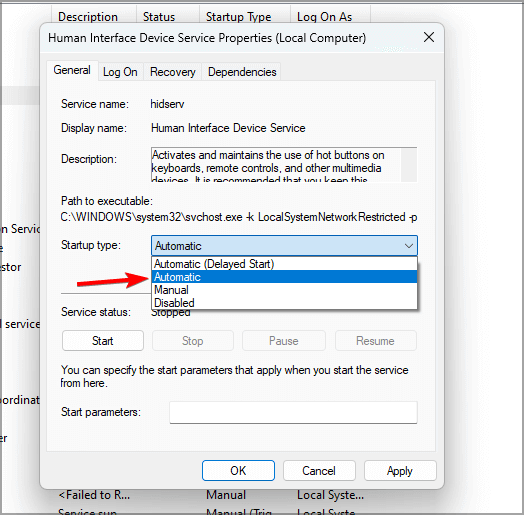
- In the General tab, change the Startup type to Automatic.

- If the service status is stopped, then click on the Start button.
- Once done, click on Apply and OK to save the changes.
- Now, close the Services window and see if you face the issue or not.
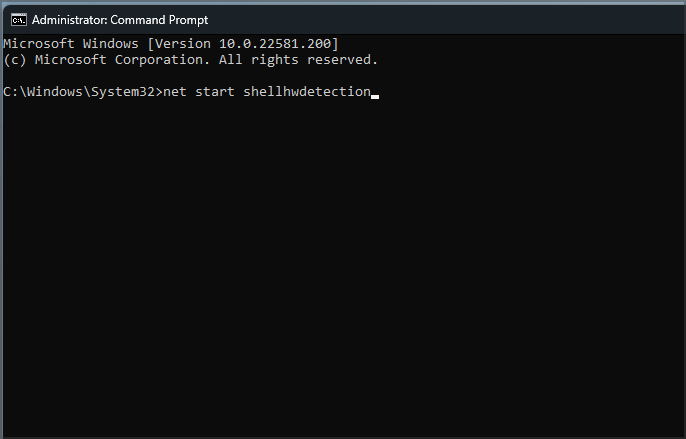
5. Using Command Prompt
You can also run the Command Prompt command to detect and troubleshoot issues with AutoPlay in Windows 11. You can do so by following the steps given below-
- Open Start Menu, search for Command Prompt and run it as administrator.
- Here, type and execute the command net start shellhwdetection

- Wait for the command to execute, and then restart your PC.
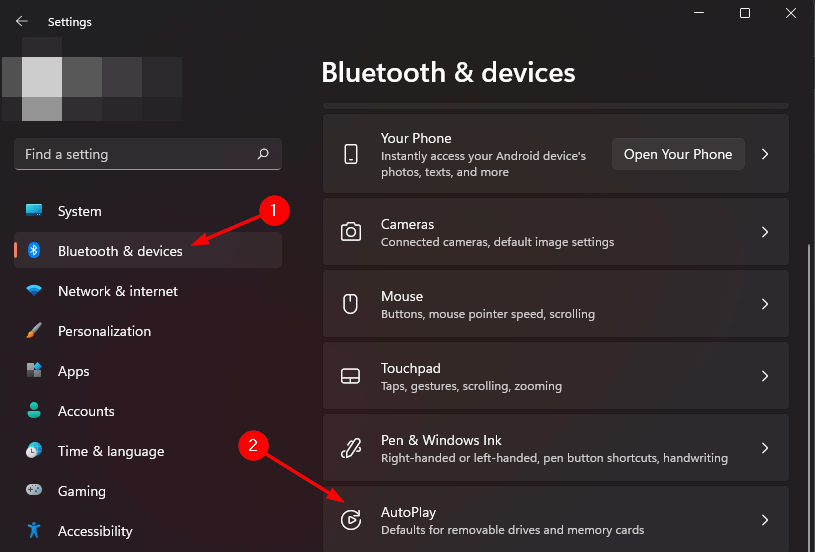
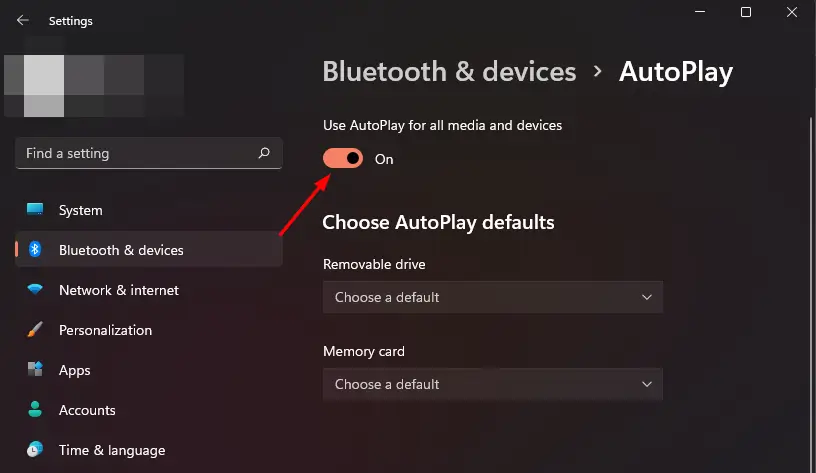
6. Turn AutoPlay Off and On
Another thing that you can try doing is turning AutoPlay off and on. You can follow the guiding steps below to do so-
- Press the Windows + I key combo to open settings.
- Here find the Bluetooth & devices, and click on the AutoPlay option.

- Toggle Use AutoPlay for all media and devices button off and on again.

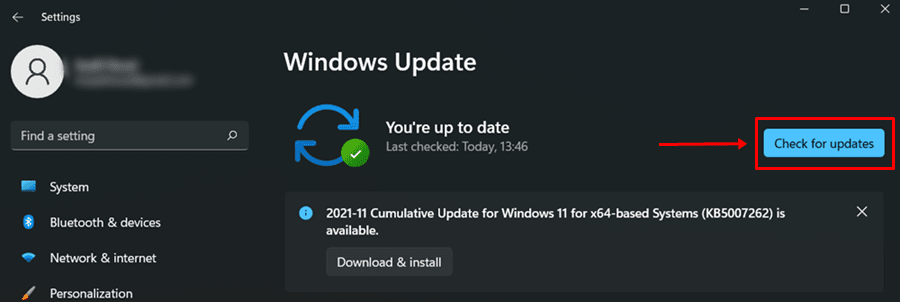
7. Check for Updates
You can also try updating your Windows to the latest version and see if that fixes the issue or not. To do so, follow the below points-
- Open Settings by pressing Windows + I key combo.
- Click on the Windows Update tab, and then on Check for Updates.

- If updates are available, download then install them.
- Once the updates are installed, restart your PC, and you should no longer face the issue.
Final Words
There is nothing to be worried about if AutoPlay is not working on Windows 11 PC. You can refer to this article if you have any problems with AutoPlay on your PC. These troubleshooting steps will help you fix AutoPlay not working on Windows 11.


