The DirectX Shader Cache files are crucial to enhance the performance of your PC. Your PC makes DirectX Shader Cache files to increase the application’s speed when loaded. These files are generally created by the graphic system on one’s PC and reduce the loading time of an application.
Though they are crucial for your system, you must clean them frequently to ensure your PC does not degrade in terms of performance. When system files like cached data are stored for too long, they tend to get corrupted and can cause issues with your system.
Therefore, it is important to delete them over time. If you want to delete DirectX Shader Cache, this article will help you with that; read ahead to know more.
What is DirectX Shader Cache?
Windows creates and stores the cache files of the apps and programs to speed up their performance. The cache files that are created due to the graphics system in the Windows 11 to speed up the application loading time are DirectX Shader Cache files.
The DirectX Shader Cache files are those files that the Graphics system has created in Windows 11. These files get created to improve the performance of the applications and speed up their loading time. It also improves the responsiveness of the Windows apps.
Ways to Delete the DirectX Shader Cache Files in Windows 11
There are several ways to delete the DirectX Shader Cache files in Windows 11, and one by one, they are briefly described below-
1. By Using Disk Cleanup Utility
The disk cleanup utility is the first method users can apply to delete the DirectX Shader Cache files in Windows 11. For that, the steps are as follows-
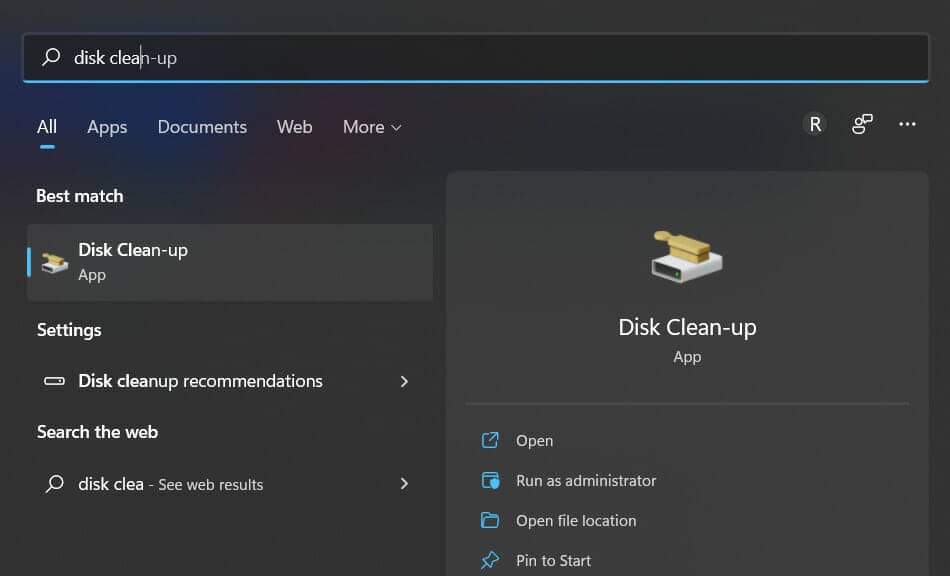
- Go to the Start menu, search for Disk Cleanup and open it.

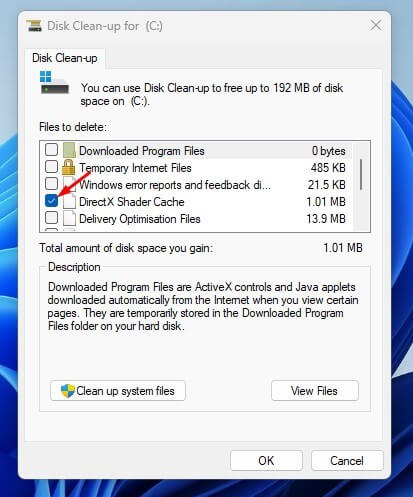
- Then, select your System installation drive from the drop-down menu and click on the OK button.
- Under the Files To Delete section, check the checkbox for DirectX Shader Cache and click on OK.

2. By Using Storage Sense
The storage sense is a storage management tool for Windows PC. This tool analyzes your storage and allows you to clean up files that you do not need. To delete DirectX Shader Cache using storage sense, follow the steps given below-
- Press the Windows+I key combo to open the Settings app.
- In the System tab, click on the Storage option.

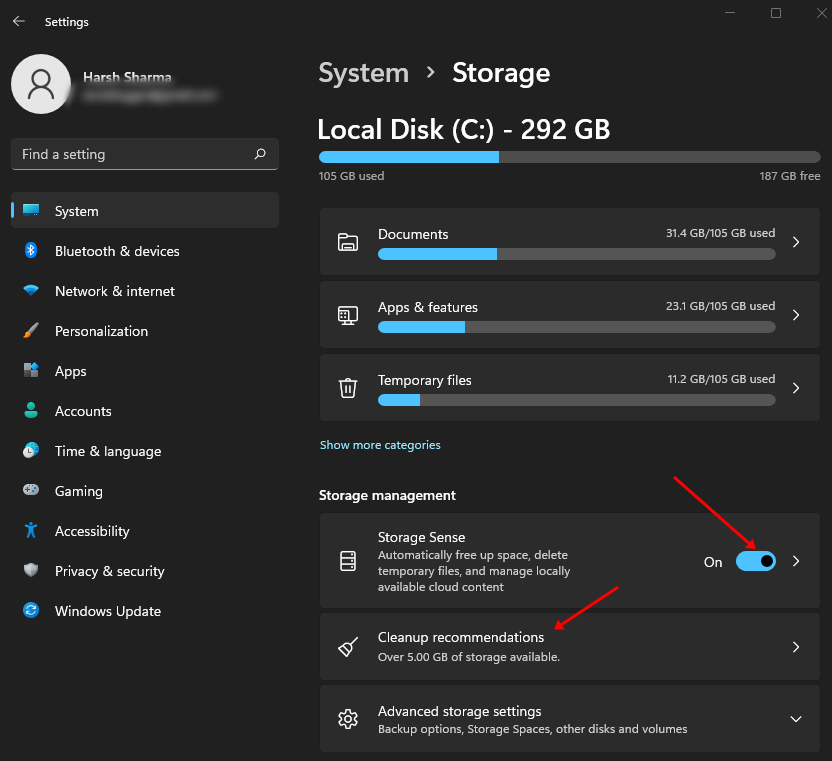
- Turn on the toggle for Storage Sense. This will automatically scan for DirectX Shader Cache files and clear them.

- If you want to do it manually, click on Storage Sense and Run Storage Sense Now. This will scan and delete the files.


3. By Using Settings
Another method to delete the DirectX Shader Cache files in Windows 11 is the Settings app. The steps for the same are given below-
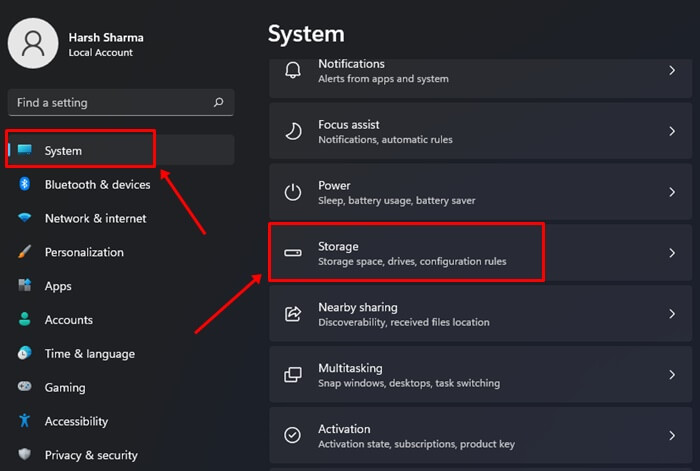
- Go to the Start Menu, search for Settings and open it.
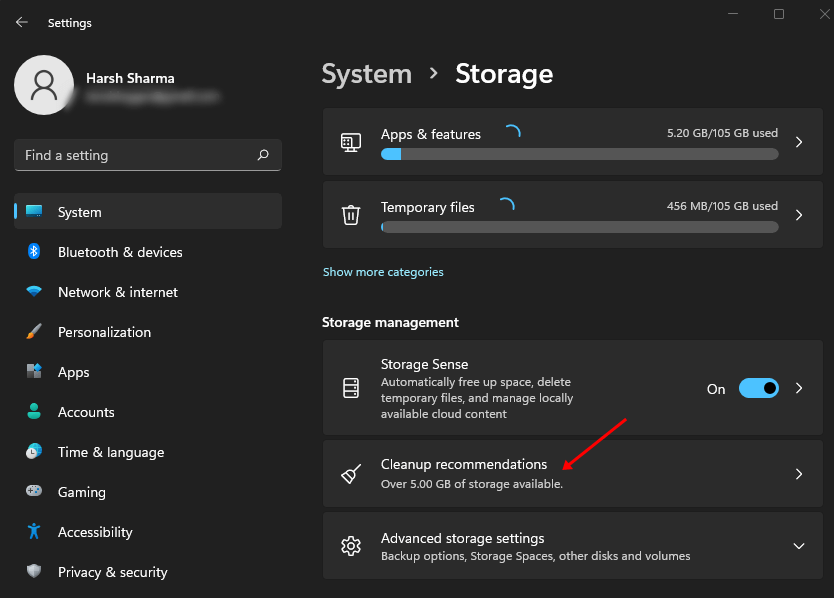
- Under the System tab, click on Storage.
- Under the Storage Management section, click on the Cleanup recommendation option.

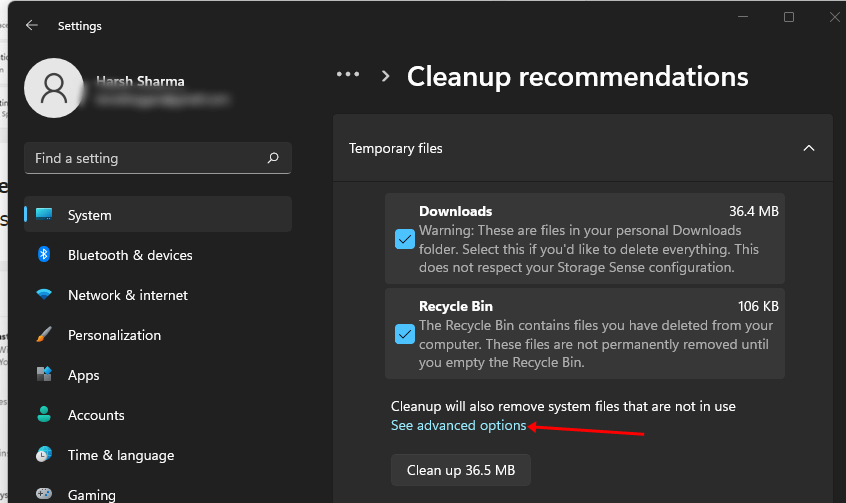
- Now, select the See advanced option.

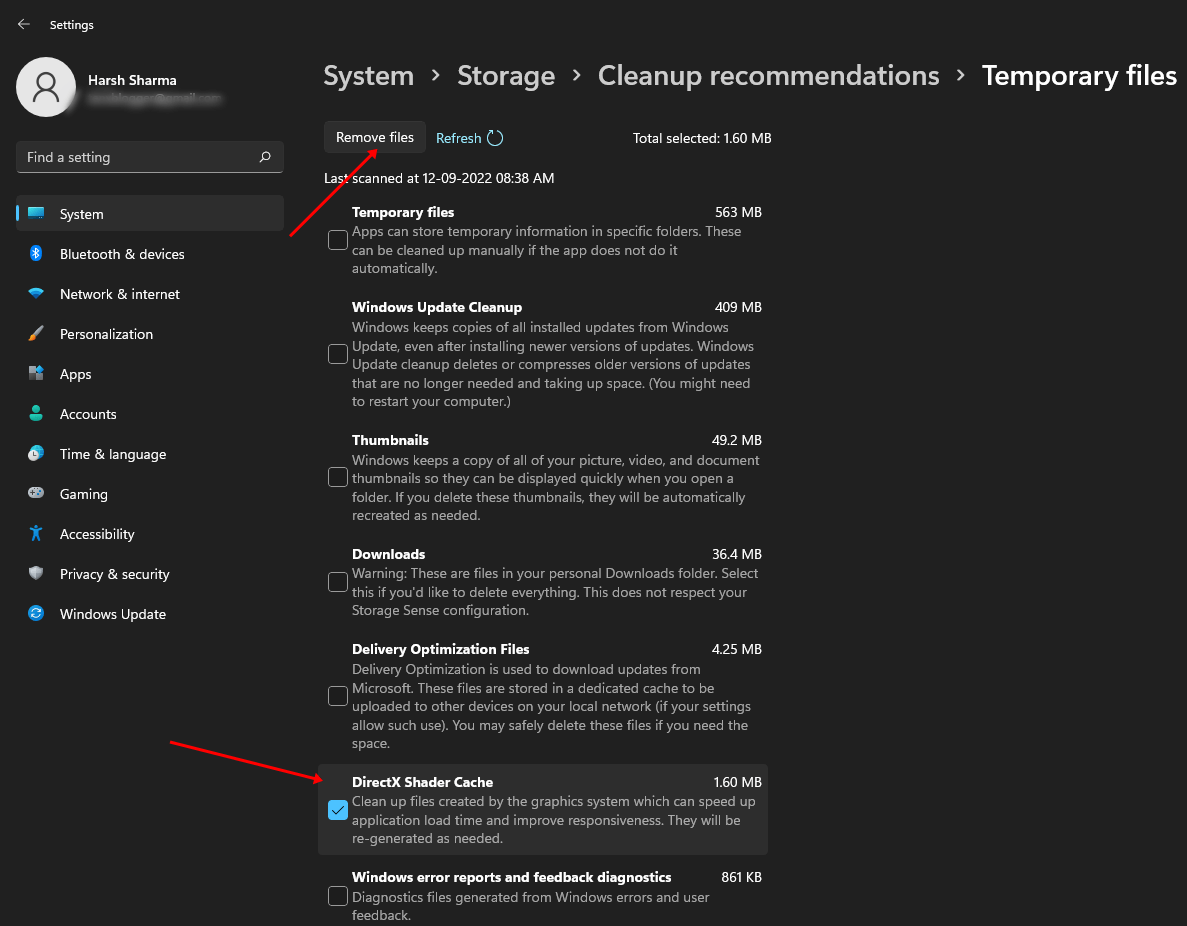
- Uncheck all options except for the DirectX Shader Cache.
- Now, click on Remove Files to delete the files.

Conclusion
These were some ways to delete the DirectX Shader Cache files in Windows 11 by which users can easily delete the files.
You can delete the files if you face any problem while loading the app and find DirectX Shader Cache files to be the culprit behind it. We have discussed the steps to do so in the article above so that you can follow them.


