Did you ever think about why some of your files on Windows 11 PC get corrupted automatically? Well, if your computer shuts down or crashes suddenly due to a power cut while you’re saving a file, the file is likely to get corrupted even if the saving process is completed properly.
However, there is another reason behind this virus and other malware attacks on your Windows 11 computer. Nonetheless, getting back your corrupted files is very annoying and tough, as it takes a lot of time and effort.
But you do not have to worry as we have some easy and potential fixes using which you can fix any type of corrupted files on a Windows 11 PC. So, if you are quite disturbed due to this issue and are keen to know about the methods, make sure to be with us until the end.
Also Read- How To Uninstall Updates in Windows 11
What Are The Reasons Behind Corrupted Files?
We have already mentioned this, but still, if you missed it before, then look at the below reasons why your Windows 11 files get corrupted:
- Installation is interrupted due to poor connectivity.
- Sudden Shut down of PC due to power cut.
- Use an unofficial way to download and install files.
- Virus or malware attack on your PC.
Methods To Fix Corrupted Files in Windows 11
So, you are now familiar with the reasons behind this issue; therefore, it will be easier for you to understand the methods to fix your corrupted files in Windows 11. So, let’s take a look at the available methods:
Fix 1: Use DISM Commands
Deployment Image Servicing and Management or DISM command will search for the corrupted file associated or related to your Windows file. After that, it will automatically replace the corrupted file by downloading the latest files from Microsoft’s official website. So, let’s take a look at the instructions that you need to follow:
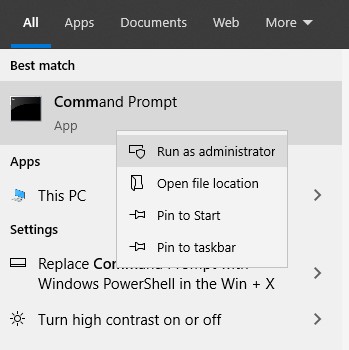
- Firstly, launch the Command Prompt using the admin rights.

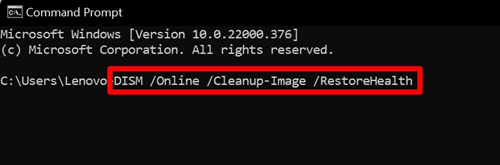
- After that, execute the command:
DISM/Online/Cleanup-Image/RestoreHealth
That’s it. Now, keep one thing on your mind to not interrupt until the process is completed. It may take a long time to complete depending on your PC files. Then, reboot your Windows 11 PC and check if the issue gets resolved or not.
Fix 2: Scan for Corrupt files
You can use the Sfc command to scan for corrupted files, and most importantly, you do not need to do anything as the Sfc command will take care of everything. So, let’s take a look at the necessary steps to run sfc scan:
- Initially, launch the Command Prompt using the admin rights.
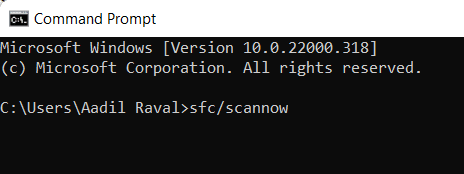
- Then, execute the command:
sfc/ scannow
Now, you just have to wait until the Sfc scan process gets completed. Once done, don’t forget to reboot your device and then check if the issue gets resolved or not.
Fix 3: Use The Safe Mode Feature
In many cases, users have reported that booting their PC into Safe mode helps resolve this error. So, you can also try this out. Therefore, let’s get a walkthrough with the steps:
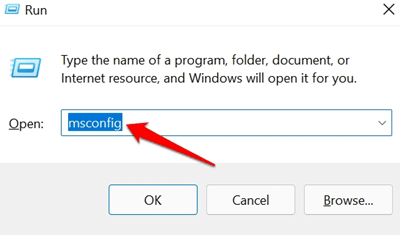
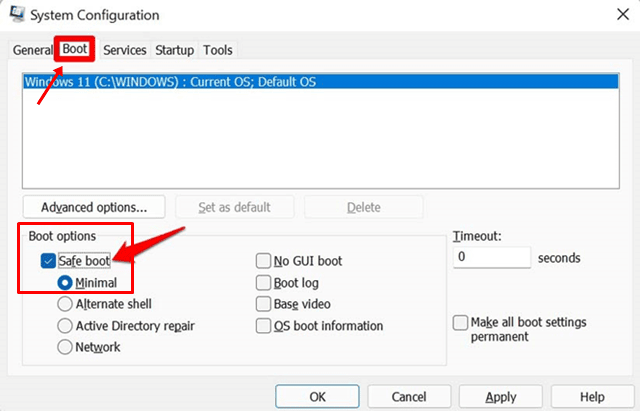
- First of all, press the Win+R key to open the Run box.
- After that, search for the msconfig. This will open the System Configuration.

- Then, navigate the path: Boot options > Safe Boot > Apply > Ok.

- Now, simply reboot your Windows 11 PC and open the command prompt using the admin rights.
- Then, again run the sfc scan by executing the command:
sfc /scannow
Fix 4: Manually Replace the Corrupt Files
If these methods don’t work in your case, then you can manually replace the corrupted files on your Windows 11 PC. But how? Let’s see:
- Firstly, download all the necessary files you think are corrupted on your Windows PC.
- Now, navigate to the directory of the installed app that is crashing.
- After that, delete the corrupted files.
- After that, once the file gets downloaded, simply copy and paste the files to the app’s directory. Then, simply reboot your device and check if the issue gets resolved or not.
Fix 5: Via System Restore Feature
- Hover over to the Windows search bar and search for System restore.
- After that, a screen with Create a Restore Point will pop up.
- Then, hit the Open button to access the System Properties settings and navigate System Protection.

- Now, check if the System Restore button is greyed out. If so, then click on your drive name located beneath Available Drives. Then, tap on the Configure button.
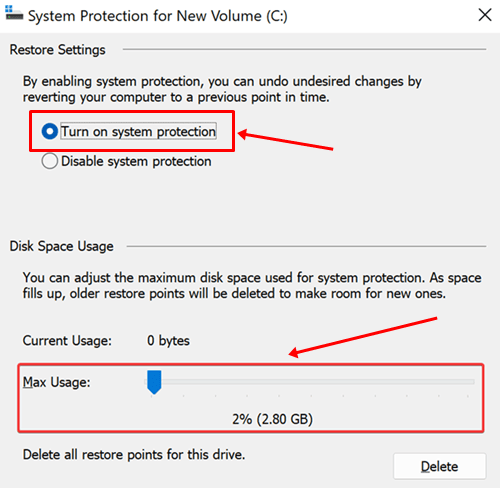
- Then, choose the Turn On System Protection option on the next page. Again, we suggest you do this for all the drives you have stored your data.

- Now, Select the Apply button and click on Ok. Then, you’ll see a System Restore option. Click on it in case you create a restore point before. Otherwise, hit the Create Restore Point button.

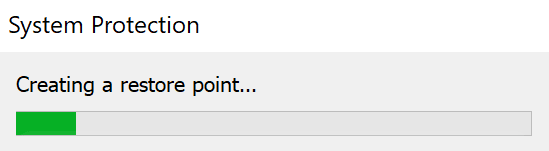
- After that, type in a description for the restore point you are about to create and hit the Create button. Now, wait until the process gets ended. Once done, you’ll see a message that the restore point has been created successfully.

- After that, repeat step number 6 and hit the System Restore button. Then, select the restore point that you created earlier.


Also Read- Create Restore Point – Delete Restore Point
That’s it. Now, just wait until your PC gets restored to its previous working state. Once done, restart your Windows 11 system and check if the issue gets resolved or not.
So, that’s how you fix the corrupted file on Windows 11 PC. We hope that this article has helped you. But, in case you have any questions, comment below.


