Recently, Microsoft released the latest patch update for their new Windows 11. However, they have added many new features and improved the performance. But, for some users, this becomes a curse as after the update, their PC is not working properly and freezing or rebooting automatically.
Nevertheless, currently, it is not sure whether Microsoft knows about this as it is not widespread. Therefore, to fix these issues, you need to Windows 11 updates, Cumulative Update etc. But, how? Well, you do not require to worry as in this guide we will explain the same. So, wait and read the guide until the end. Therefore, let’s start with the guide.
Also Read- Fix Black Desktop Background Display Issue in Windows 11
Methods To View Updates You Want to Remove
A few methods are available to uninstall the updates on Windows 11 easily. But, you know what, you need to find out which updates you need to uninstall. So, let’s take a look at the ways to do so:
1: Using Settings
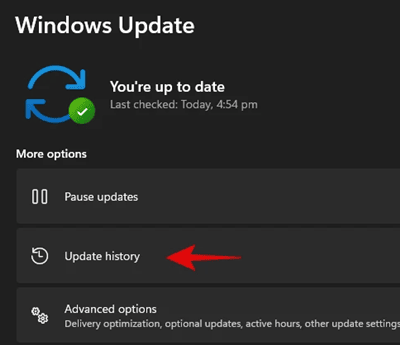
- Initially, press the Win+I key simultaneously to open the Settings.

- Navigate to Windows update > Update History.

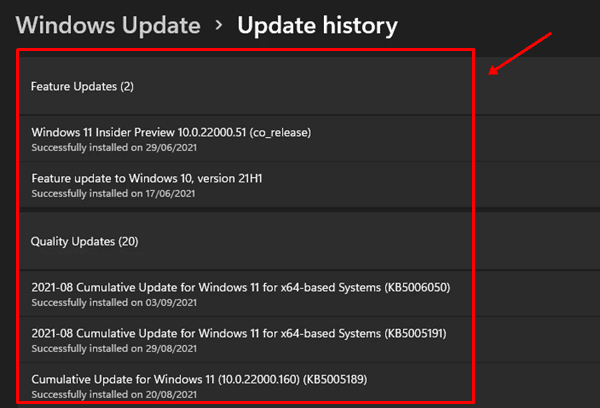
- Now, a list of previous updates will appear. So, simply note down the KB number of the specific update that you need to remove from your Windows 11 PC.


2: Using CMD
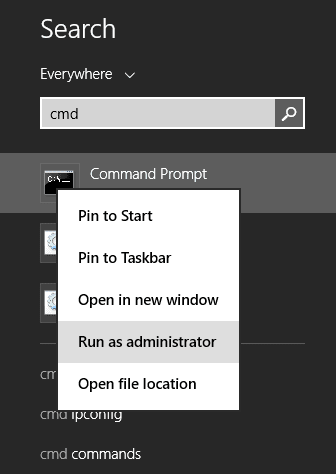
- Firstly, open CMD using the Run As Administrator.

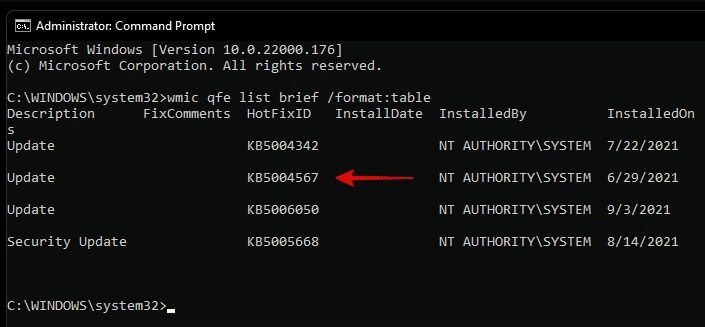
- Then, execute the command: wmic qfe list brief /format:table
- After that, a list of previous updates will appear based on concerned updates such as Quality Updates, Driver Updates, Definition Updates, Other Updates.

- Then, you need to select the update that you want to uninstall and not down the serial number mentioned below the HotFixID for the selected update.
That’s it. Now, you know which update you have to uninstall. So, it’s time to really make it happen. Therefore, so, let’s started with the methods:
Methods to Remove Windows Updates from Your PC
Method 1. Via Settings
- First of all, press the Win+I key simultaneously to open the Settings.
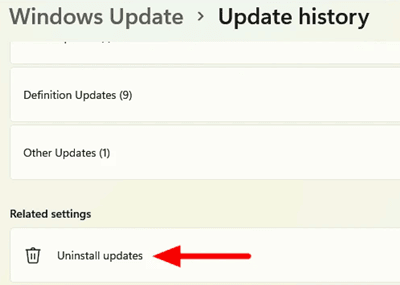
- After that, shift to the Windows Update and click on the Update history.
- Then, hit the Uninstall updates button. Now, you’ll be redirected to the Control Panel, where you’ll get a list of previous updates.

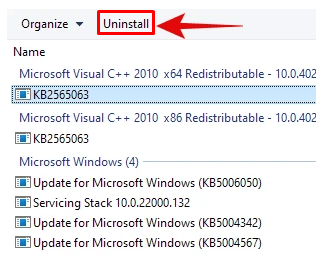
- After that, use the KB number you noted before, select the update, hit the Uninstall button located at the top of the page, and follow the on-screen instruction to uninstall it.

Method 2. Via CMD or Windows PowerShell
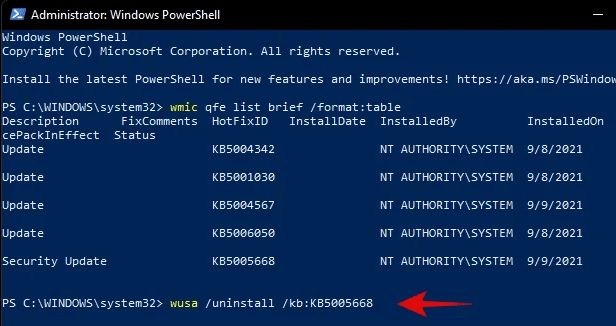
- To begin, you have to open the Windows PowerShell or CMD using the Admin Rights.
- After that, execute the command: wmic qfe list brief /format:table
- Then, a list of recently installed updates will open, so select the update using the KB number you noted before.
- After that, execute the command: wusa /uninstall /kb:NUMBER That you have noted before

That’s it. If you do not want to receive confirmations before uninstallation and restart. Then, execute the command: wusa /uninstall /kb:NUMBER /quiet
However, in case you want to close all the applications running in the background before rebooting your device, then execute the command: wusa /uninstall /kb:NUMBER /quiet /forcerestart
Also, if you want to confirm a restart, then execute the command: wusa /uninstall /kb:NUMBER /quiet /promptrestart
Method 3. Via Windows RE
- Firstly, press the Win+I key simultaneously to open the Windows Settings.
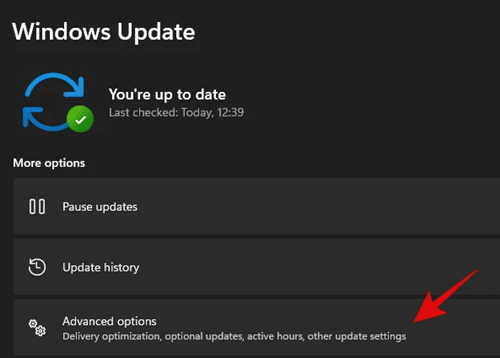
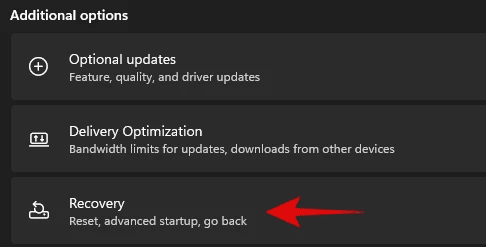
- After that, shift to the Windows Update and click on the Advanced options.

- Then, tap on the Recovery tile and hit the Restart now located beside the Advanced Startup option.


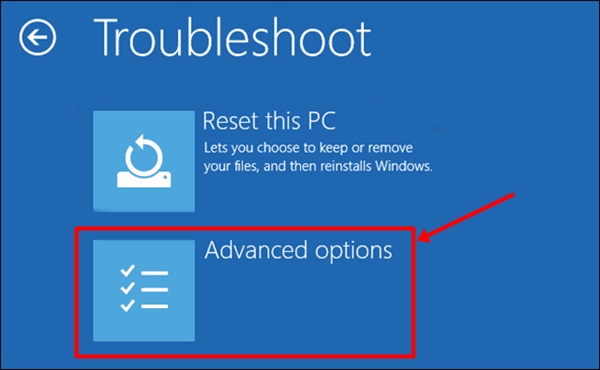
- Now, your PC will be booted into recovery mode. Then, you can hit the Troubleshoot.
- After that, click on the Advanced Options and select the Uninstall updates option.

- Then, select the type of update you wish to uninstall, such as Uninstall Latest Quality Updates or Uninstall Latest Feature Updates.
- After that, click on your administrator account and log in using your credentials. Then, hit the Uninstall quality/feature and tap on the Done button to confirm your action.

Method 4. Via Windows Troubleshooter
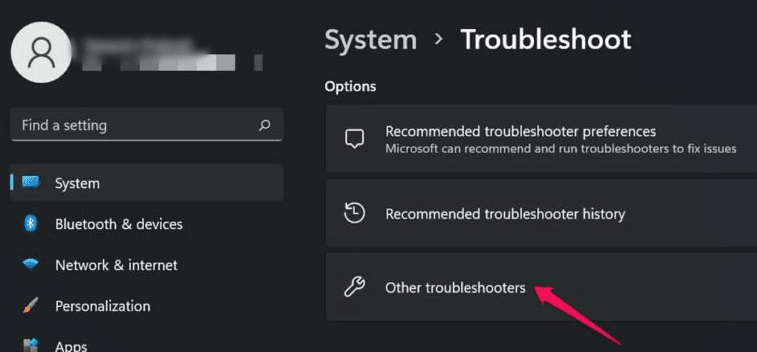
- First, you must press the Win+I key simultaneously to open the Windows Settings.
- After that, hit the Troubleshoot > Other troubleshooters option.

- Then, click on the Run button located in front of the Windows Update.

- It will automatically start looking for the problems and might take a few minutes to detect the problem. However, after that, it will automatically fix it.
- Once done, hit the Close button and reboot your PC. That’s it. Now, you won’t have to uninstall it because the issue gets fixed.

So, that’s how you can uninstall the updates on your Windows 11 PC. We hope this guide has helped you. But, in case you require more help, comment below.


