Talking about Windows 11, there are various settings in Windows 11 that can also be customized to suit the preferences of a specific user. However, the lock screen is one of those features.
The Lock Screen in Windows 11 is the key safeguard for restricting access to your system to people who know the password. In addition, it protects your computer from unwanted access. You can even disable this feature as some customers do not want a lock screen on their Windows 11 system.
So, if you’re seeking a way to turn off/disable the Lock Screen on your Windows PC, here’s a step-by-step guide. Therefore, if you want to disable the lock screen feature on your PC, make sure to follow this guide until the end.
Also Read- How to Disable Ads in Windows 11 File Explorer
Methods To Disable Lock Screen on Windows 11
So, here are some methods or tricks that you can use to disable the lock screen feature on your Windows 11 device. Therefore, if you aren’t familiar with them, make sure to follow them:
Method 1: Use Group Policy Editor
Initially, you use the Group Policy Editor to disable this feature on your PC. Therefore, let’s take a look at the steps and see how to do this:
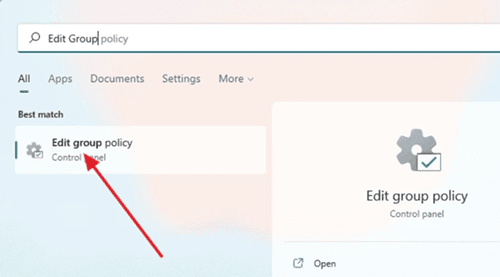
- First, from the Windows Search bar, search for Edit Group Policy. Then, open it.

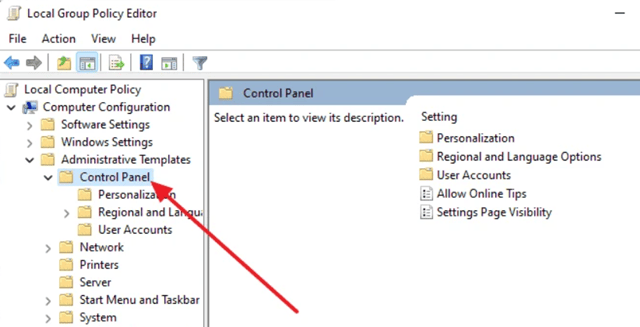
- After that, double-click on the Computer Configuration > Administrative Templates > Control Panel.

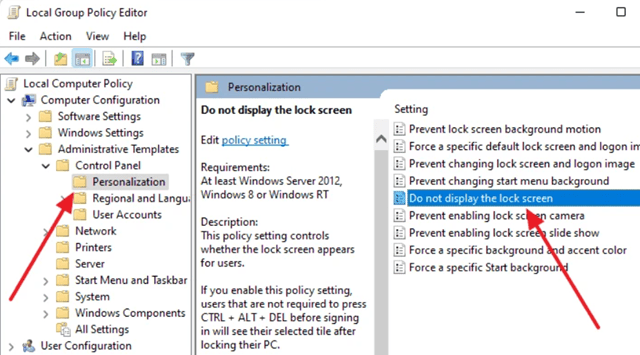
- Then, select the Personalization option and tap on the Do not display the lock screen.

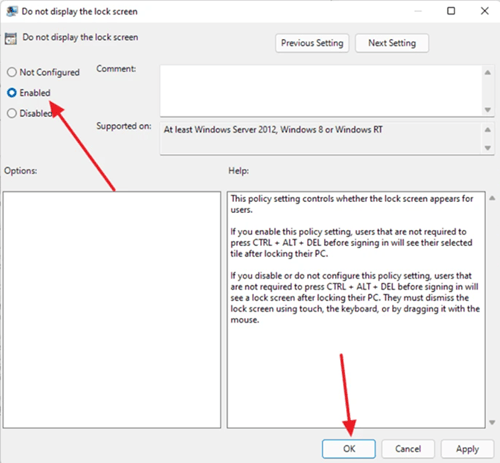
- Finally, select the Enabled option and hit the Ok button on the next page. Then, simply restart your device to apply the changes.

Method 2: Use Windows Registry
You can use the Windows Registry to turn off the local screen on your Windows 11 PC. So, let’s see how:
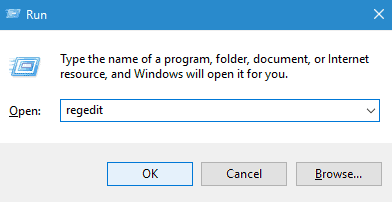
- Initially, launch the Run box and search for regedit. This will open the Windows Registry window.

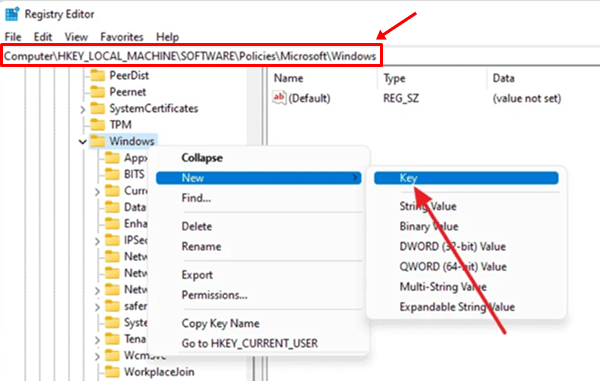
- After that, navigate to the:
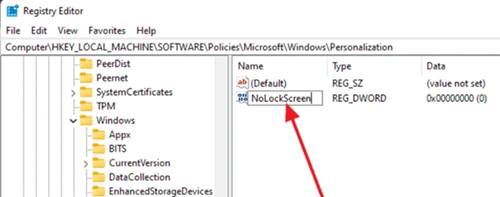
Computer\HKEY_LOCAL_MACHINE\SOFTWARE\Policies\Microsoft\Windows - Now, locate the Windows folder and right-click on it. Then, select New > Key from the appeared drop-down list.

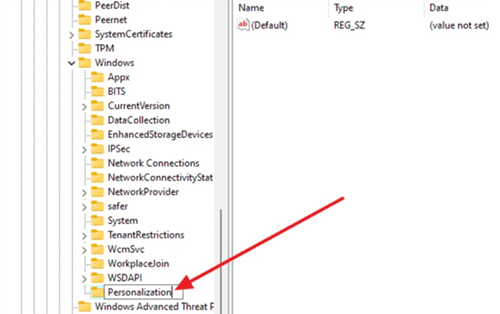
- Then, name the folder as Personalization.

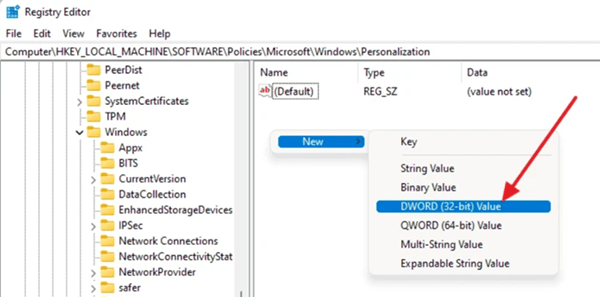
- After that, create a new String. However, to do this, right-click on the empty space on the right side of the window. Then, select the New and choose the DWORD (32-bit) Value.

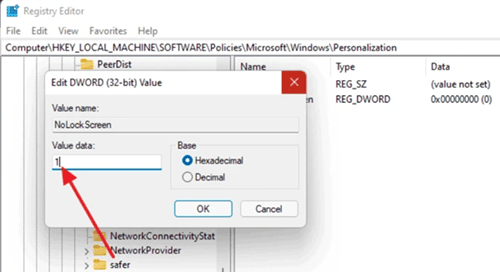
- Now, rename the string to NoLockScreen and double-click on it. Then, give it Value Data to 1 and hit the Ok button. That’s it. Now, simply reboot your device to apply the changes.


So, that’s all on how to fix the turn-off/disable the Lock Screen on your Windows PC. We hope that this dedicated article has helped you. However, in case you have any doubts on your mind regarding the topic, comment below to let us know.


