Superfetch (SysMain) is a service in Windows 11 that boosts the performance of your PC by reducing the load time. This feature/service preloads the apps you open in the memory, thus speeding up Windows 11. However, users have reported this service doing the opposite work by slowing down your PC.
This feature improves the performance of your PC by identifying the pattern in which you use your apps and then preload them in the memory even before you open them. The preloaded app takes only the unused part of the RAM, thus ensuring that your PC does not run out of memory.
This article will discuss various ways to disable Superfetch (SysMain) in Windows 11. Though this feature speeds up your PC, many users have said that this feature results in high system resource usage, thus decreasing the performance. This is generally reported by PC with low specs. If you have been facing issues with Superfetch and want to disable it, this article will help you with that.
Also Read- Quick Ways to Take a Screenshot on Windows 11
Disable Superfetch (SysMain) in Windows 11
There are various ways to disable Superfetch (SysMain). Following the steps given below, you will be able to turn this feature off on your PC.
1. Using CMD
You can disable Superfetch (SysMain) in Windows 11 using CMD. To do so, follow the steps given below-
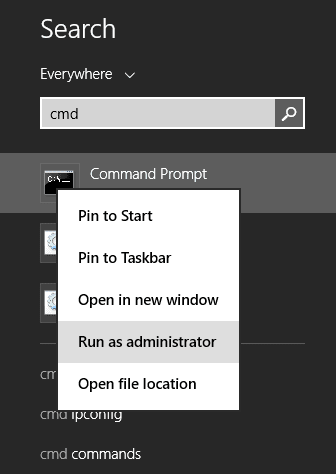
- Open Start Menu, and search for Command Prompt. Select the app from the search result and click on Run as administrator.

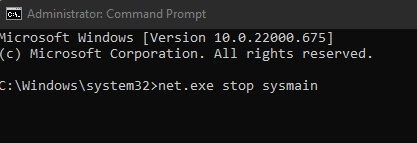
- Next, type the command net.exe stop sysmain and execute it.

- Now to disable the service type and execute the command sc config sysmain start=disabled

- Once done, the Superfetch service will be disabled.

2. Using Services
Another way to turn off or disable the feature is by using the Services app. Follow the steps given below to turn off Superfetch (SysMain) in Windows 11-
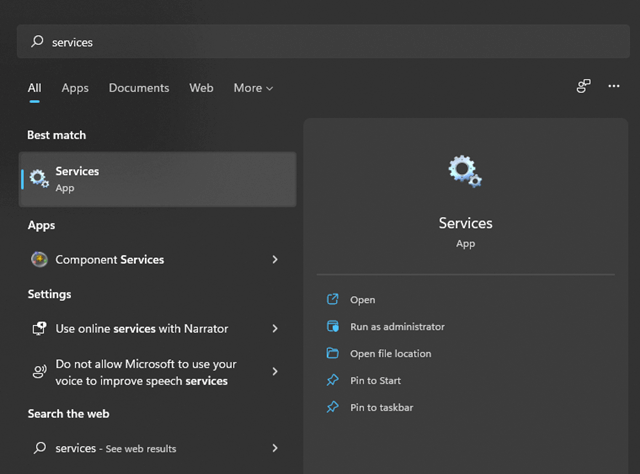
- Press the Windows key and then in the Start Menu, search for Services and open it.

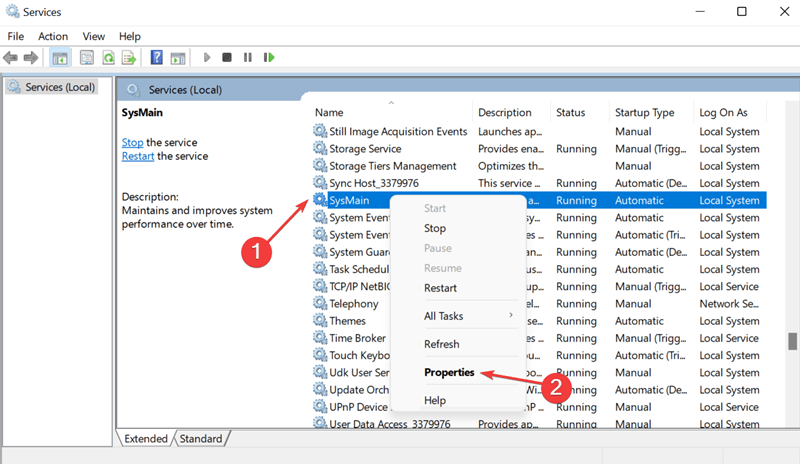
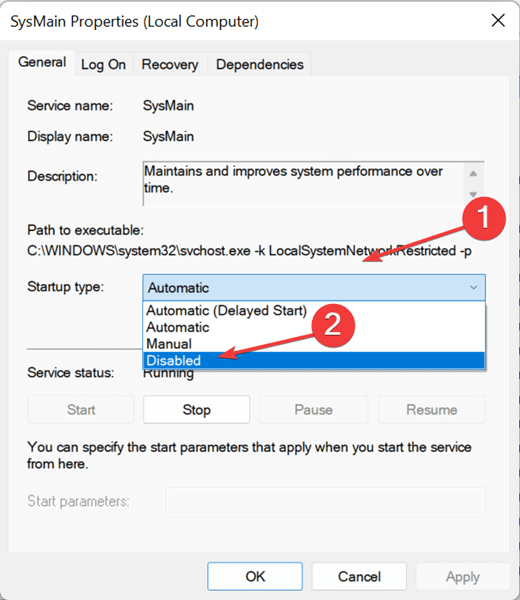
- Search for SysMain service here. Right-click on the service, and then click on Properties.

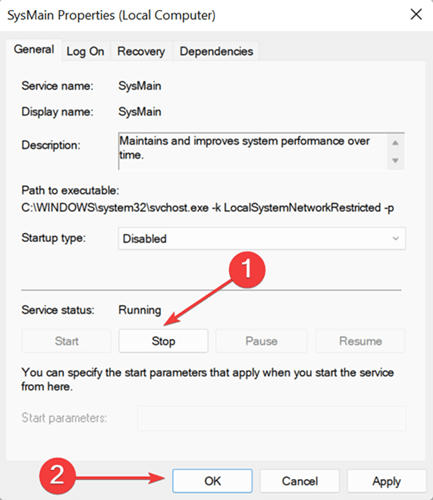
- Now, set the Startup Type to Disabled and click on the Stop button.


- Click on Apply and then on OK to save the changes.
- Close the Services app window and restart your PC to disable the service.
3. Using Registry Editor
You will also be able to disable the Superfetch (SysMain) feature in Windows 11 by tweaking the Registries. Following are the steps to use Registry Editor to disable the feature on your PC-
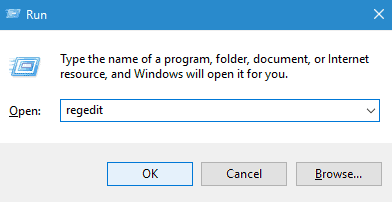
- Press Windows + R key combo. Here type Regedit and press Enter to open the Registry Editor.

- When given the User Account Control, click on Yes.
- Head to the following address-

-
Computer\HKEY_LOCAL_MACHINE\SYSTEM\CurrentControlSet\Control\Session Manager\Memory Management\PrefetchParameters
-
- Now, right-click on the empty space on the right side. Click on New and then on DWORD (32-bit) Value.
 Value.")
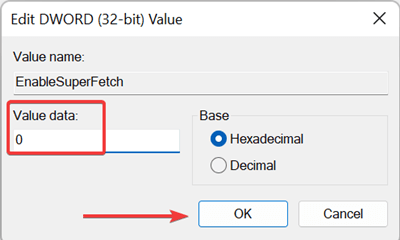
- Rename the new key you created as EnableSuperfetch.

- Double-click on the key to edit it. Set the Value Data as 0.

- Click on OK and then close the Registry Editor. Restart your PC to save the changes you made.

 Value.")

Final Words
These were some ways to Disable Superfetch (SysMain) in Windows 11. If you want to disable Superfetch (SysMain) on your PC, you can follow any methods mentioned in this article.


