Remote Desktop is a standard feature that has been included in their operating system since Windows XP. After that, every windows version has a Remote Desktop feature in it. So using this you can access any computer remotely and complete your work without even going there.
In 2021 tools related to Remote Desktop are in the hype, because everybody living work from home culture needs these features to access each other system files and make changes to them. There is no need to buy a third-party tool to use a remote desktop connection because windows already offer you this; you just need to enable this feature.
So below, we will guide you on activating or enabling Remote Desktop connection in Windows 11 and help you connect to another PC.
Also Read- How to Open RDP Port to Allow Remote Desktop Access
List of Methods to Enable Remote Desktop on Windows 11
Note: Remote Desktop is only available on Windows 11 Pro and Enterprise. You can use Chrome Remote Desktop as an alternative if you have Windows 11 Home edition.
There are multiple ways to enable and configure remote desktop on Windows 11:
- Settings app
- Control Panel
- Power Shell
1) Enable Remote Desktop on Windows 11 via Settings App
One of the best and easy method to enable remote desktop connection in windows 11 is via setting app. Follow these below steps.
- Open the Settings app or press Windows + I together.

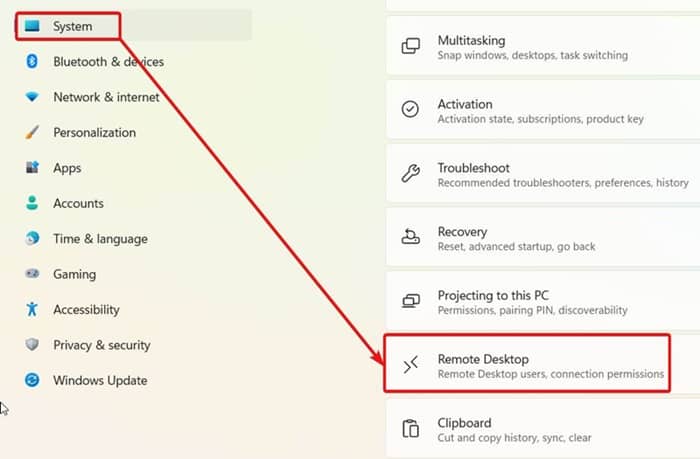
- Click on System and scroll down a bit. Then, on the right side, click on Remote Desktop.

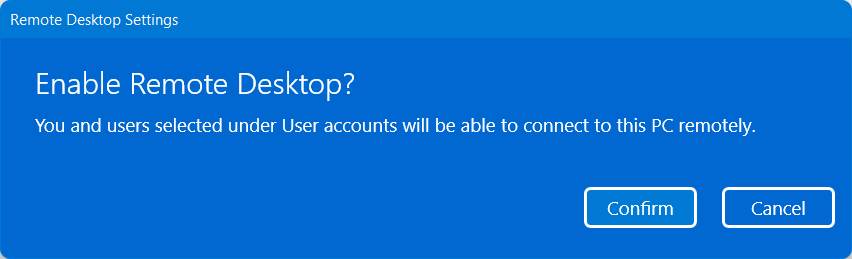
- Toggle the switch to turn on Remote Desktop.

- Make sure to use the Network Level Authentication to make the connection more secure.
- The settings page shows the current Remote Desktop port that’s helpful if you need to configure a router to allow connections outside the network. If no changes are required, keep it 3389.
- Tap on the Confirm button.


Once you have finished the above steps, you can connect to any PC using the Microsoft Remote Desktop App.
2) Enable Remote Desktop on Windows 11 via Control Panel
As we mention, there are plenty of ways. You can choose as you like. You can also enable RDP connection through the control panel.
- Click on the Windows button and search for Control Panel.

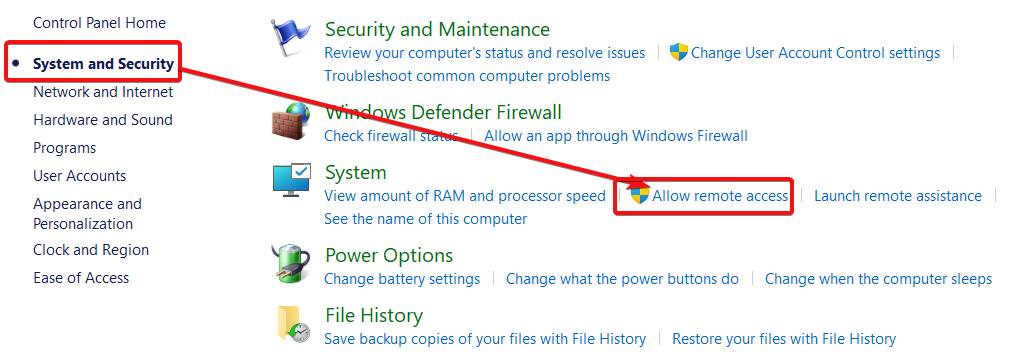
- In Control Panel, click on System and Security.
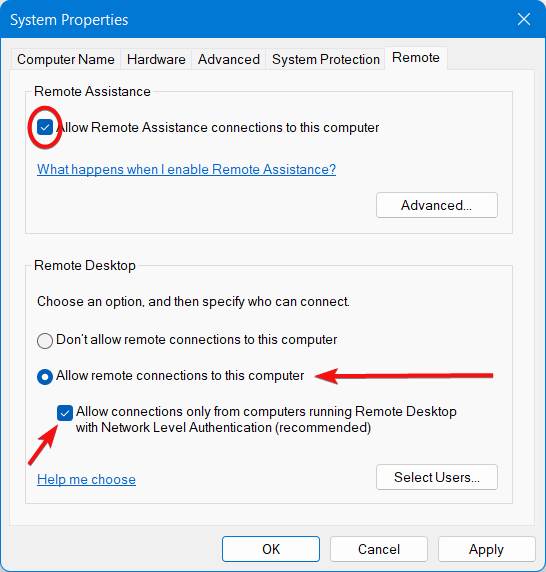
- Next, under the System section, click on Allow remote access.

- In the new pop-up window, under the Remote tab, check to Allow remote connections to this computer.

- Click on Apply followed by OK.

3) Enable Remote Desktop on Windows 11 via Power Shell
This is a bit complicated method but works the same as above. Some tech geeks like to use window’s power shell to enable or disable features in Windows 11.
- Click on the Windows button at the bottom left corner and search for Power Shell.
- Now, right-click on Power Shell, and click on Run as administrator.
- Copy and paste the below command and press Enter.
Set-ItemProperty -Path 'HKLM:\System\CurrentControlSet\Control\Terminal Server' -name "fDenyTSConnections" -value 0
- Although optional, you can type the below command to enable remote desktop through Windows Firewall and press Enter.
Enable-NetFirewallRule -DisplayGroup "Remote Desktop"

Well, that’s all we have here about how you can enable Remote Desktop on Windows 11. We hope after reading this guide, you now know three ways to enable Remote Desktop. Further, if you have any queries or suggestions, please reach us using the comment section below.


