When you want to leave your PC or your laptop for a short time like when you are going for lunch then sleep mode comes in handy. Sleep mode puts your PC in a state where it is not shut down and does not consume much power. When you put your PC to sleep, your Programs will not be closed and you will be able to resume your work from where you left off.
However, many users have reported facing issues with Sleep Mode not working on Windows 11. If you too have been facing this issue, then this article will help you with that. In this article, we will be discussing how you can fix Sleep Mode not working in Windows 11.
Also Read- How to Fix Windows 11 Lag After an Update
Fix Sleep Mode Not Working on Windows 11
There are various ways to fix the issue of sleep mode not working on Windows 11, such as-
1. Disable Fast Startup
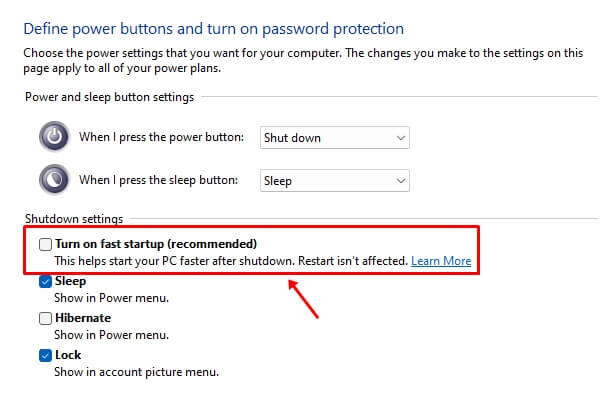
You may face this issue due to fast startup being enabled. Fast Startup boosts the startup of your PC but may interrupt sleep functionality and cause this issue. You must turn off fast startup and then check if you still face this issue or not-
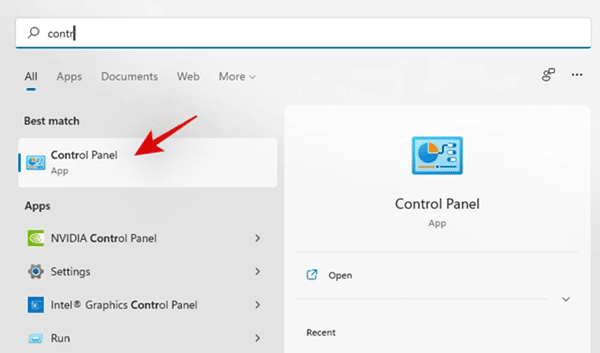
- Go to the Start menu and search for the Control Panel and open it.

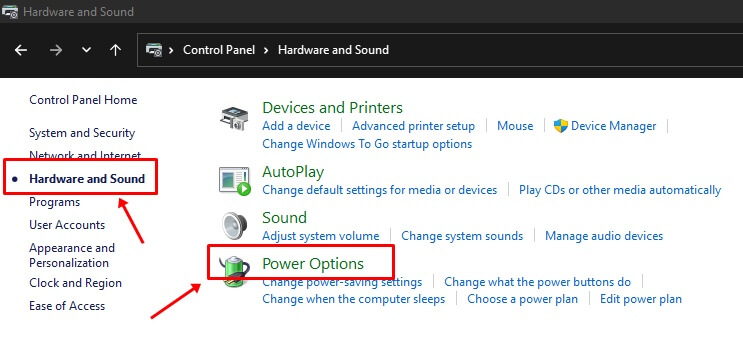
- Here, click on the Hardware and Sounds option, and then click on the Power Options.

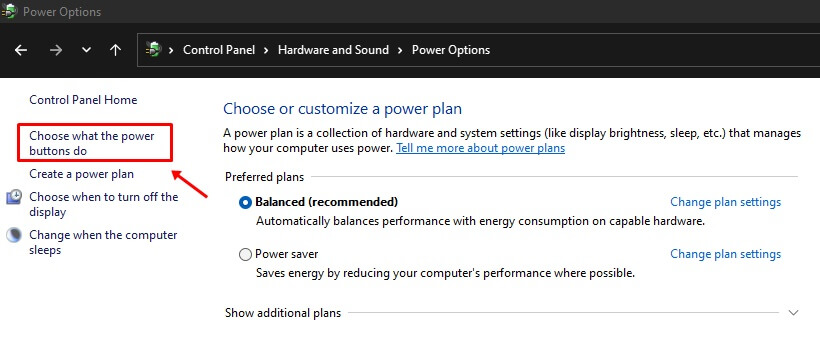
- Now, click on the Choose what the power button do option on the left sidebar.

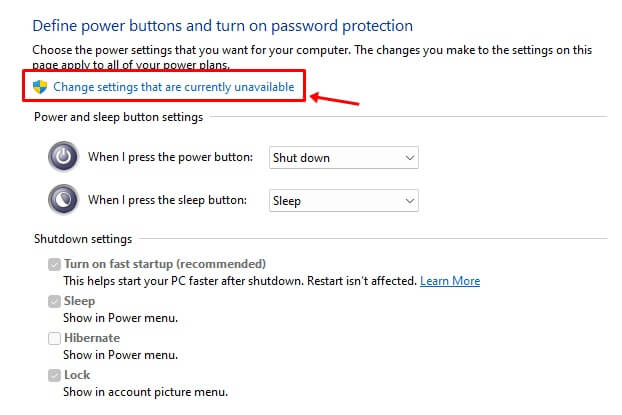
- Then in the next window, click on the Change settings that are currently unavailable.

- At last, uncheck the checkbox for Turn on fast startup to disable it.

- Click on Save Changes.
2. Ensure Sleep Mode is On
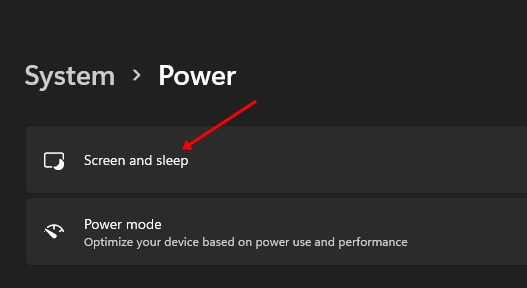
The user must ensure that they have not disabled sleep mode accidentally. This can be a reason behind the sleep mode not working on Windows 11. In that case, you need to check the screen and sleep settings in Windows 11. For that, the steps are given below-
- Go to the Start menu and search for Settings and open it.
- Under the System tab, click on the Power and Battery option.

- Next, click on the Screen and sleep tab to expand it.

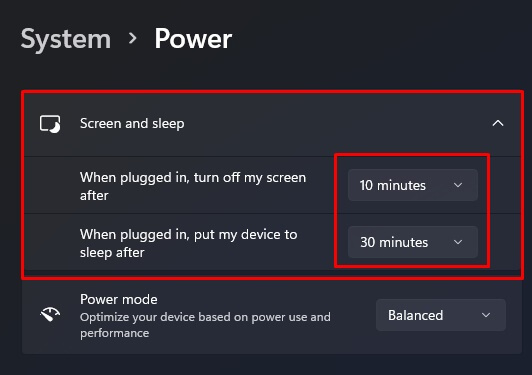
- Now, set a specific time for the computer to go into sleep mode.

- After making the changes, close the Settings app.

3. Disable Wake Up PC For Mouse and Network Adapters
It can also happen when the mouse or other adapter is connected to your PC and that wakes up your PC from sleep mode. You need to change these settings to fix the issue. To do so, follow the steps given below-
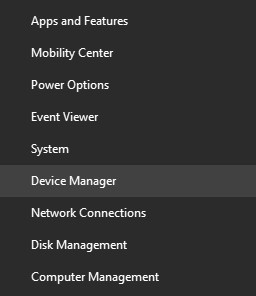
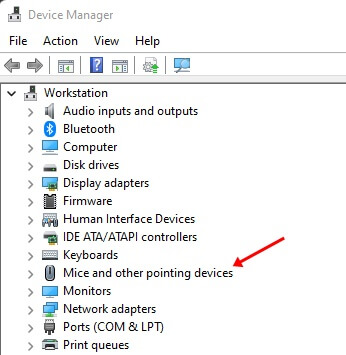
- Press Windows + X key combo and click on Device Manager.

- Double-click on the Mice and other pointing devices to expand it.

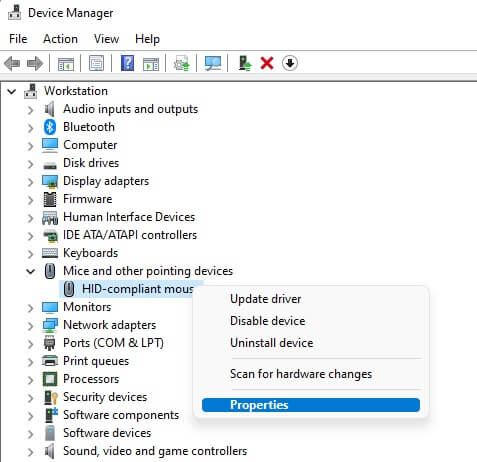
- Then, right-click on the HID-compliant mouse and select its Properties.

- Under the Power Management tab, uncheck the checkbox for Allow this device to wake the computer option. Then, click on OK.

- Follow the same steps given above for the Network adapter.

4. Close Unwanted Programs
Sometimes the background apps and processes don’t allow your PC to go into sleep mode. If this happens, then you need to identify all those apps by using the command prompt and close them manually. For that, the steps are given below-
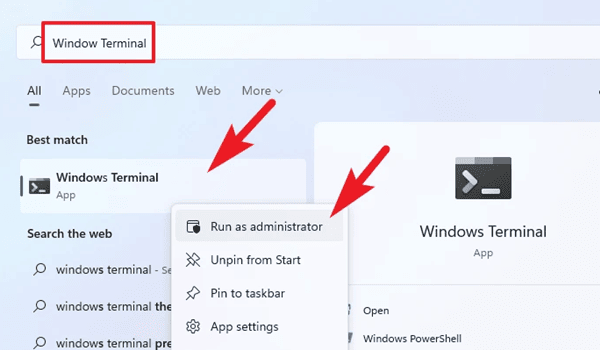
- Press Windows + X key combo, and then click on Windows terminal(Admin) from the list that appears.

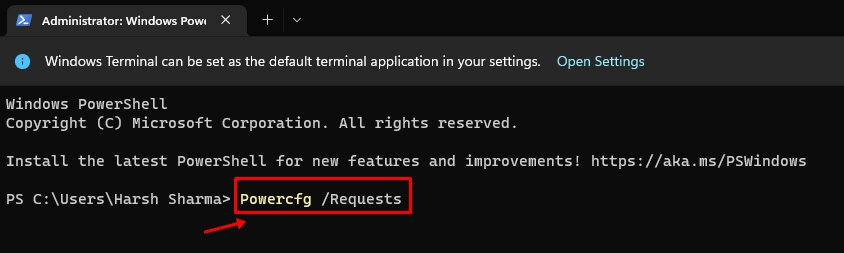
- Here, execute the following command-

-
Powercfg /Requests
-
- Look out for the apps here that prevent your PC from sleeping and close them.
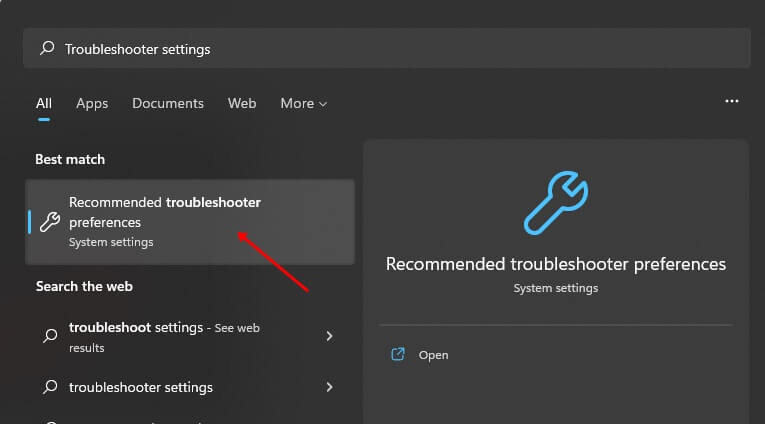
5. Run Power Troubleshooter
The power troubleshooter identifies issues with the sleep mode and power-related issues and helps fix them. Follow the steps given below to run the power troubleshooter-
- In the Start menu, search for the Troubleshooter settings and open it.

- There, select the Other Troubleshooters option.

- Then look out for the Power option, and click on the Run button next to it.

- Now, follow the on-screen instructions to fix the issue.


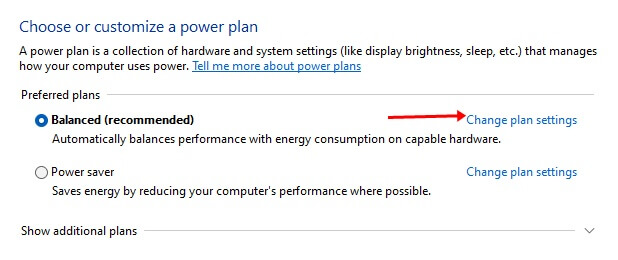
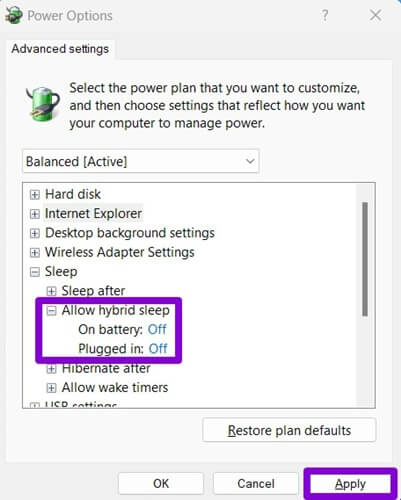
6. Modify Power Options
Another thing that you can try doing is modifying the power options. You can modify the power options by following the steps given below-
- Press Windows + R key and type Control. Press Enter to open the Control Panel.
- Here, search for the Power option and click on it.
- There, click on the Change plan settings.

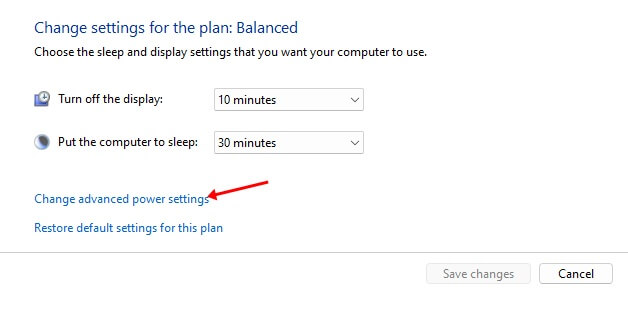
- Now, click on the Change advanced power settings option.

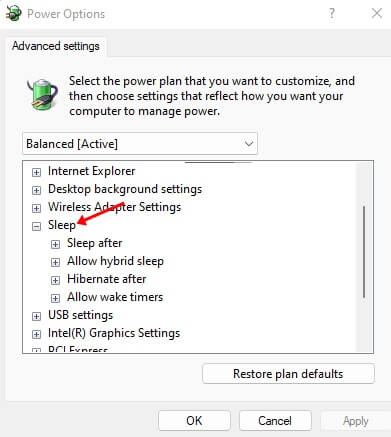
- Now in the Power Options window, double click on Sleep to expand it.

- Next, expand Allow Wake Times by double-clicking on it.
- Select Disable for both On battery and Plugged in.

- At last, click on Apply to save the changes
- Follow the same steps for the Hybrid sleep features.


Conclusion
The above article explains the various ways to fix the sleep mode when it does not work on Windows 11 PC. Following the above steps, you will be able to fix Sleep Mode not working on Windows 11.


