Issues with DLL files are common in Windows and such issues generally occur when the particular DLL file goes missing. DLL files are essential for Windows PC; they are required to run specific programs on Windows. When the program cannot access the required DLL file, you will get an error message saying DLL file is not found.
One such error with the DLL file that you might encounter is Wmain19.dll not found. This error is encountered when you launch software that requires the Wmain19.dll file to function but cannot access it. Let’s discuss the methods to help fix this issue in Windows.
Fix Wmain19.dll Not Found Error on Windows 11/10
You will encounter this issue when the Wmain19.dll file is missing or corrupted. This happens when something goes wrong during the Windows Update, driver update, or after making changes to your system. Given below are the steps to do so-
1. Run a Virus Scan
This issue can occur due to viruses or malware on your PC. Run the virus scan through Windows Security, which should fix this issue if caused due to virus or malware.
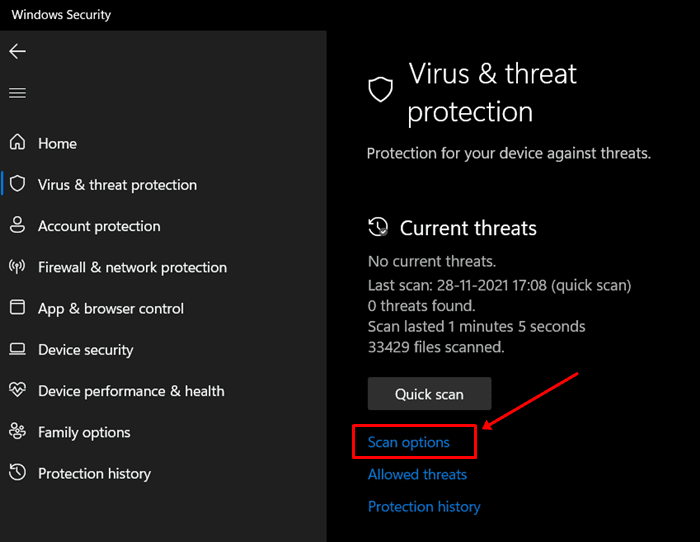
- Open the Windows Security from the Start Menu.
- Here, click on Virus & threat protection.
- Now, click on Scan Options here.

- Select Full Scan and click on Scan Now to run the scan.


2. Run SFC Scan and DISM
You can run SFC and DISM commands to scan and fix corrupted files on your PC. Given below are the steps to do so-
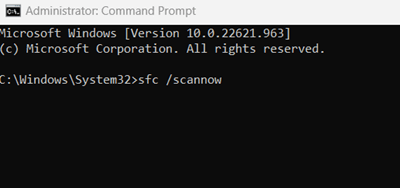
- Press Windows + R keyboard shortcut, type CMD, and press Ctrl + Shift + Esc. Click on Yes when the UAC prompt appears.
- Now, run the SFC scan by executing the following command-

-
Sfc /scannow
-
- After the above command, execute the commands given below one by one to run the DISM scan-
-
DISM /Online /Cleanup-Image /CheckHealth -
DISM /Online /Cleanup-Image /ScanHealth -
DISM /Online /Cleanup-Image /RestoreHealth
-
- Once done, close the Command Prompt and reboot your PC.
3. Update Windows
Another reason you could face this issue is outdated Windows or a problem with the previous update. Updating the WIndows to the latest version will fix this issue. You can follow the steps given below to install the latest updates-
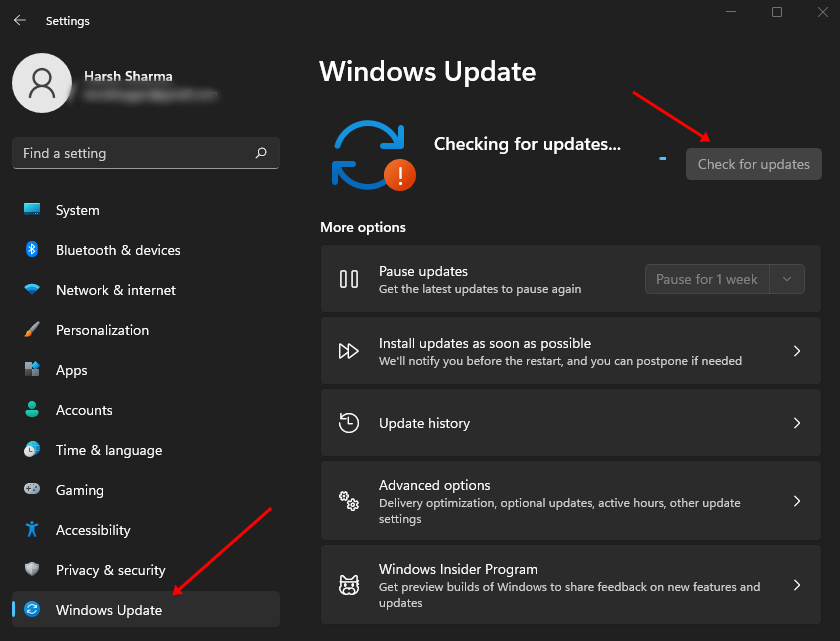
- Open the Windows Settings from the Start Menu.
- Under the Windows Update tab, click on the Check for Updates button.

- You will see all the updates available; install them.
- Once all the updates are installed, restart your PC.
4. Download the Missing/Corrupted DLL File
You can download the Wmain19.dll file from the internet and replace it with the corrupted DLL file. You can do it by following the steps given below-
- Click on this link to head to the download page of the Wmain19.dll file. Here, click on the Download button to download the DLL file.
- Head to the location where the download file is saved. If the file is in ZIP format then right-click on the file and click on Extract All.
- Now, follow the steps on your screen to extract the file.
- If you are using a 64-bit PC then copy and paste the file to the address given below-
-
C:\Windows\SysWOW64
-
- For 32-bit PC users, they can copy and paste the file to the following address-
-
C:\Windows\System32
-
- Once you have pasted the file, restart your PC.
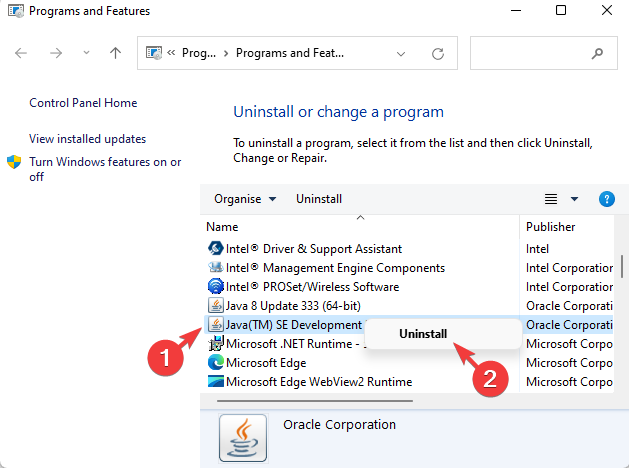
5. Reinstall the Software
If you tried replacing the DLL file but that didn’t solve the issue then you should try reinstalling the program/software you are facing issues with it. To do so, follow the steps given below-
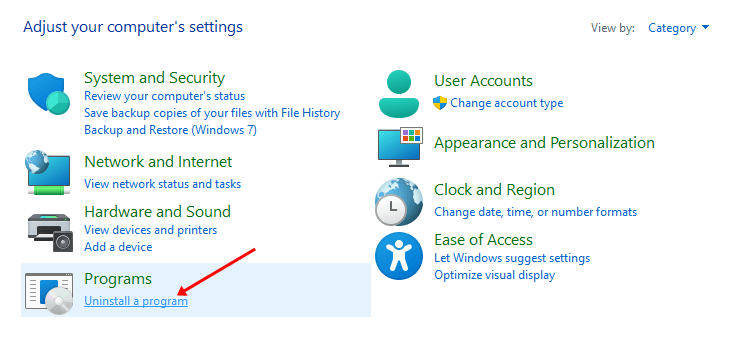
- Open the Start Menu, search for the Control Panel, and open it.
- Here, click on Uninstall a program.

- From the list of software click on the one you facing the error with. Click on Uninstall and then confirm uninstalling the program.

- Once the program is uninstalled, restart your PC.
- Now, download and install the software again on your PC and that should fix the issue.
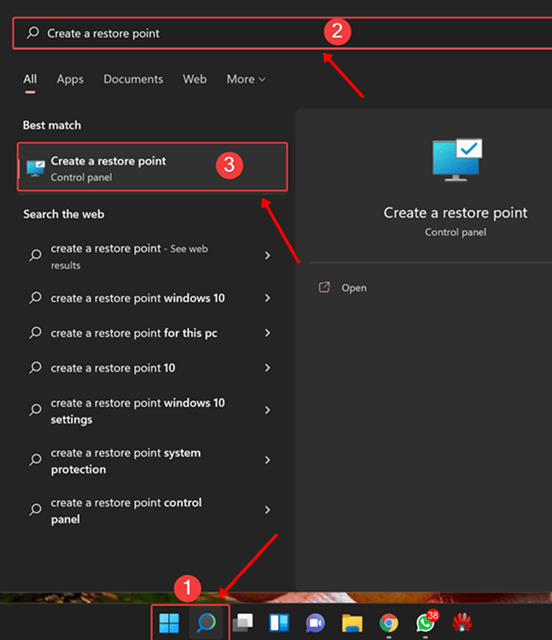
6. Restore your System
You can use System Restore to revert your system using the restore point. This is helpful if the Wmain19.dll not found error is caused after you made some changes to your system. Given below are the steps to do so-
- Open the Start Menu and from here open Create a restore point.

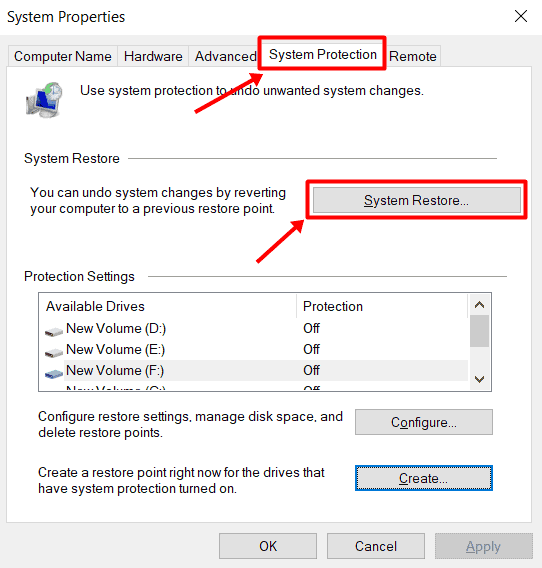
- On the window that opens up, click on the System Restore button.

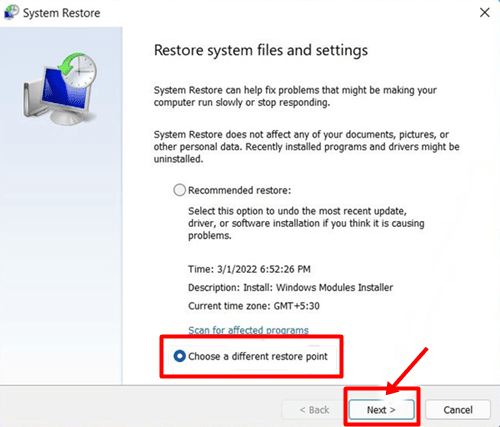
- Now, select Choose a different restore point and click Next.

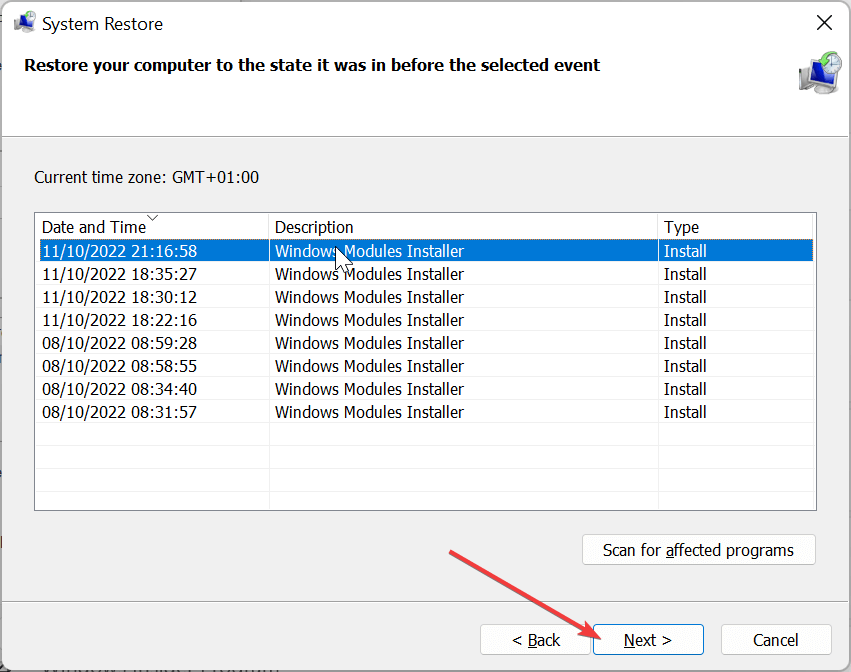
- Select the restore point from the list. You can click on Scan for affected programs to see what changes will be done to your system.

- Finally, click on Finish to begin the process.
- Wait till the process is finished and that should fix the issue.
Bottom Line
These were all the steps that you can follow to Wmain19.dll file missing on your PC. You still have an option left, i.e., reinstall the Windows, in case the steps didn’t help you. But we consider it to be the last resort only to be followed if none of the other methods fixed the issue.


