Inaccessible_Boot _Device is a BSOD error you may face during the system startup. This error stops your PC from booting correctly and is more critical than a regular BSOD error. You are likely to encounter this error when your PC cannot read Windows 11 partition.
If you face this error, this may be due to BIOS upgrades, SSD not detected by PC, overclocked CPU, etc. Facing this issue repeatedly can also cause your hard drive to crash.
Unlike other BSOD errors, this one is more serious and can cause permanent issues to your PC. If you have been facing this issue, this article will be your lifesaver. In this article, we will be discussing various ways to help fix the Inaccessible_Boot _Device error in Windows 11.
Also Read- Disable Superfetch (SysMain) in Windows 11
Fix Inaccessible_Boot _Device Error in Windows 11
Following the are the troubleshooting methods to fix Inaccessible_Boot _Device error in Windows 11 PC-
1. Boot to Safe Mode
Before you continue with the troubleshooting steps in this article, you must boot to safe mode on your PC. To boot to safe mode, follow the steps given below-
- Turn off your PC first. Now, press the Power button to turn it on.
- Once you see the Windows logo, press and hold the power button again to turn off your PC.
- Do this 2-3 times, and you will be headed to the Automatic Repair screen.
- Here, click on the Advanced Recovery Options.
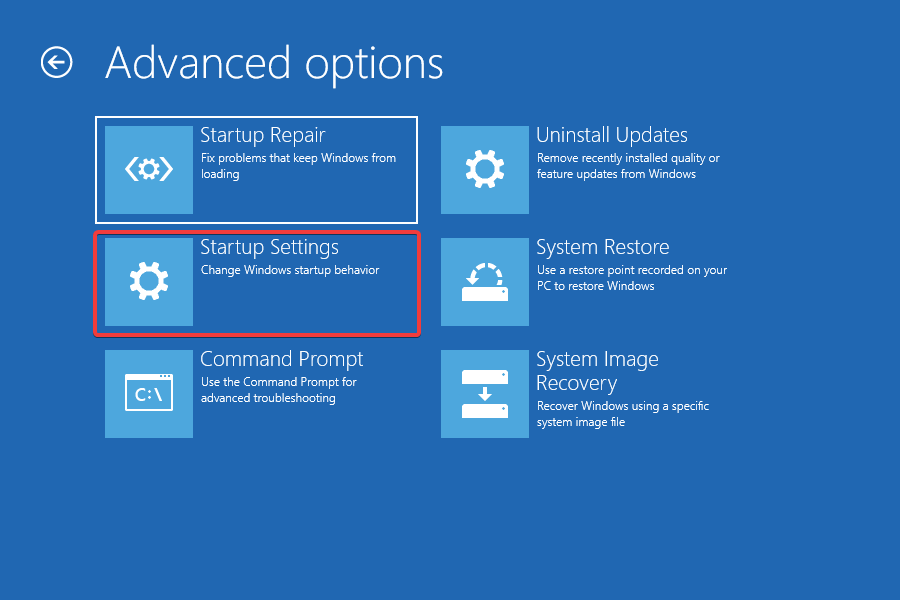
- Next, select Troubleshoot > Advanced Options > Startup Settings.
- Click on Restart and press 5 or F5 to boot your PC to safe mode.
Once you have booted to safe mode, you can continue ahead with the troubleshooting steps in this article.
2. Run SFC and DISM Scan
You should try running the SFC scan and DISM scan if you face the Inaccessible_Boot _Device error in Windows 11. If the issue is caused due to corrupted system files, then running the SFC and DISM scan will probably fix the issue. To run the SFC scan, follow the steps given below-
- Press the Windows key and search for CMD. Now, run the Command Prompt as administrator.
- Type the command sfc /scannow and hit Enter to execute it.
- Wait for the process to complete, and then restart your PC.
You should now no longer face the issue. However, if you still encounter it, then try running the DISM scan by following the steps mentioned ahead-
- Run the Command Prompt with administrative privileges.
- Now, type DISM.exe /Online /Cleanup-image /Restorehealth and press Enter to execute the command.
3. Uninstall Update
If you started facing this issue after installing an update, you should probably try removing the update you installed on your PC. Given below are the steps to uninstall the recently installed Windows update-
- Open Start Menu, and then open Settings.
- Click on the Windows Update tab and then on Update History.
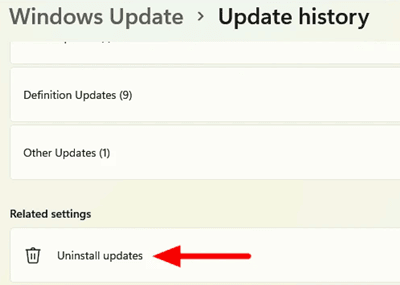
- Under the related settings, click on Uninstall Updates.
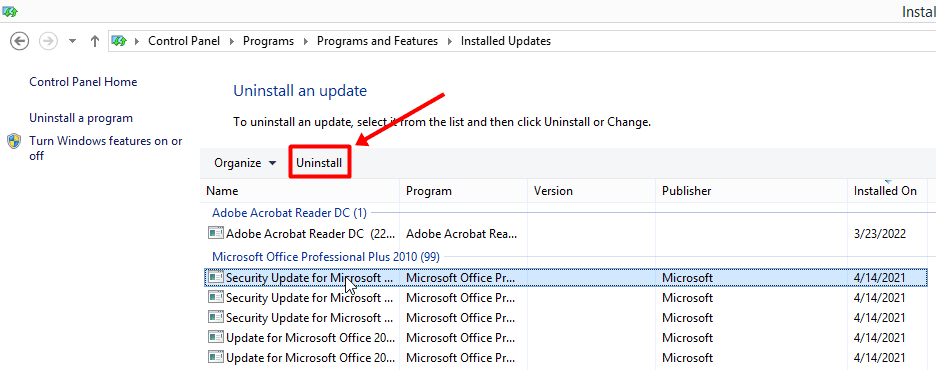
- Now, select the recently installed update, and click on Uninstall.
- Confirm uninstalling the update, and then restart your PC.
4. Update Driver
You may also face this issue due to outdated drivers. Therefore, you should try updating the drivers on your device and then check if you still face the issue or not. To do so, follow the steps given below-
- Press Windows + X key combo, and then from the menu, click on Device Manager.
- Here, look for the hardware with the yellow exclamation mark. Double-click on it to expand it.
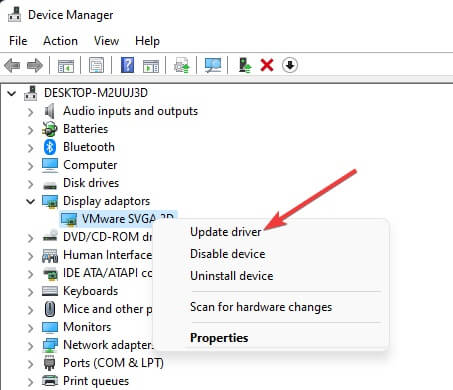
- Right-click on the device with the exclamation mark and click on Update Driver.
- Click on Search automatically for drivers to update the driver.
- Once done, close the Device Manager and restart your PC.
5. Run CHKDSK
Another troubleshooting step to follow is running the CHKDSK scan. If there is any problem with the disk, then the Check Disk scan will troubleshoot it. To run CHKDSK, follow the steps given below-
- Click on the Start icon on the taskbar, and search for CMD. Select Command Prompt and then click on Run as administrator.
- Here, type and execute the command chkdsk /r C:
- Wait for the scan to complete, and then restart your PC.
- Once your PC restarts, you should no longer face the issue.
6. Perform System Restore
If you started facing this issue recently, you could try performing a system restore. System restore will fix the Inaccessible_Boot _Device error in Windows 11. To continue ahead with this, you will need a restore point to the time when your system was working fine.
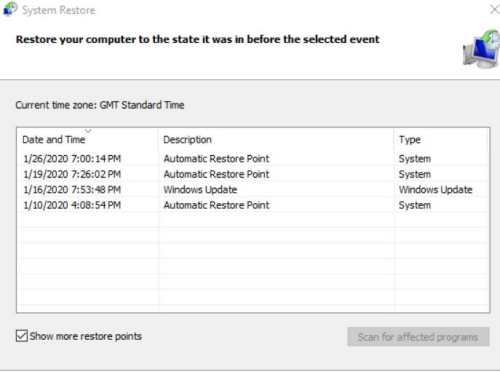
- Press Windows + R key combo, type rstrui, and open it.
- In the System Restore window, select the restore point from the list. If you want to see what programs will be uninstalled and reinstalled, click on Scan for affected programs.
- Click on Next to continue ahead.
- Wait for the process to complete, and click on Finish.
- After the system restores, your PC should work fine.
7. Reset Windows 11
If you still encounter the issue even after thoroughly following the above steps, resetting the PC will probably work for you. To reset Windows 11, follow the steps given below-
- Open Settings by pressing the Windows + I key combo.
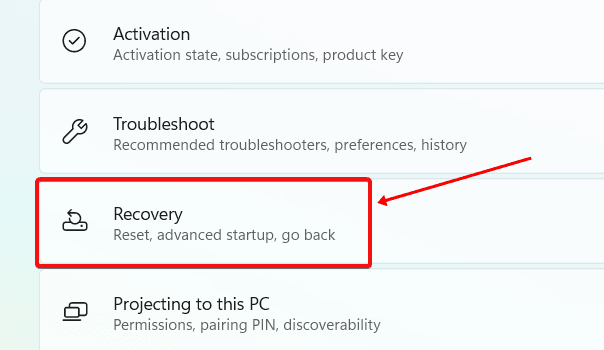
- In the System tab, click on the Recovery option.
- Click on the Reset PC button. You will be given two options-
- Keep My Files- This option keeps your files and removes settings and apps.
- Remove Everything- This option removes everything, including your files, settings, and apps.
- Select the preferred option, and wait for the process to complete.
- After your PC resets, the error will no longer be encountered.
Final Words
These were all the ways to fix the Inaccessible_Boot _Device error in Windows 11. As we discussed above, this is a BSOD error caused when your PC cannot read the boot partition. If you encounter this error, following the above steps will help you fix it.

