Windows Search is a great tool to help you search for files, folders, and apps on your Windows PC. It is way better than opening File Explorer and visiting every folder just to find a file you need. All you can do is open Windows + S to open Windows Search and you can search for the file or folder by name.
It has been reported by the users that Windows Search was not showing any results to them. This happens when the indexing is paused or has some problem. There can be many reasons why indexing may stop on your PC. In this article, we will list all the possible ways to fix Indexing paused on Windows 11.
Troubleshooting Methods to Fix Indexing Paused on Windows 11
This issue can occur when your Windows is not updated, and there is a problem with the search service, corrupted system files, or even due to some random bug on your PC. You can follow the steps mentioned below to fix the issue.
1. Restart your PC
Before continuing with any of the troubleshooting steps mentioned below, we recommend you perform a reboot. This will clear all the apps and services running in the background and fix all the temporary bugs.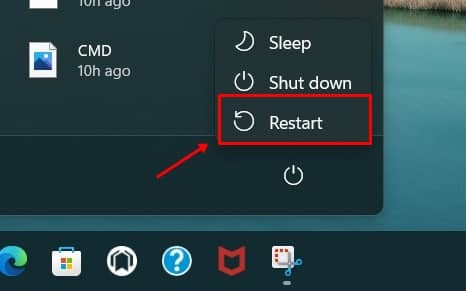
A simple restart should fix the issue without going through any hassle with the other troubleshooting steps. If the issue is not solved after the restart, you can move to the next step in this article.
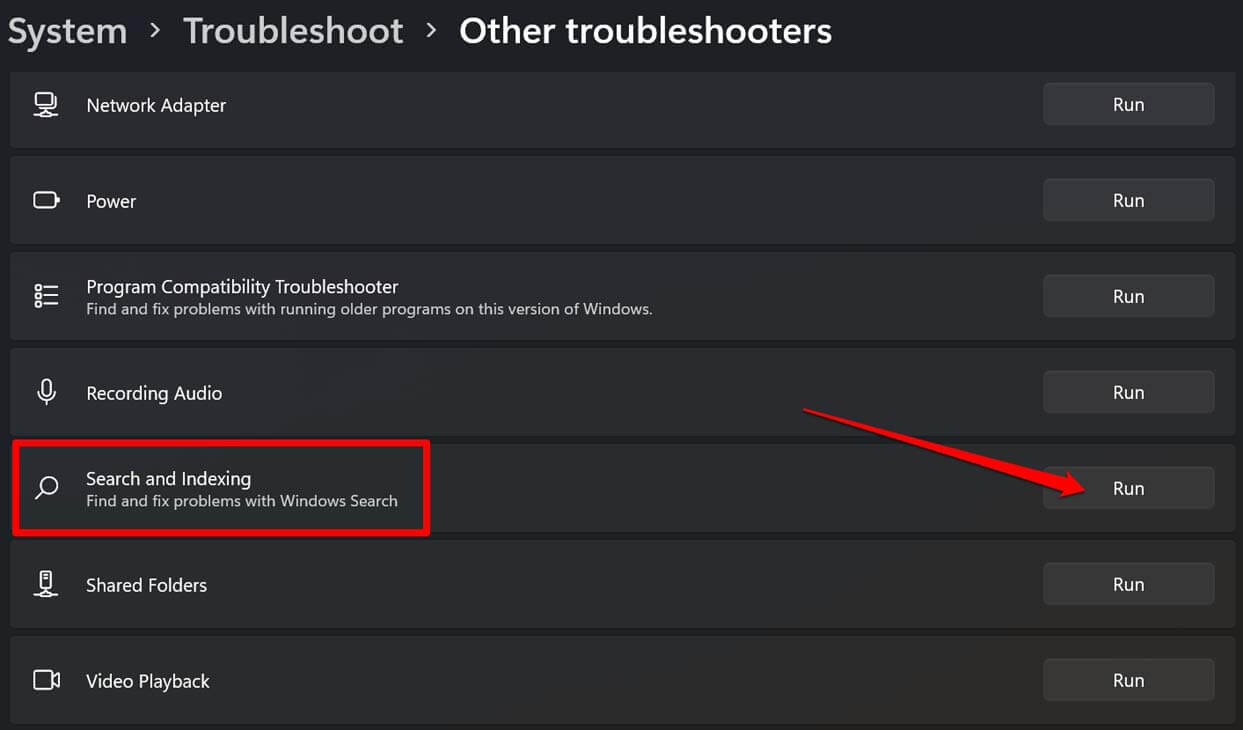
2. Run Search and Indexing Troubleshooter
Windows have an in-built search and indexing troubleshooter that you can use to fix all the issues with the Windows Search. To run it, follow the steps given below-
- Use the Windows + I keyboard shortcut to open the Settings app.
- Under the System tab, click on Troubleshoot and then click on Other Troubleshooters.

- From the list of troubleshooters, search for Search and Indexing, and click on the Run button next to it.

- Follow the on-screen instructions to run this troubleshooter and that should fix the issue for you.

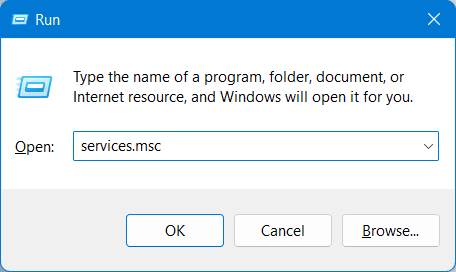
3. Restart Windows Search Service
You can try restarting the Windows Search Service to fix the issue. Given below are the steps to do so-
- Press Windows + R key combo on your keyboard, and then type Services.msc and Press Enter to open the Service app.

- Here, search for Windows Search; right-click on it and then click on Restart to restart the service.


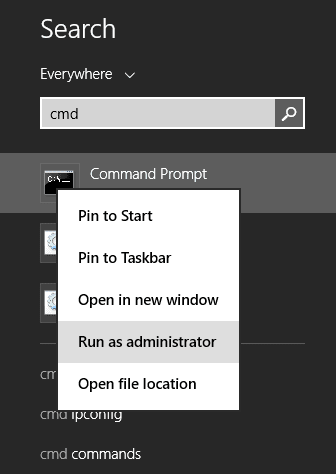
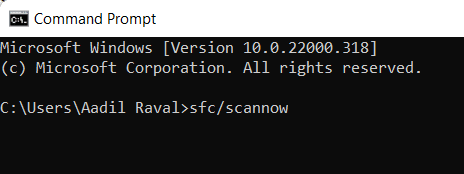
4. Run SFC Scan
Corrupted files can cause problems with the proper functioning of your PC. If you are facing this issue, it can be due to corrupted system files. You can run the SFC scan by following the steps given below to repair the corrupted files and fix this issue-
- Press the Windows key, and search for Command Prompt. Right-click on the Command Prompt and then click on Run as Administrator.

- Here, type the following command and then execute it by pressing Enter.
- sfc /scannow

- sfc /scannow
- The process will start now. It might take some time for the process to get completed.
- Once the process is completed, restart your PC.
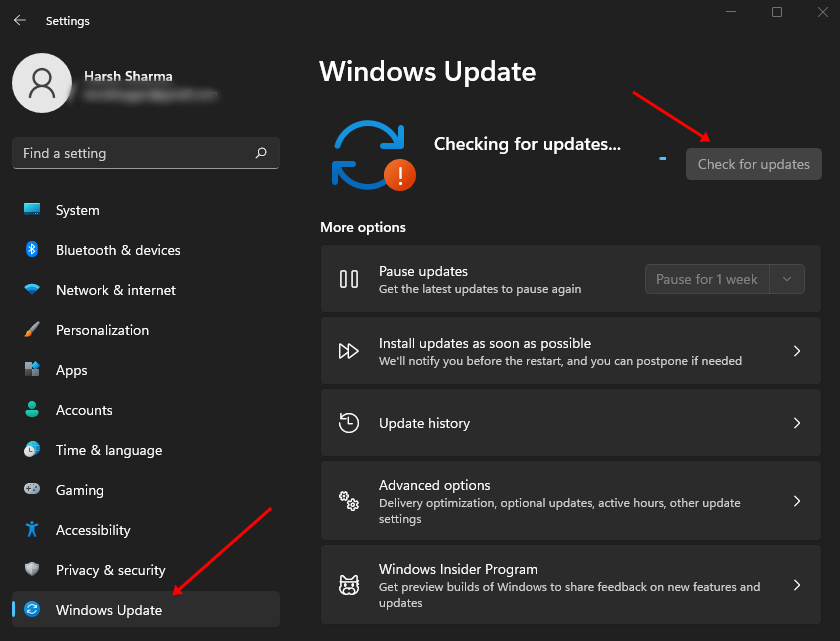
5. Update Windows
You might face this issue if Windows is not updated. You can update the Windows to the latest version by following the steps given below-
- Open the Settings app by using the Windows + I keyboard shortcut.
- Head to the Windows update on the left sidebar, and then on the right side, click on the Check for Updates button.

- All the updates available will be listed here; download and install them.
- Once done, restart the PC and the issue should be fixed.
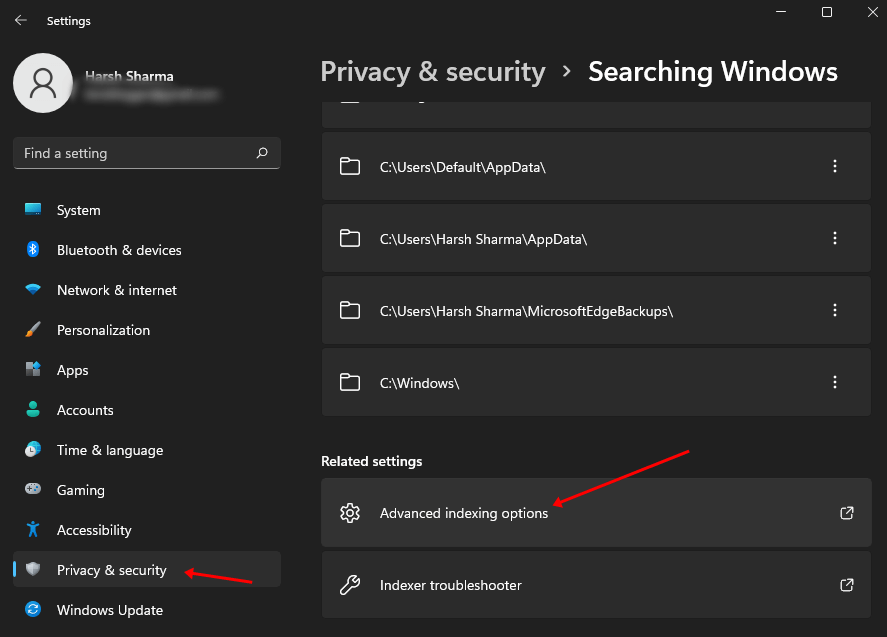
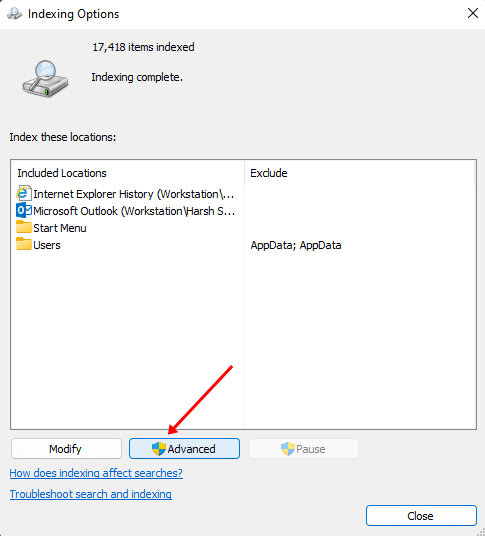
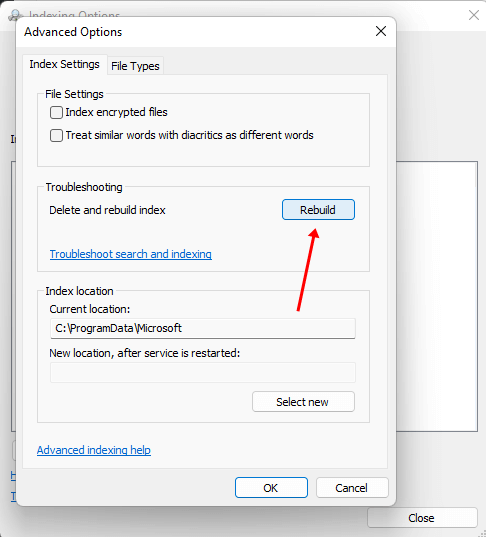
6. Rebuild Indexing Data
Another thing that you can try doing is rebuilding the indexing data. If the issue occurs on your device due to a corrupted index library, then this should fix the issue. To do so, follow the steps given below-
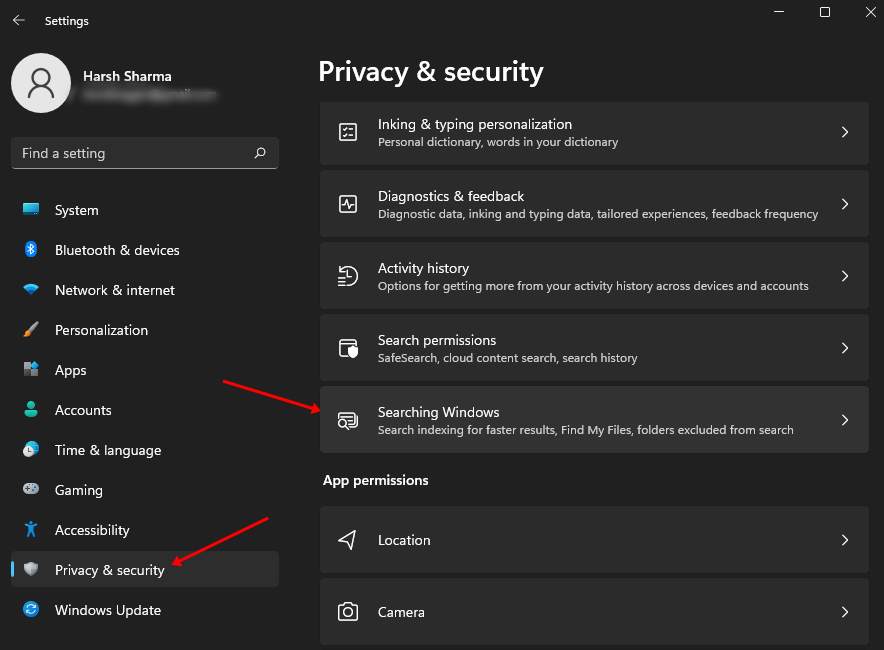
- Head to Windows 11 Settings by pressing Windows + I key combo.
- On the left sidebar, click on Privacy & Security tab, and then on the right side, click on Searching Windows.

- Scroll down to the Related Settings section, and then click on Advanced Indexing Options.

- Next, click on the Advanced button.

- Under the Troubleshooting section, click the Rebuild button to rebuild the indexing data.

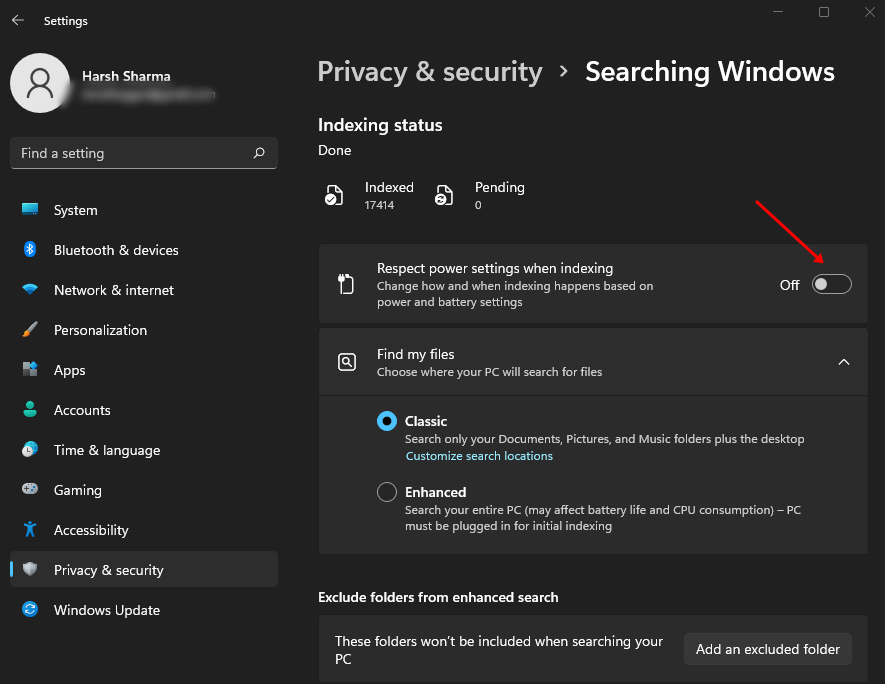
7. Turn on Indexing on Low Power
If the indexing is paused when your PC is running low on battery, it might be because of the power settings. You can simply turn on search indexing on lower power to solve this issue.
- Press the Windows + I key combo and this will open the Settings app on your PC.
- Under the Privacy & security tab, click on the Searching Windows option.
- Now, click on Respect Power Setting When Indexing and turn it off.

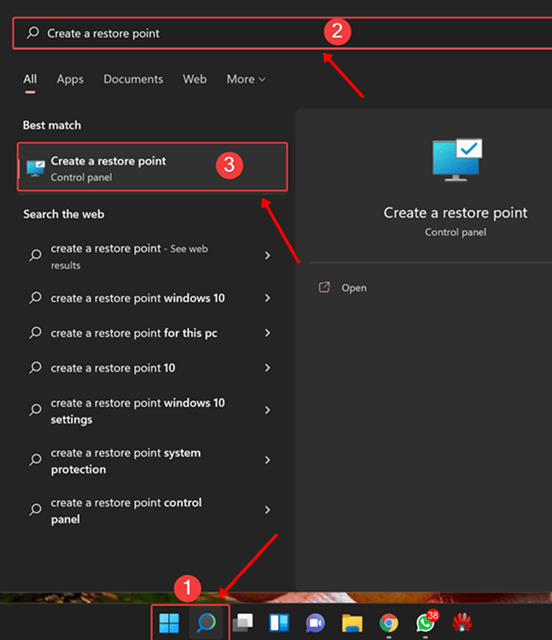
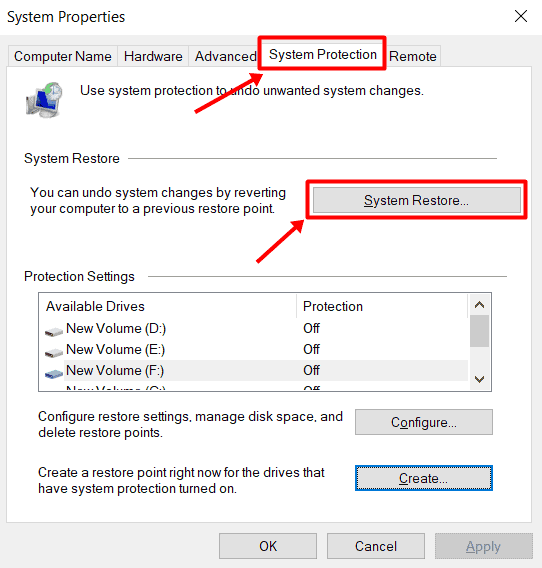
8. Perform System Restore
Lastly, you can perform a system restore to revert to the point when the PC is working fine. You need to have a restore point to continue with this method. To do so, follow the steps given below-
- Press Windows key on your keyboard, search for Create a restore point and open it.

- Here, click on the System Restore button.

- You will now see two options- Recommended Restore and Choose a different restore point; select any one of them.
- If you selected Choose a different restore point, then select a restore point, and click on Next.
- Now, click on Finish and the process will start.
- Your PC might restart during the process, so just wait till the process is completed.
Conclusion
If your Windows PC is not indexing the search result, this article will help you fix it. We have discussed all the possible troubleshooting steps to help fix Indexing paused on Windows 11. If you still face the issue, then we recommend you reset your PC or reinstall Windows.


