Microsoft does not allow users to install Windows 11 on an unsupported processor or CPU. Users can check whether their PC is compatible with installing Windows 11 or not. If your PC is not compatible you get an error message saying ‘This PC doesn’t currently meet Windows 11 system requirements’ or ‘The processor isn’t currently supported for Windows 11’.
This issue is faced when the user tries to install Windows on a PC with unsupported system specs, especially if your PC doesn’t have TPM 2.0 or UEFI secure boot. This article discusses a complete step-by-step guide to Installing Windows 11 on an unsupported CPU.
Also Read- How to Fix Windows 11 Lag After an Update
System Requirements for Installing Windows 11
Your PC must meet the following system requirements to install Windows 11-
- 1 GHz processor or faster with two or more cores compatible with a 64-bit processor.
- 4GB RAM or more is required.
- At Least 64GB of free space is needed.
- Your PC should be UEFI and Secure Boot Capable.
- TPM (Trusted Platform Module) 2.0 is required.
- Graphics card compatible with DirectX 12 or later with WDDM 2.0 driver
- 720p display greater than 9-inch diagonally with 8 bits per color channel required.
- Internet connection with a Microsoft Account.
Steps to Install Windows 11 on an Unsupported CPU
To bypass Windows 11 on an Unsupported CPU, you will have to first download the Windows 11 ISO, bypass Windows 11 systems requirement check and then install Windows 11. We have discussed the complete guide below-
1. Download the Windows 11 ISO
Firstly download the Windows 11 ISO from the official website. To do so, follow the steps given below-
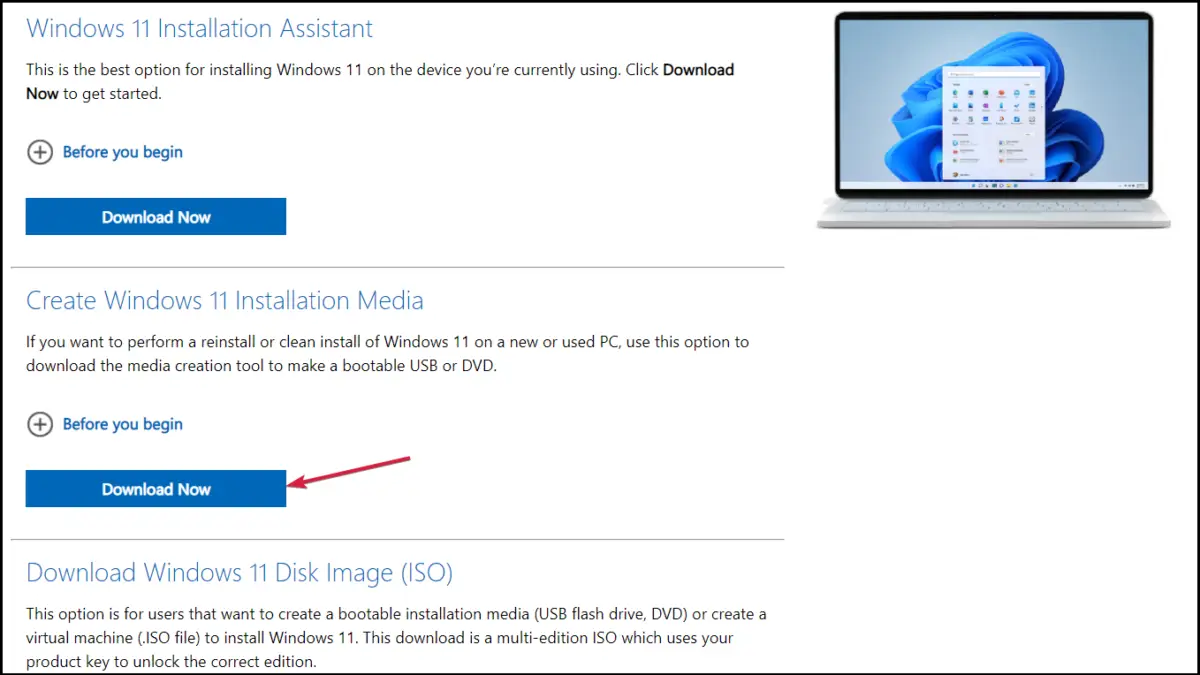
- Go to the Windows 11 Download page.
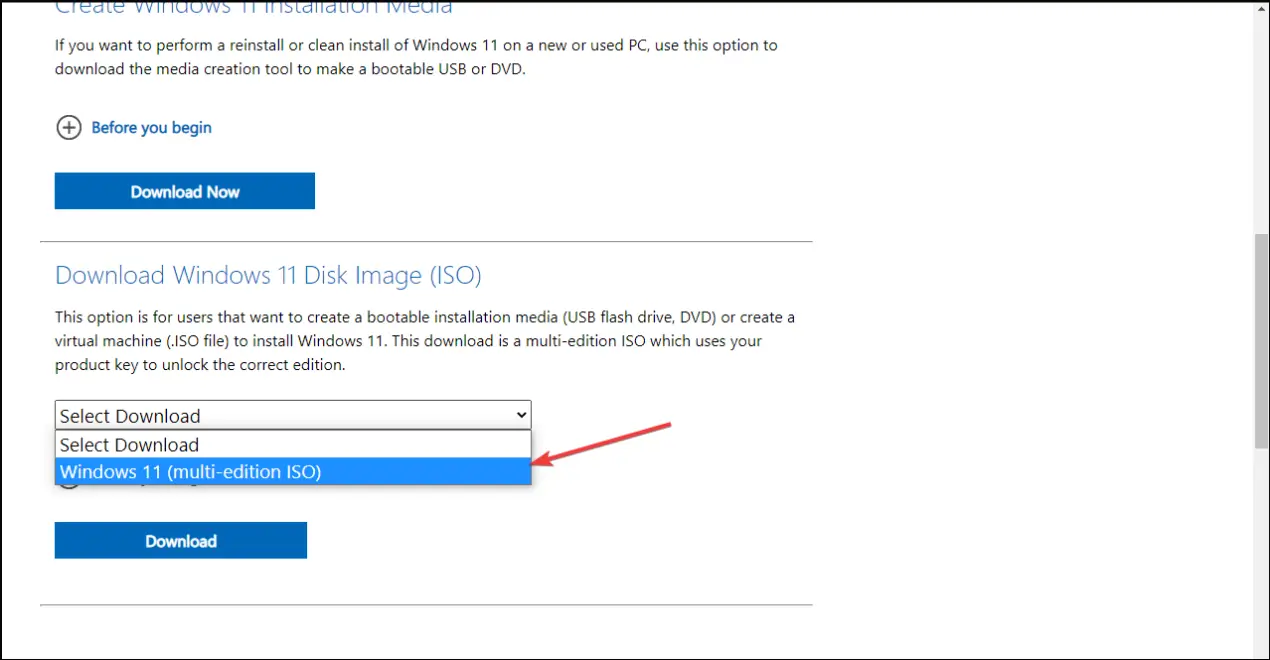
- Under Download Windows 11 Disk Image (ISO), click on the Select Download dropdown.

- Now select the Windows 11 version you want to download and then click on Download.
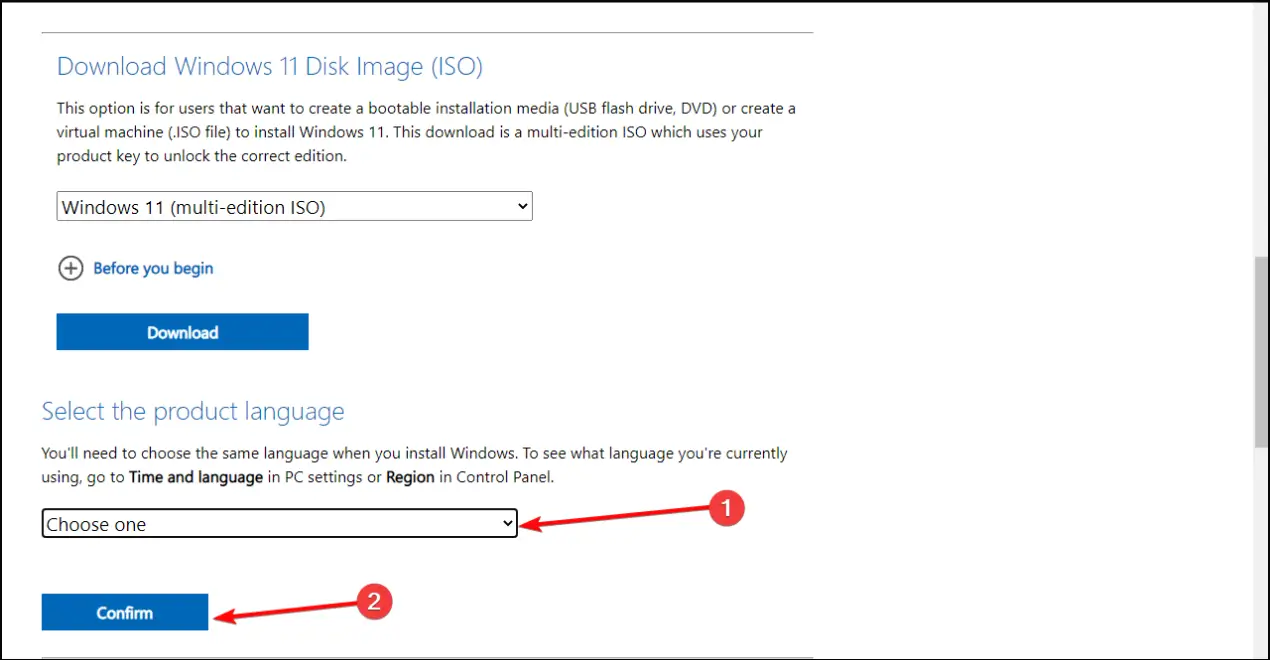
- Next under the Select the product language, click on the Choose one dropdown menu and select the language as per your preference, and then click on Confirm.
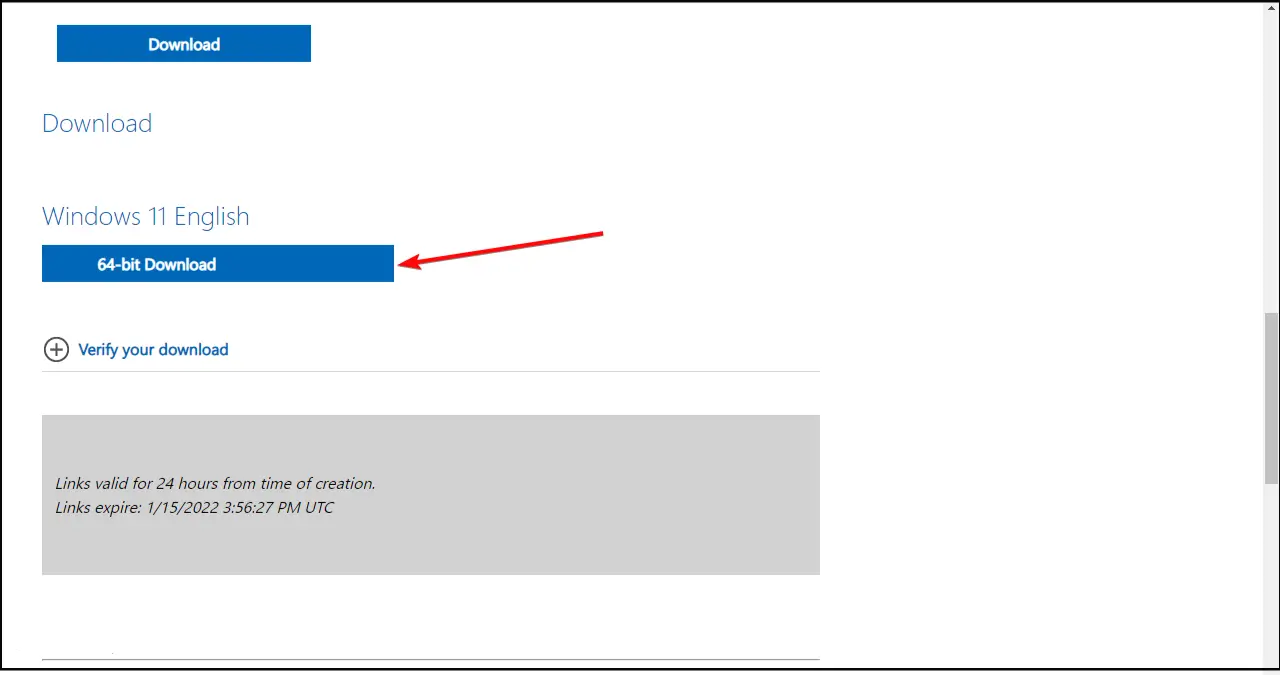
- At last, click on the 64-bit Download to download the ISO.


2. Bypass the CPU Check
Now you will have to bypass the CPU check for Windows 11 using the registry editor. To do so, follow the steps given below-
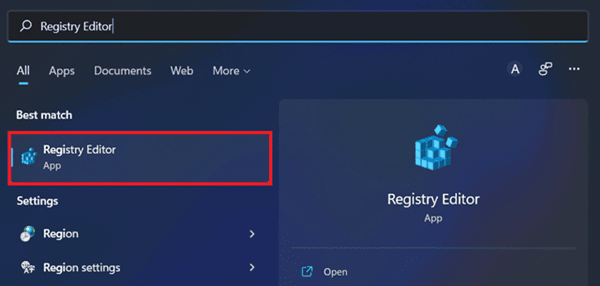
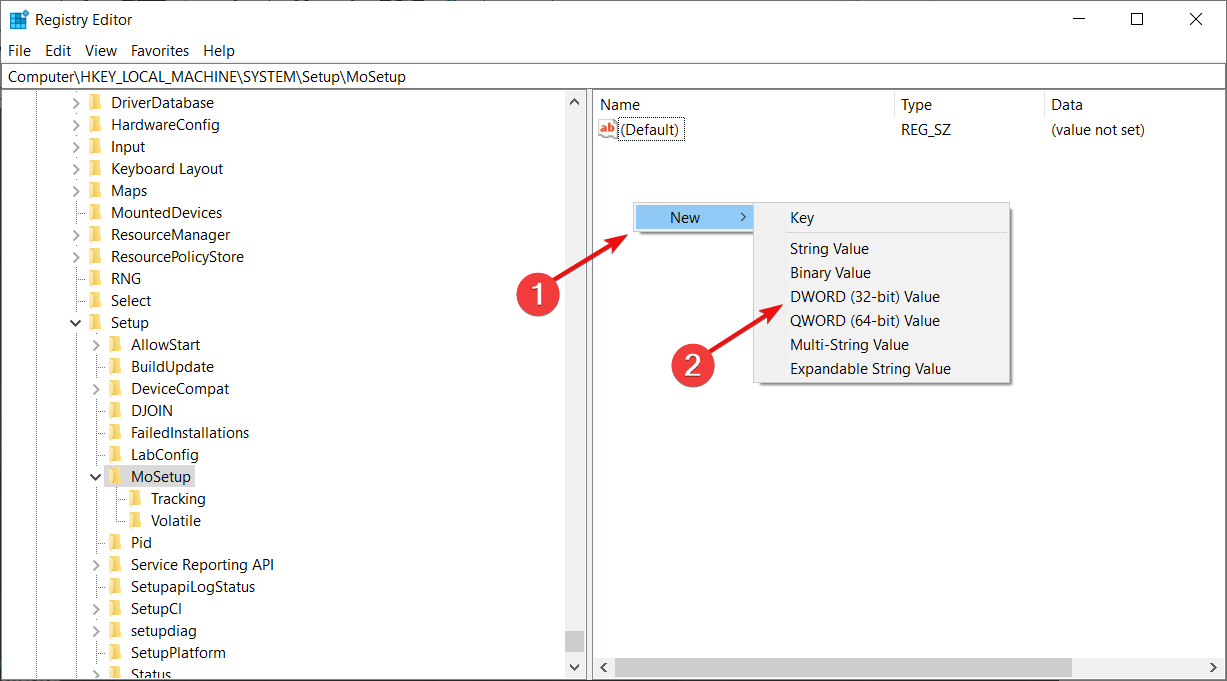
- Open Start Menu, search for, and open Registry Editor.

- Here head to the following path-
HKEY_LOCAL_MACHINE\SYSTEM\Setup\MoSetup
- Right-click on the right pane, click on New, and then on DWORD(32-BIT) Value.

- Rename the new key you created to
AllowUpgradesWithUnsupportedCPU
- Double-click on the new key, change the Value Data to 1 and click on the OK button.
- Once the process is done, Restart your PC.
3. Install Windows 11
Once done with the above steps you can install Windows 11 from the ISO by following the steps given below-
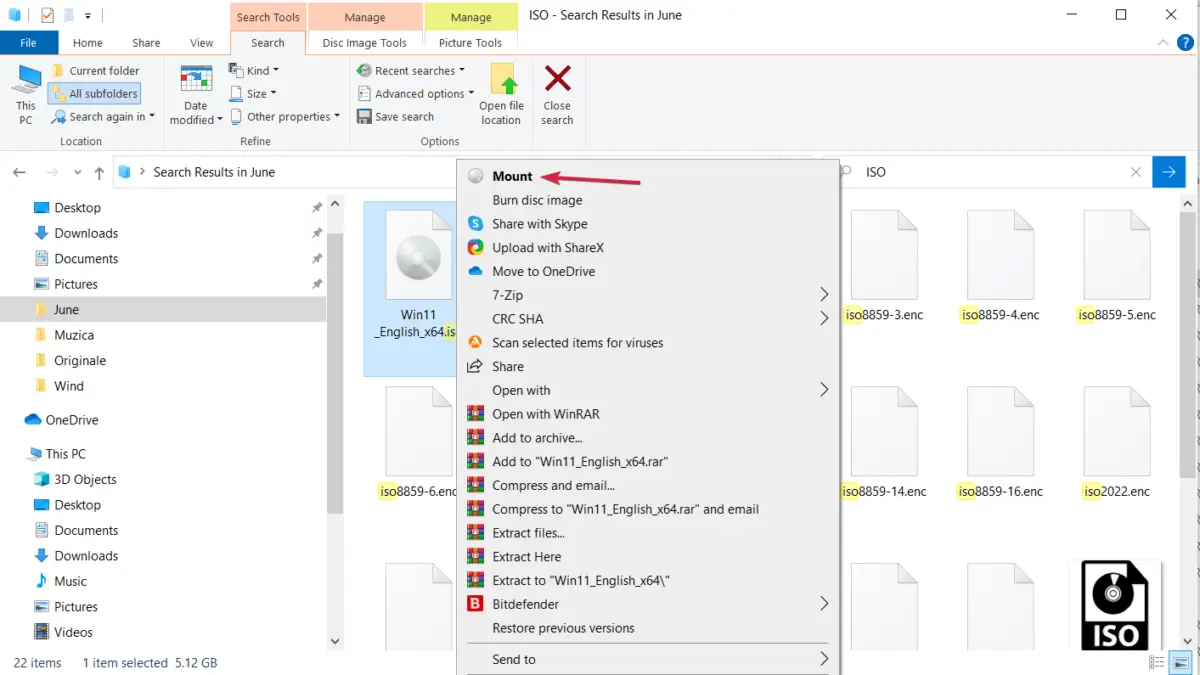
- Press the Windows + E key combo on your keyboard to launch File Explorer.
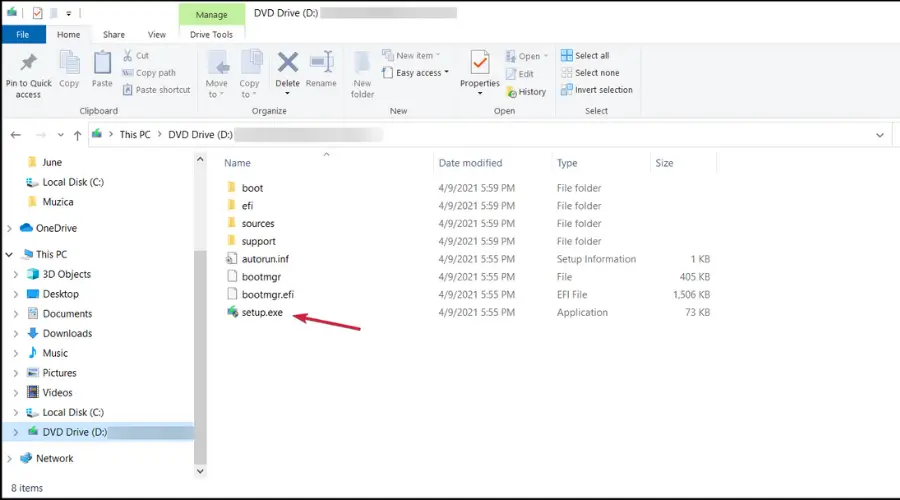
- Here, head to the location where you have saved the ISO. Right-click on the ISO file and then click on the Mount option.

- You will see a virtual drive on File Explorer; access it. Then double click on the setup.exe.

- Follow the on-screen instructions to install Windows 11 on your PC.
4. Install Windows 11 from USB Drive
If you don’t want to install Windows 11 from the ISO but the USB then you do have the option to do that as well.
However, this method can only be possible after you have made the changes to the Registry Editor. To install Windows 11 from the USB drive, follow the steps given below-
- Download the Windows 11 Media Creation Tool from this link.
- After downloading the Media Creation tool, run it on your PC. Also, ensure you have plugged in your USB drive on your PC.
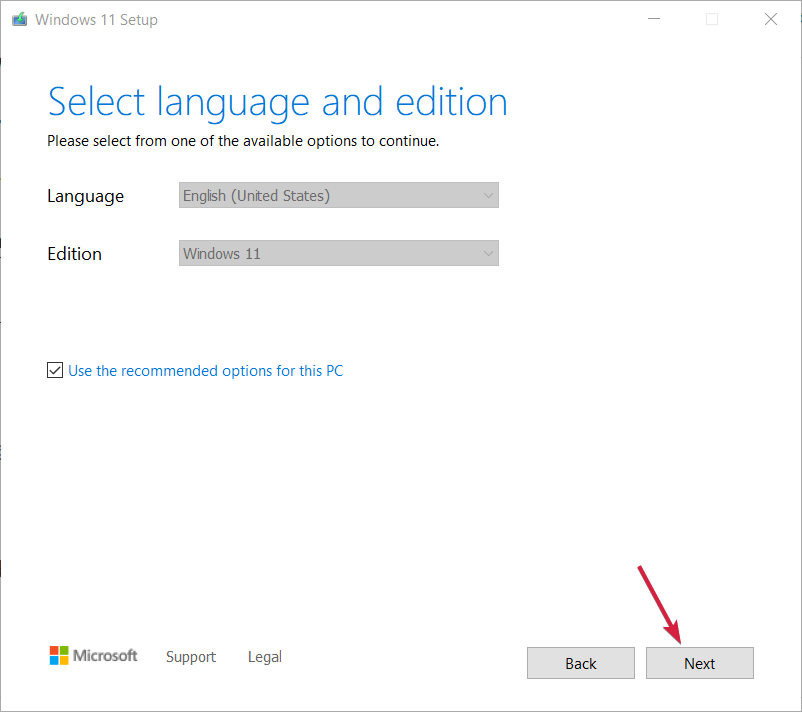
- On the Select Language and Edition window, click on Next.

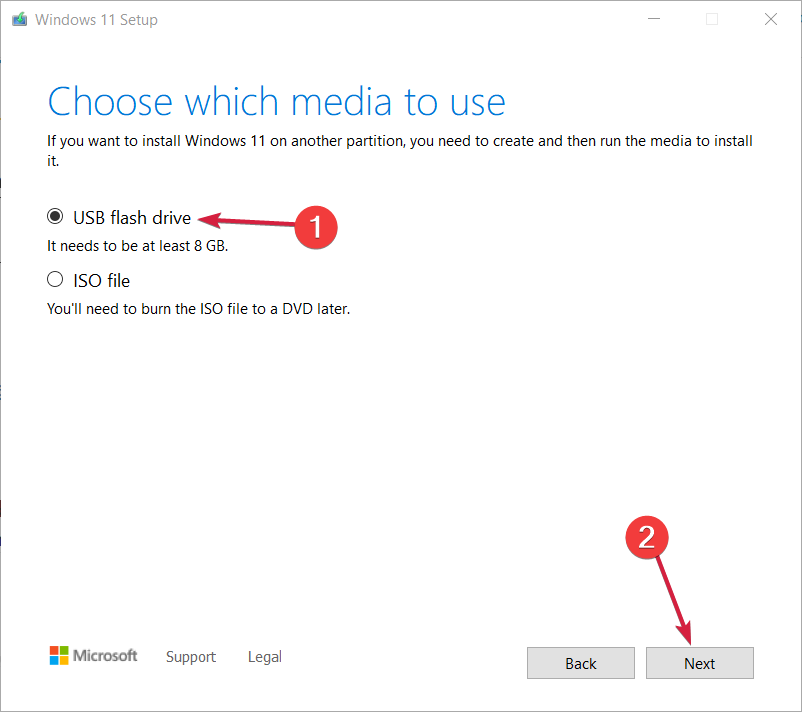
- Now, click the option for USB Flash Drive, and then click on the Next option. Select the USB flash drive, and then click on Next.
- Media Creation will make bootable media for Windows 11. You will need an internet connection for installing Windows 11.
- Once done, shut down your PC.
- Boot your PC to BIOS and install Windows 11 from the USB drive.
Conclusion
The above article discusses the step-by-step process of install Windows 11 on an unsupported CPU. We mention multiple ways so you can pick as per your need and get the experience of the windows 11 operating system. If you have any doubts, let us know in the comment section.


