The mouse in Windows 11 allows Windows to work more efficiently on high-res displays. However, to handle the high-DPI games more efficiently, Windows has changed the way it behaved in its previous versions. As a result, it is potentially a reason for a game to stutter, freeze, or lag if it doesn’t read your mouse data.
However, the mouse starts to lag on their Windows 11 PC for some users. It appears that this problem is primarily experienced by users who use high-DPI or high-polling rates while gaming. Despite the partial fixes that Microsoft suggests to their users, there may be a way to fix the mouse lag issue in Windows 11 computer. So, let’s get started with them.
Also Read- How To Uninstall Updates in Windows 11
Best Methods To Fix Mouse Lagging & Stuttering on Windows 11
So, here are some fixes that will help you fix your gaming mouse lag issue on Windows 11. Therefore, if you are facing this issue right now, make sure to follow the fixes mentioned below:
Fix 1: Reboot Your PC
There are chances that due to some temporarily stored cache files, your hardware may fail to connect to your system OS, due to which you are getting this kind of error. So, before performing anything, we suggest you reboot your PC once and check if the issue persists or not.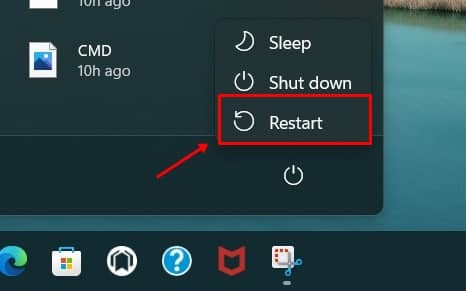
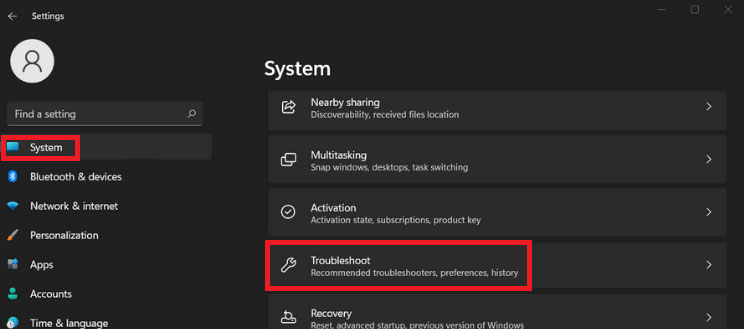
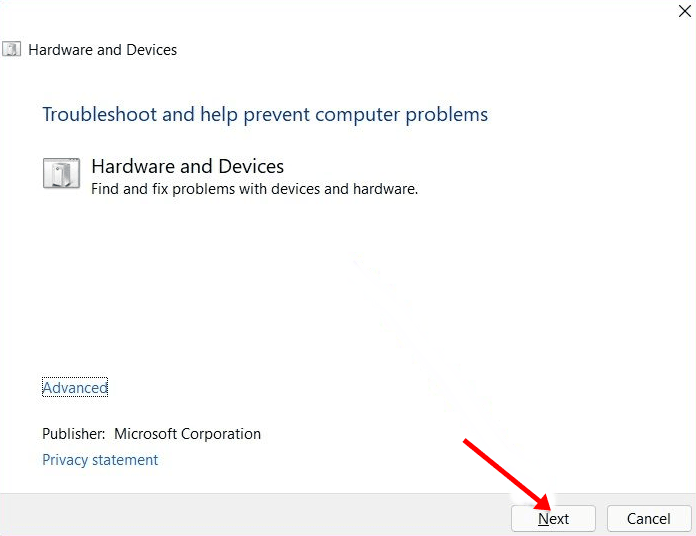
Fix 2: Run Hardware Troubleshooter
After rebooting, if you find that the mouse is still lagging on your Windows 11 PC, then without getting late, you need to perform the hardware troubleshoot with the help of these steps:
- Firstly, you must click on Start > Settings > System.

- After that, tap on Troubleshoot tile and then click on the Others Troubleshooters.
- After that, simply hit the Run button next to the device or hardware you are having a problem with.

Fix 3: Reconnect Your Mouse
There are chances that the connection between your mouse and PC may be loose due to which you are facing this issue. Therefore, we advise you to remove and reconnect your mouse, then check if the lag issue persists or not.
Fix 4: Reinstall Your Mouse Driver
We have seen that an older mouse driver sometimes becomes the main villain behind this issue in many cases. Therefore, keeping the drivers up-to-date is crucial to ensure your device’s performance. So, if you don’t know how to do this, perform the given instructions:
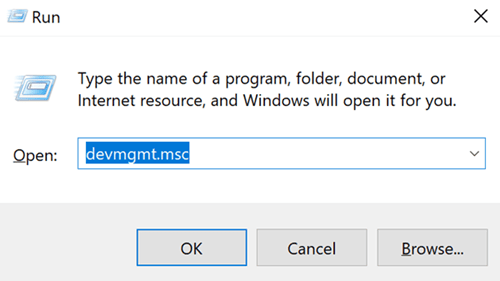
- Initially, use the Win+R key to open the Run box and search for the devmgmt.msc.

- After that, double-click on the Mice and other Pointing Devices tab to expand it.
- Then, finally, right-click on your Mouse name and select the Uninstall Device option. After that, again reinstall it; you can simply reboot your PC, that’s it.


Fix 5: Check For OS Update
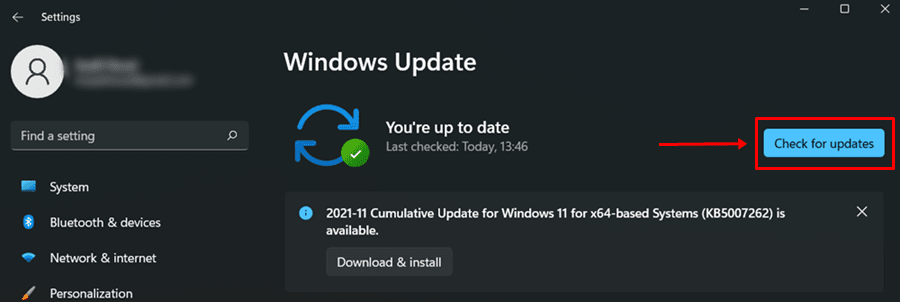
Did you check if your OS is updated or not? Well, it is possible that the last update may contain some bugs due to which you are getting mouse lagging issues on your PC, and Microsoft is very cautious about their user experience; therefore, chances are there that they may roll out some minor update to fix this issue. So, you must check if there are some updates available to not using the given steps:
- Firstly, tap on the Start menu and select the Settings option.

- Then, select the Update & Security option from the list of settings.

- That’s it. Now, simply hit the Check For Updates button to check if any update is available for your PC. If so, make sure to install it and check if the mouse lag issue gets resolved or not.


Fix 6: Disable Mouse Trials
Disabling the mouse trials might be a good option if you are still stuck with the same error. But, how? Let’s find out:
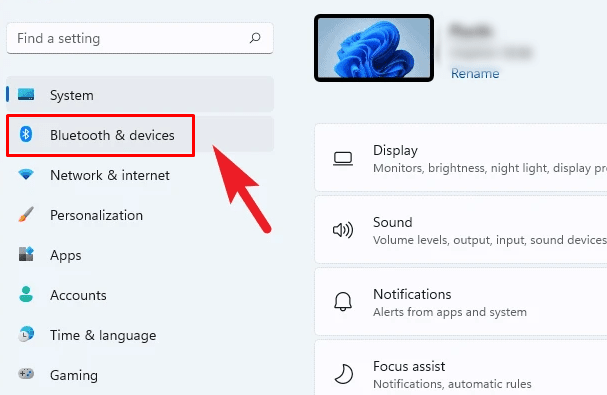
- First, tap on the Start menu and open the Settings app.
- After that, tap on Bluetooth & Devices and click on the Additional mouse settings under the Related Settings tile.

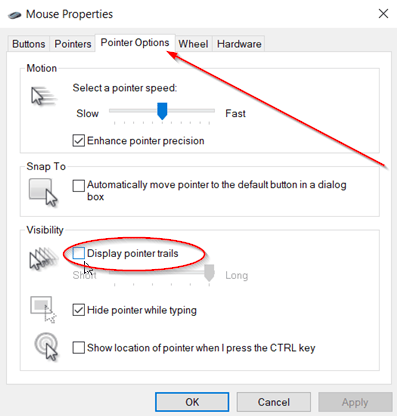
- Then, shift to the Pointer Options tab and make sure to uncheck the box beside the Display pointer trails, and hit the apply button.

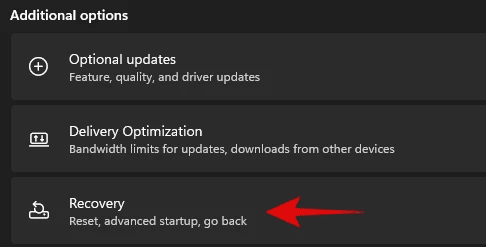
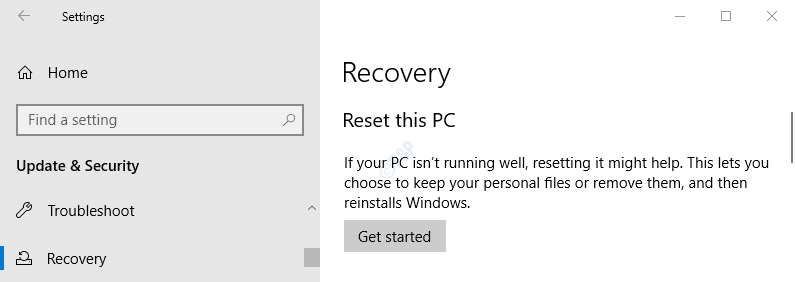
Fix 7: Reset The Windows
Does nothing help you? Don’t worry; there is still an option that will surely help you get rid of this situation. But, unfortunately, you have to compromise with your installed apps and data. So, if you have no issue with this, we advise you to reset the Windows on your PC. Here are the steps that will help you:
- Firstly, press the Win+I button simultaneously to open the Windows Settings and navigate the System tab.

- Then, inside the System tab, you must tap on the recovery option.

- That’s it. Now, simply hit the Reset This PC option, and if you ask for confirmation again, hit the Reset PC. Then, follow the on-screen guidelines to reset your PC.


So, that’s all on how to fix the mouse lagging and shattering issue in Windows 11 PC. These methods are also working for wired and wireless (Bluetooth) mouse. We hope that this article has helped you. But, suppose in case you still have any questions in your mind, comment below.


