Network sharing is a feature on Windows PC using which users can share files with users connected to a local network. This can be useful when you have multiple PCs connected to the same network and you want to share files. However, after installing Windows 11, users have reported facing issues with the Network Discovery and sharing.
So what causes this issue? This issue is generally caused due to reasons such as permission not given, outdated version, improper settings, essential services not present, and various such. In this article, we will be discussing various ways to fix Network Discovery and Sharing in Windows 11.
Also Read- Fix Active Directory Users And Computers Missing
Fix Network Discovery and Sharing Not Working in Windows 11
If you have been facing issues with Network Discovery and Sharing in Windows 11, you can follow the steps given ahead to fix it.
1. Ensure Network Discovery is Turned On
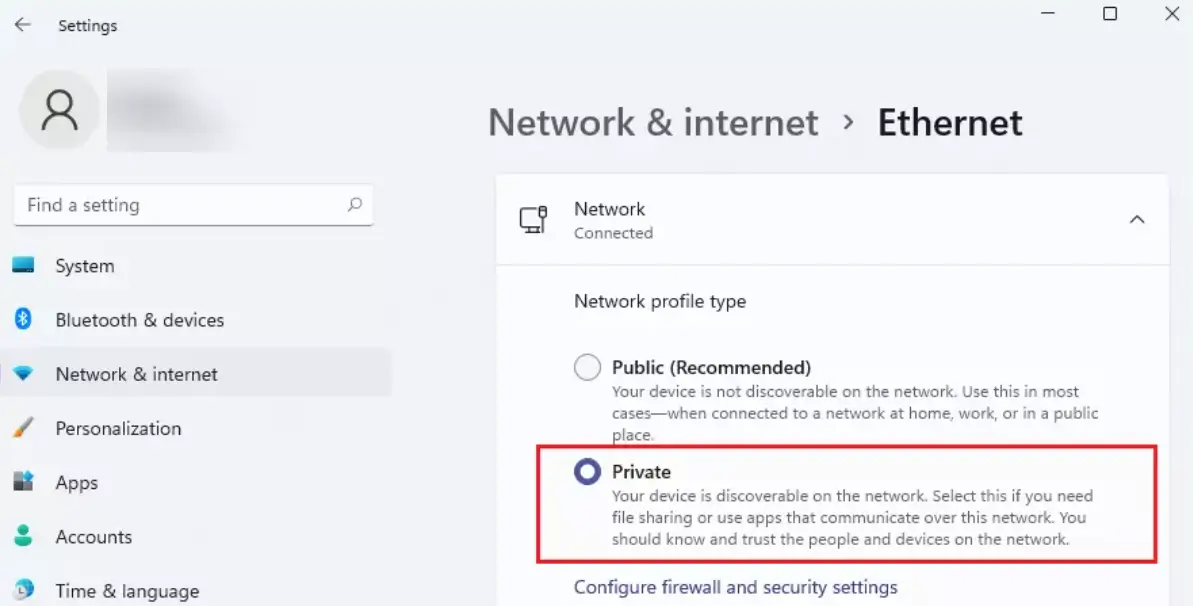
Firstly, you must ensure that the network discovery is turned on. You must set the network profile type to private and then check if you still face the issue or not. To do so, follow the steps given below-
- Open Windows 11 Settings by pressing the Windows + I key combo.
- Head to Network and Internet, and then select Ethernet or Wi-Fi network, depending on the type of network you are connected to.

- Next, set the Network Profile Type to Private.

- Once done, you should no longer face the Network Discovery and Sharing issue.

2. Reconfigure Sharing Settings
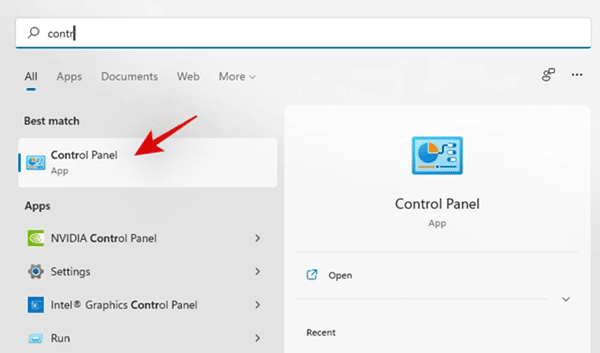
Another troubleshooting step to follow is reconfiguring the sharing settings. You will be able to do so by following the steps given ahead in this article-
- Press the Windows key, type Control Panel and open it.

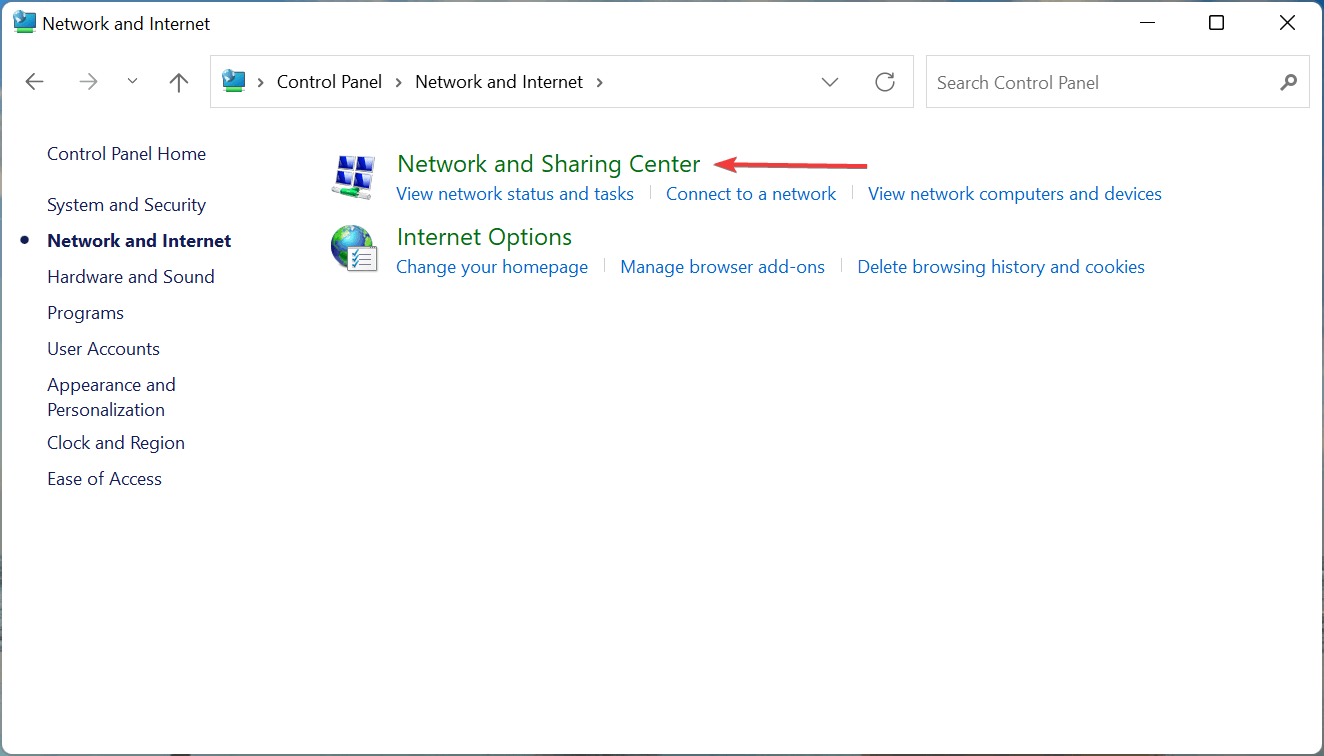
- Head to the Network and Internet section and click on Network and Sharing Center.

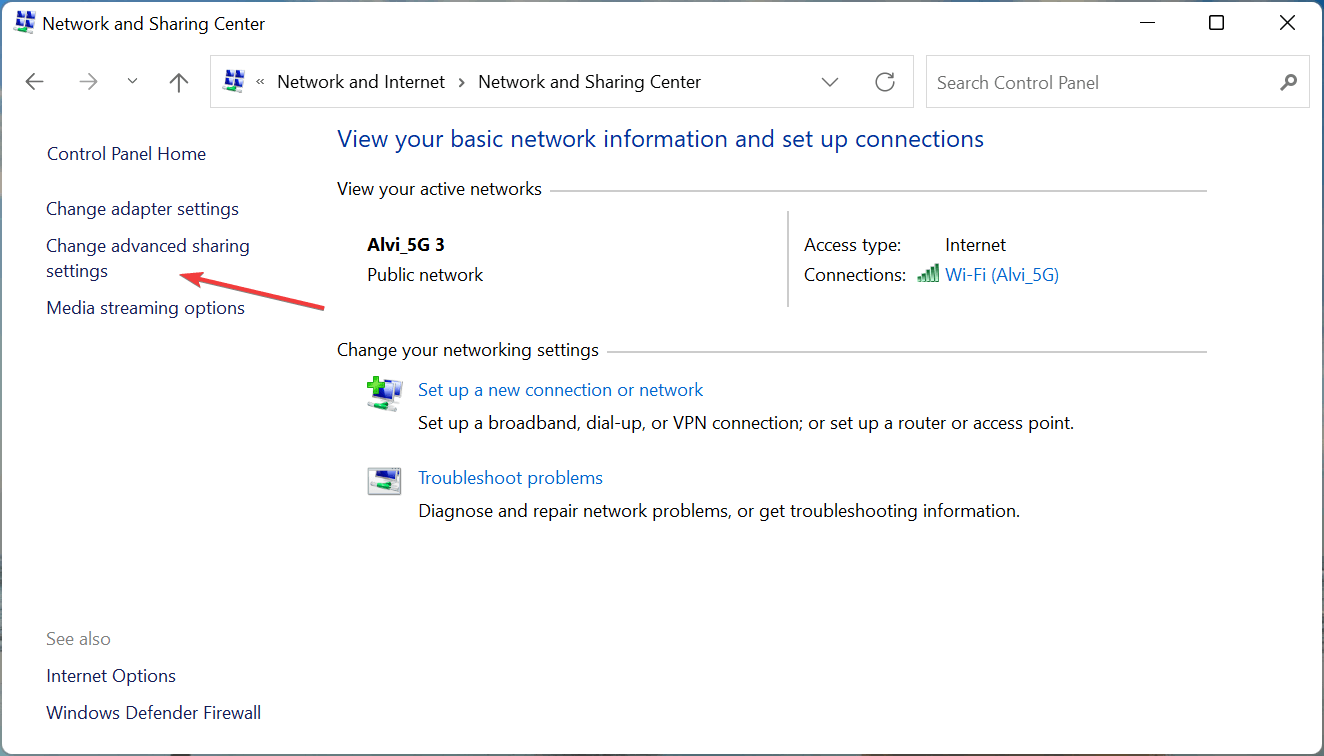
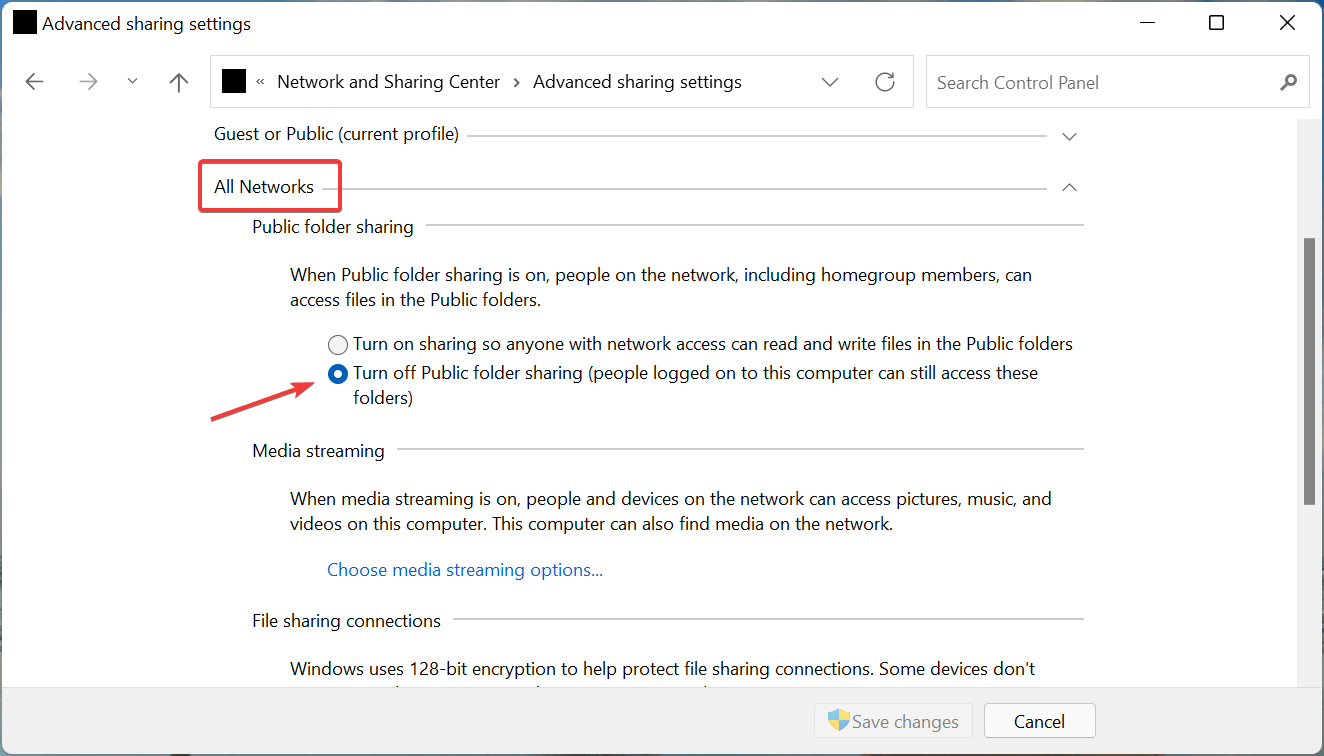
- On the left sidebar, click on the Change Advanced Sharing Settings.
- Expand All Networks, and then under Public Folder Sharing, select the Turn off Public folder sharing option.
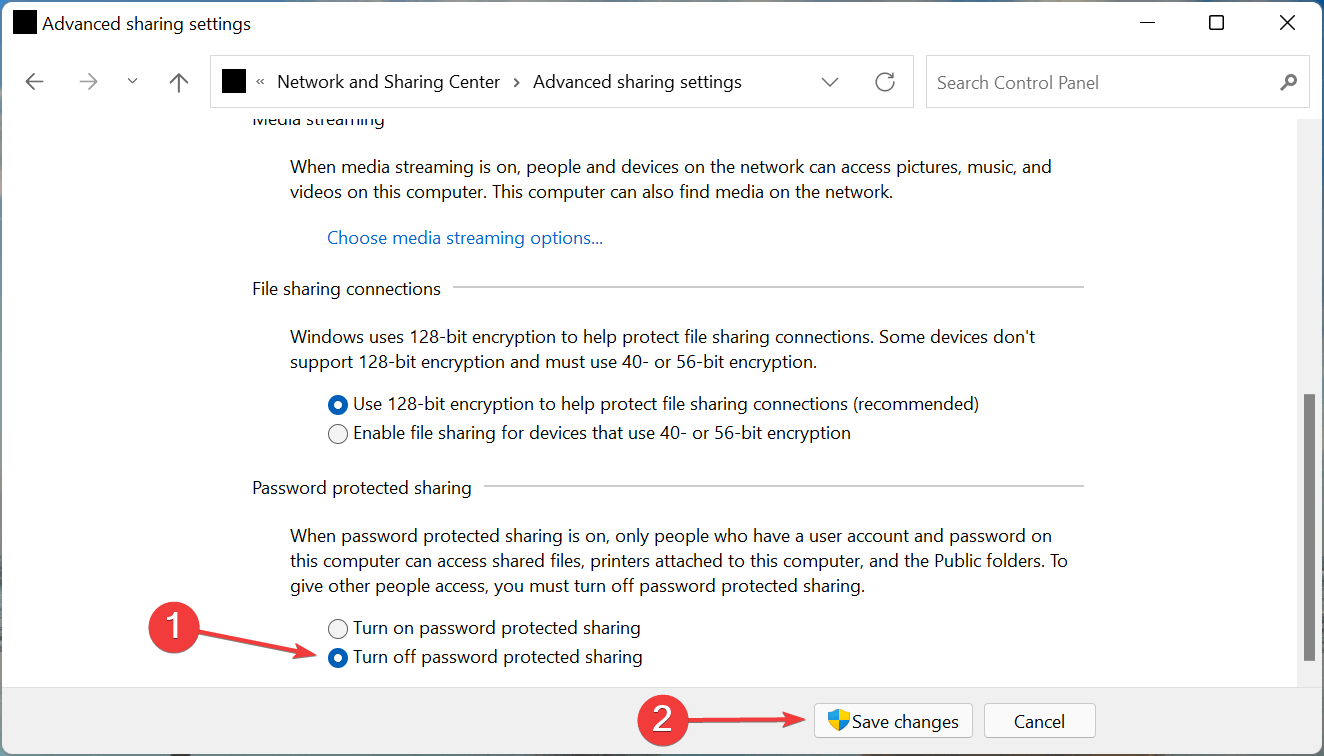
- Now under the Password Protected Sharing, select the option for Turn off password protected sharing.
- Click on Save Changes and then restart your PC to save the changes.

3. Update Windows
You may also face the issue due to pending updates. To update Windows, follow the steps given below-
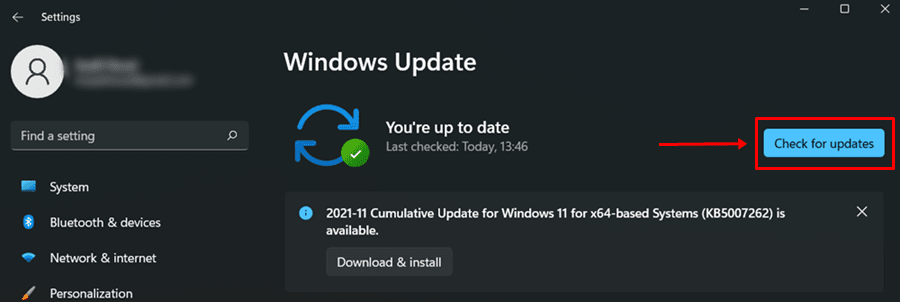
- Press Windows + I key combo to open the Settings.
- On the left sidebar, head to the Windows Update section.
- Now, click on Check for Updates to find all the updates available.

- Download and install all the updates you see here, and then restart Windows 11 to fix the issue.
4. Ensure Critical Services Are Running
If the critical services are not running, then also you may face the issue. You must ensure critical services are running if you face issues with Network discovery and sharing in Windows 11. To run the critical services, follow the steps given below-
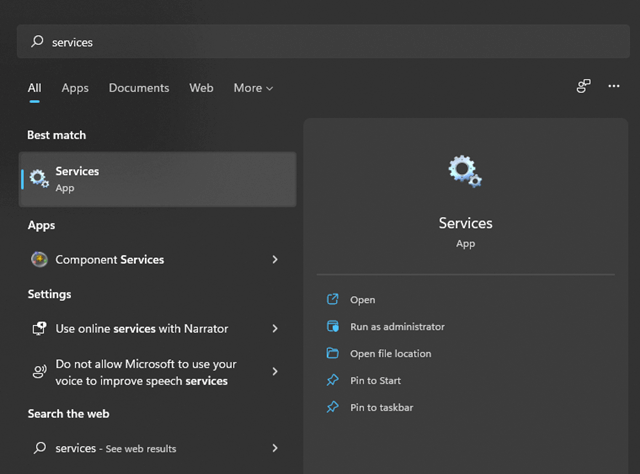
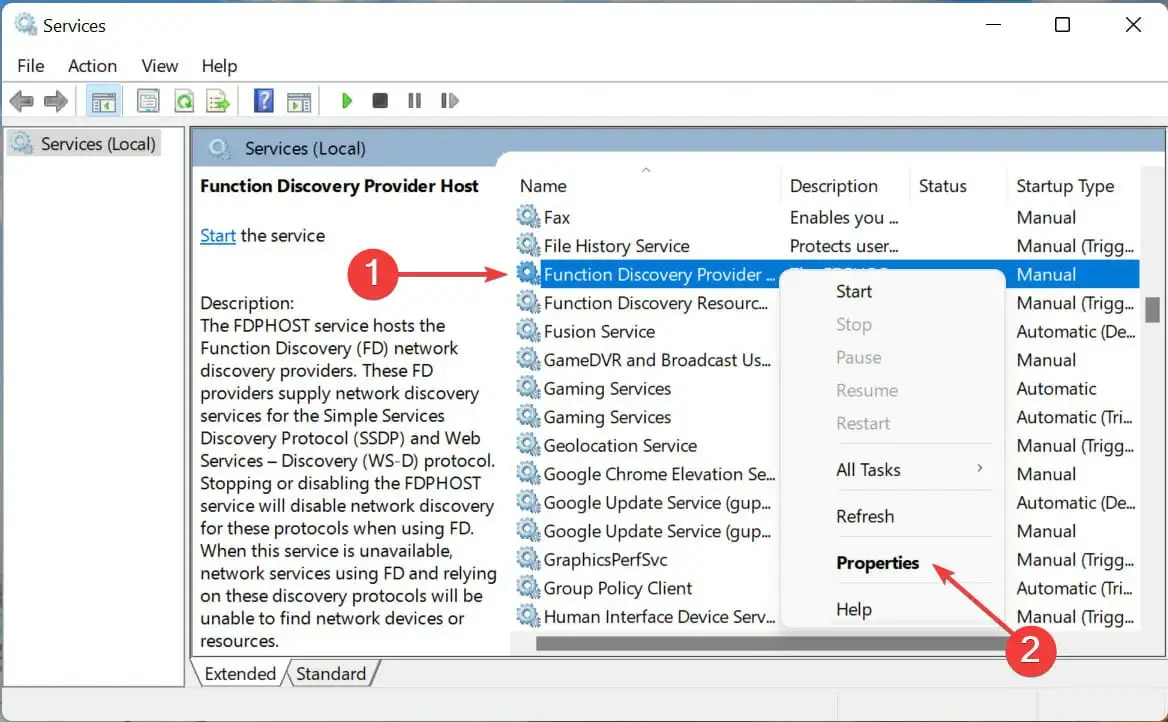
- Open Start Menu, search for Services, and then open it.

- Search for Function Discovery Provider Host service here. Right-click on it, and then click on Properties.

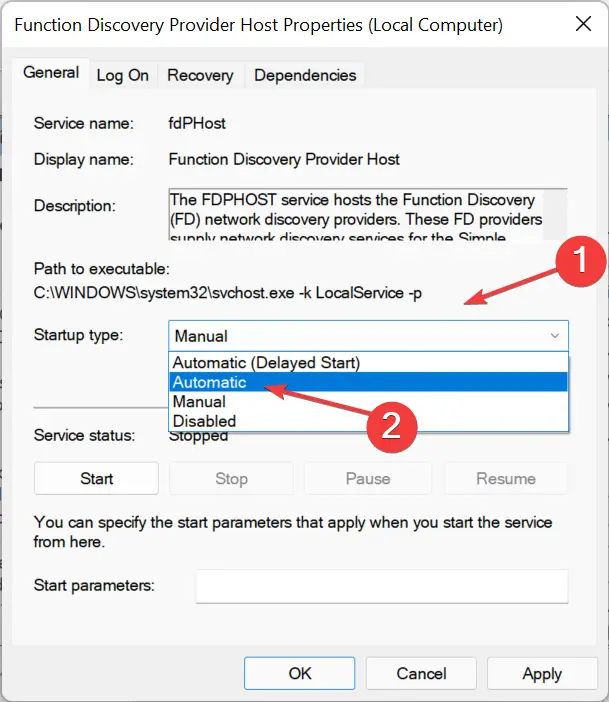
- Next, set the Startup Type to Automatic and click on the Start button.

- Once done, click on Apply and then on OK to save the changes.
- This should most probably fix the Network Discovery and Sharing in Windows 11.
5. Ensure Necessary Permissions Are Given
Lastly, you must ensure that all the necessary permissions are given. If Network discovery and sharing is not working fine in Windows 11, then you should try giving the necessary permissions and then check if you still face the issue or not. To do so, follow the steps given below-
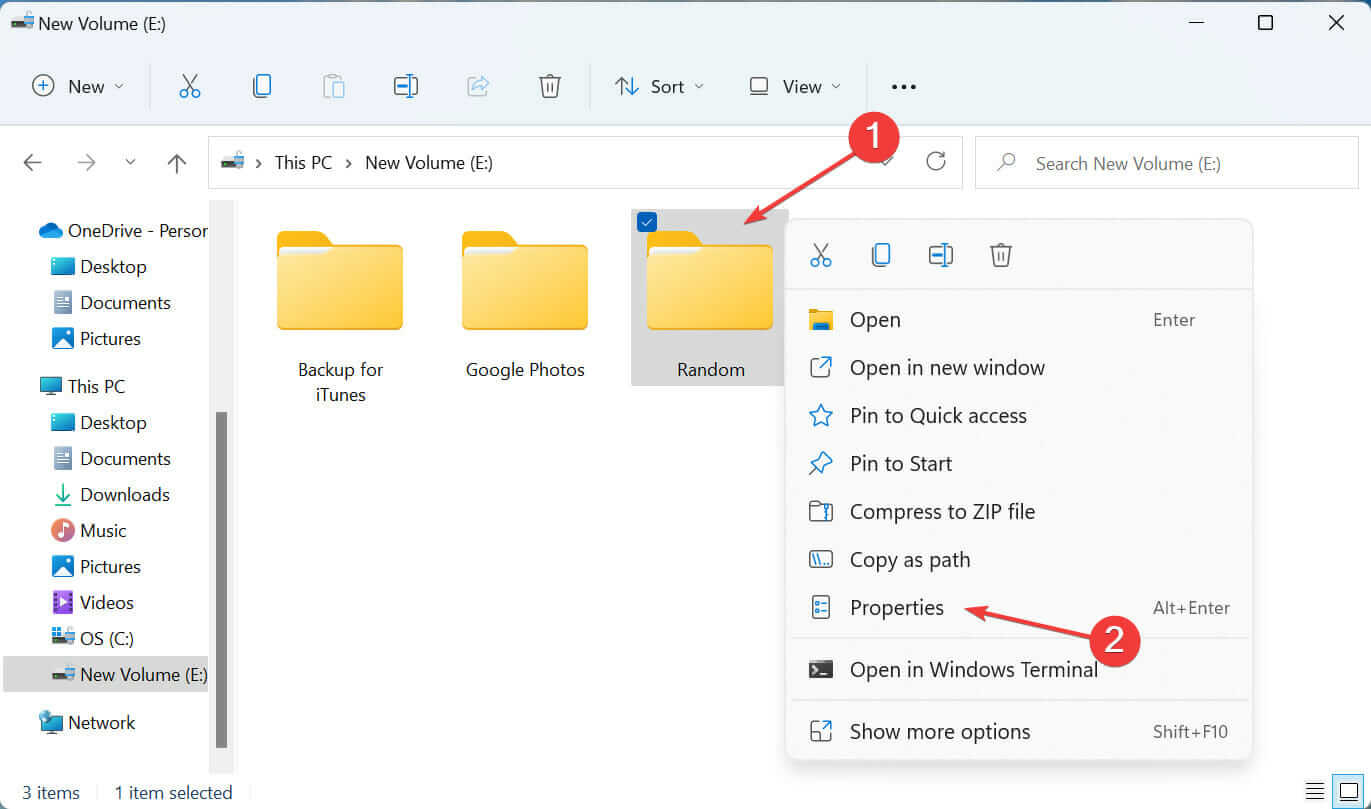
- Open File Explorer by pressing the Windows + E key combo. Head to the location of the folder you are facing any problem with.
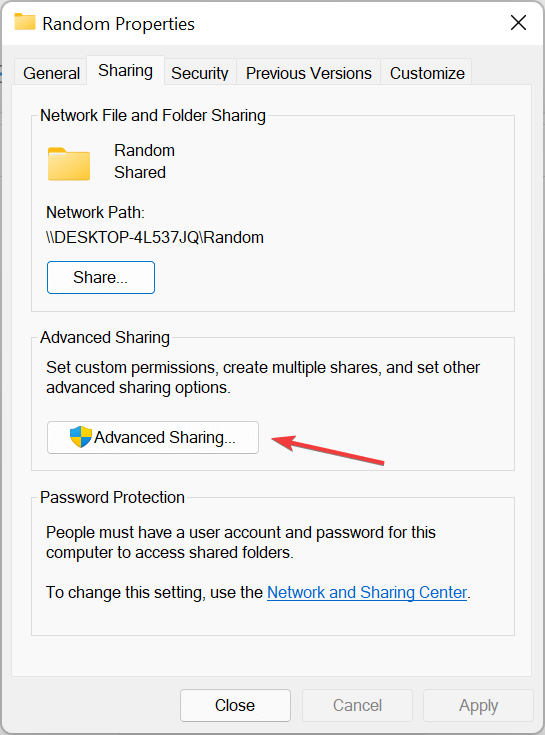
- Right-click on the folder, and then click on Properties.

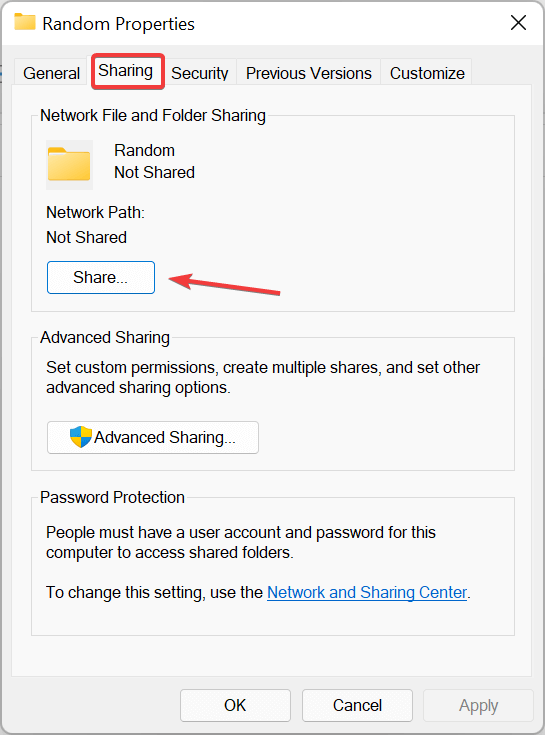
- Here, head to the Sharing tab, and click on the Share button.

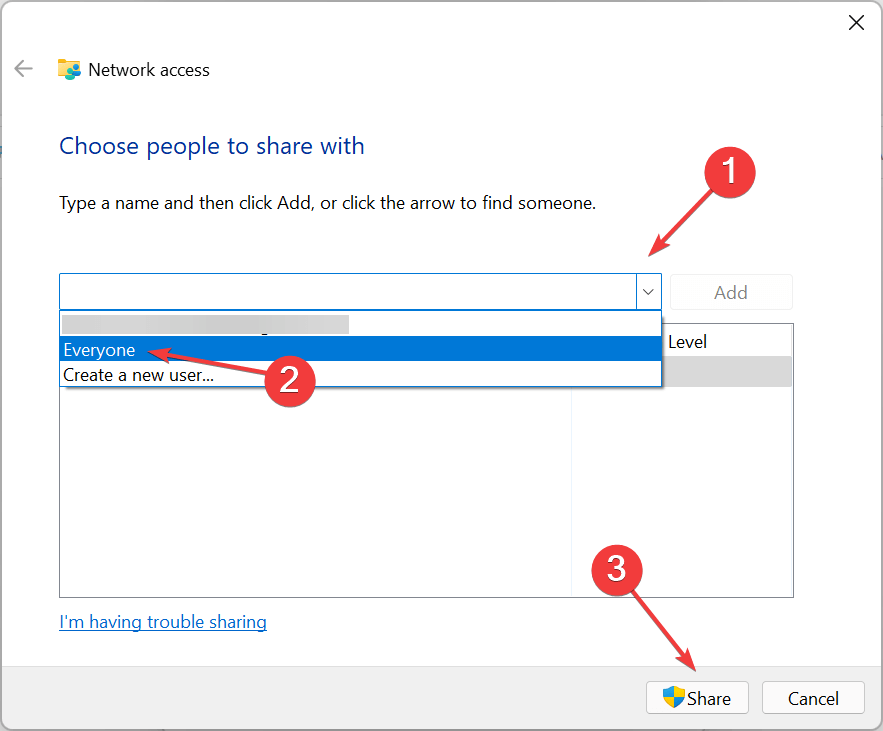
- Click on the drop-down menu, click on Everyone, and click on the Share button.

- Click on the Done button to continue ahead.
- Next, click on the Advanced Sharing button.
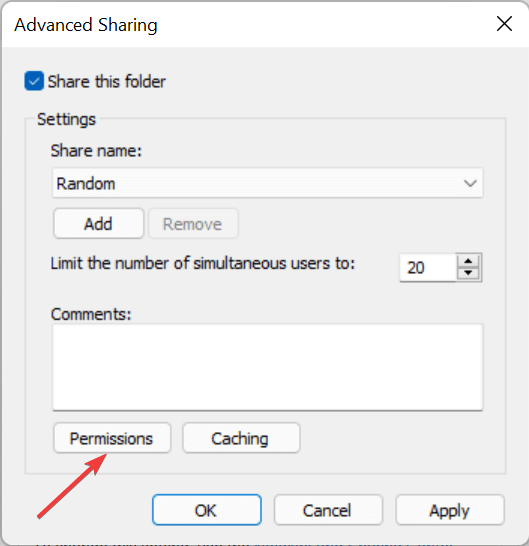
- Check the checkbox for Share this folder, and then click on the Permissions button.

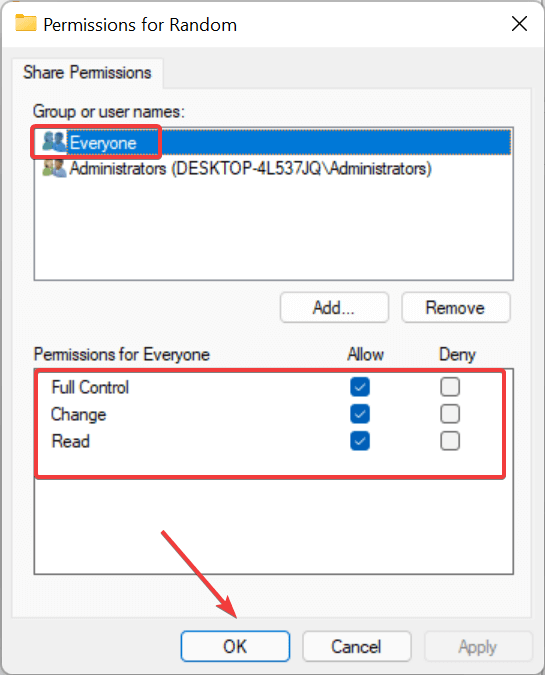
- Select the Everyone option, allow all the permissions, and click on OK.

- Again click on Apply and OK to save the changes.
- Now restart your computer, and the issue will be fixed.
Conclusion
We have discussed all the possible troubleshooting steps to help fix Network Discovery and sharing issues in Windows 11. If you have been facing this issue, then you can follow the steps in this article, and you will be able to fix the issue you have been facing.


