Windows 11 came with very strict requirements to be installed on a PC and many people were not able to install it because their PC didn’t meet the system requirements. However, after some workarounds, people could bypass the system requirements and install Windows 11 on their PC. However, users who somehow managed to pass the System Requirements set for Windows 11 now see the ‘System Requirements Not Met’ watermark on their PC.
Unsupported PC running Windows 11 has started displaying a watermark saying ‘System requirements not met.’ This watermark is Microsoft’s way of reminding people that they are running Windows 11 on a PC that is not compatible with the OS. Though the watermark doesn’t interrupt the workflow and your PC will work flawlessly, it can be annoying to have this watermark.
If you are looking for a way to remove this watermark, this article will help you. In this article, we will be discussing how you can remove the ‘System requirements not met’ watermark.
Also Read- How to Disable Ads in Windows 11 File Explorer
Steps To Remove ‘System Requirements Not Met’ Watermark
To remove the ‘System requirements not met’ watermark on Windows 11, you will have to change some Registry Settings.
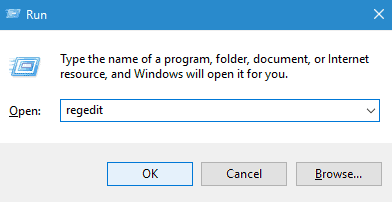
- Press Windows + R key combo on your PC. In the Run Dialog box, type Regedit and hit Enter to open the Registry Editor. When given UAC, click on Yes to continue.

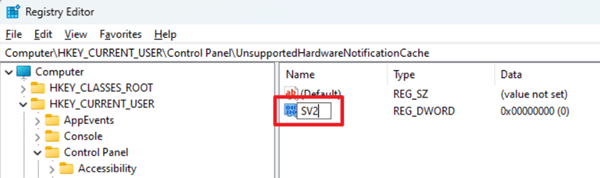
- Now, in the Registry Editor, head to the following address-
HKEY_CURRENT_USER\Control Panel\UnsupportedHardwareNotificationCache
- If you don’t find the UnsuppportedHardwareNotificationCache registry, right-click on the Control Panel on the left sidebar and click on New and then on New Key. This will create a new key; name it as UnsupportedHardwareNotificationCache and you will be good to go.


- If you have created the UnsupportedHardwareNotifcationCache folder yourself, you will have to make the DWORD file manually. Right-click on the UnsupportedHardwareNotificationCache folder on the left side, and then click on New. Next, select DWORD (32-bit). Now name the new DWORD as SV2.
")

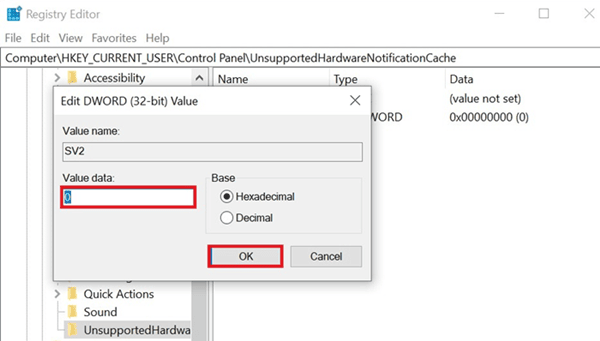
- Double-click on the SV2 on the right side to edit it. Change its value to 0 and then click on OK.


")
After doing so, close the Registry Editor and restart your PC. When your PC restarts, you will no longer see the watermark.
Final Words
If you are running Windows 11 on unsupported hardware, you see the ‘System requirements not met’ watermark on Windows 11; then you can follow the steps in this article. Following the above steps, you will be able to remove the watermark that you are seeing on your PC.


