Using Services, you can manage various services running on your PC. You can enable and disable services on your PC with the Services app. But what if the Services app does not open on Windows? Many users have recently reported that the Services app was not opening on their Windows 11 PC.
When this happens, you won’t be able to change the services running on your Windows PC. So how can it be fixed? If you are here looking for troubleshooting steps to fix Services not opening in Windows 11, then you are at the right place; let’s discuss how you can fix this issue.
Fix Services not Opening in Windows 11
This issue can be encountered due to various reasons. No matter what the reason may be behind facing this issue, you can follow the steps given in this article to fix this issue.
1. Try Opening Services Through Run Dialog or Command Prompt
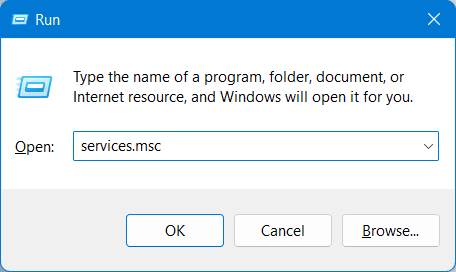
If you cannot open the Services through the traditional method, you can try opening it through the Run Dialog Box or Command Prompt. To open Services through the Run Dialog box, follow the steps given below-
- Press Windows + R key combo and type Services.msc. Click on OK to open the Services window.

To open Services through Command Prompt, follow the steps given below-
- Press the Windows key, search for Command Prompt, and open it.

- Here, type the command Services.msc and press Enter.

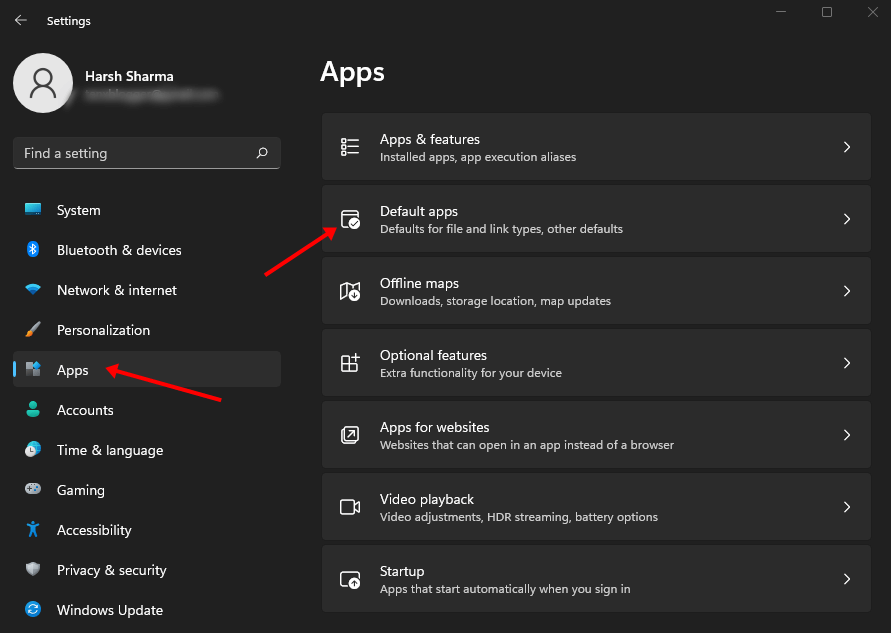
2. Set Correct Default App for MSC Files
The Services app might not open on Windows 11 if the correct default app for MSC files is not set. You must set the correct default app for MSC files to fix the issue.
- Press Windows key and click on the Settings icon here.
- Under the Apps tab, click on the Default Apps option.

- Type .msc in the search box and click on the first option.
- Select Microsoft Management Console and click the Set Default button to set it as the default app for MSC files.
3. Fix Corrupted Files
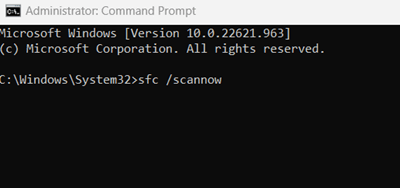
Corrupted files are likely to cause this issue. If Services is not opening in Windows 11, try scanning for corrupted system files and fixing them. You can run the SFC and DISM scans to fix the corrupted files. Given below are the steps to run the SFC scan-
- Click on the Start icon and type CMD. Right-click on Command Prompt and then click on Run as administrator. Here, type the following command and execute it-
- sfc /scannow

- sfc /scannow
- Wait for the scan to reach 100%, and then restart your PC.
If the SFC scan didn’t solve the issue, then you can run the DISM scan by following the steps given below-
- Firstly, run Command Prompt as administrator.
- Now, type and execute the following commands one by one-
-
DISM /Online /Cleanup-Image /CheckHealth -
DISM /Online /Cleanup-Image /ScanHealth -
DISM /Online /Cleanup-Image /RestoreHealth
-
- After executing the above commands, restart your PC.
4. Run System Maintenance Troubleshooter
Another thing that you can try doing is running the System Maintenance Troubleshooter. The steps for the same are discussed below-
- Open the Run Dialog box by pressing Windows + R key combo.
- Here type msdt.exe -id MaintenanceDiagnostic and press Enter.
- This will open the System Maintenance troubleshooter window; follow the on-screen instructions to run the troubleshooter.
- Once done, try opening Services app.
5. Re-Register DLL Files
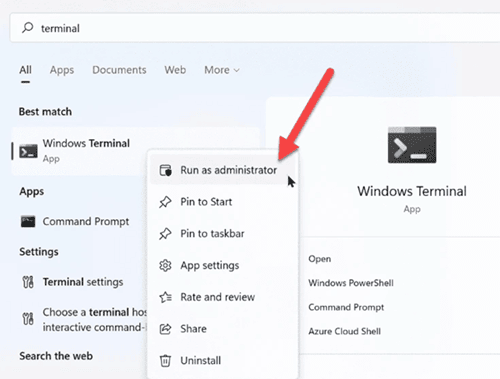
If you still face the issue, try re-registering the DLL files. You can re-register DLL files using the command prompt by following the steps given below-
- Press Windows + X key combo and then click on Windows Terminal (Admin).

- Now, type and execute the following commands one by one-
-
regsvr32 msxml.dll -
regsvr32 msxml2.dll -
regsvr32 msxml3.dll
-
- Now, close the Terminal window and restart your PC.
6. Clean Boot your PC
Third-party programs might interfere with your PC and cause this issue. In that case, you can clean boot your PC to see what program is causing the issue and fix it. Given below are the steps to clean boot your PC-
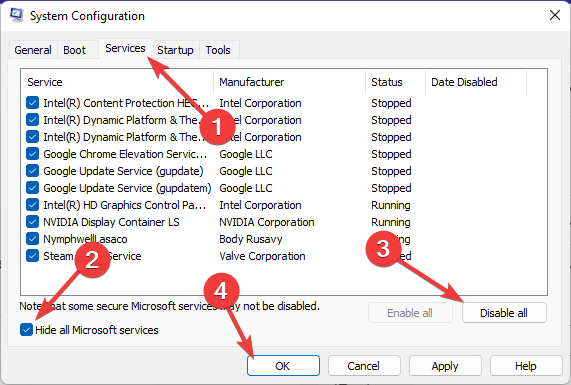
- Open the Start Menu, search for System Configuration, and open it.
- Head to the Services tab, check the checkbox saying Hide all Microsoft Services and then click on Disable All button.

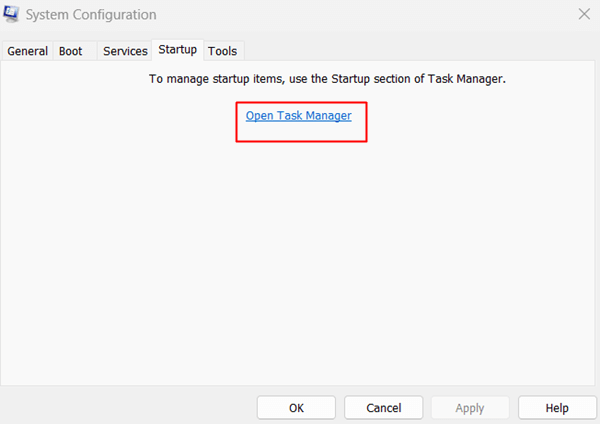
- Now under the Startup tab, click on the Open Task Manager option.

- Select the startup app and then click Disable to disable it. Do this for all the startup apps here.
- Once done, restart your PC to clean and boot it. Now you can check what program is causing the issue and delete it.
Final Words
Facing issues with Windows is common, and if you can’t able to use the Services app on your PC, this article will help you solve it. We have listed various troubleshooting steps to help fix Services not opening in Windows 11. That’s it with our guide to fixing this issue; we hope you find the solution to the problem in this article.


