Windows 11 Error System Thread Exception Not Handled is a BSOD error that you may face while using your PC. The error is most probably encountered because of the incompatible driver, bugs in the system, outdated Windows, or such. Your PC may show up with a black screen when you encounter this issue and you may no longer be able to use your PC.
Many times, your computer may restart normally but you can encounter the error in between the normal usage of your PC. If you are facing this issue, and you have made your way to this article looking for its fix then you are at the right place. In this article, we will be discussing how you can fix Windows 11 Error System Thread Exception Not Handled.
Also Read- Fix Windows 11 Setup Failed to Validate Product Key
Fix Windows 11 Error System Thread Not Handled
Given below are the steps to fix Windows 11 Error System Thread Not Handled-
1. Update Drivers
The very first thing that you should try doing is updating the drivers. In most cases, the issue is faced due to outdated drivers on your PC. You should be updating the drivers and then checking if you still face the issue or not. To update the drivers, follow the steps given below-
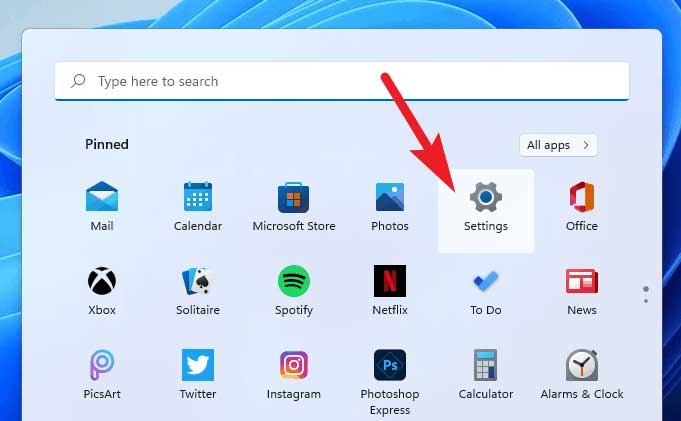
- Open the Settings app on your PC by pressing the Windows + I key combo.

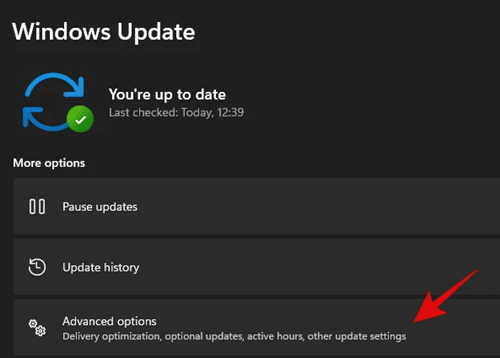
- On the left sidebar of the Settings app, click on Windows Update. Now on the right side, click on Advanced Options.

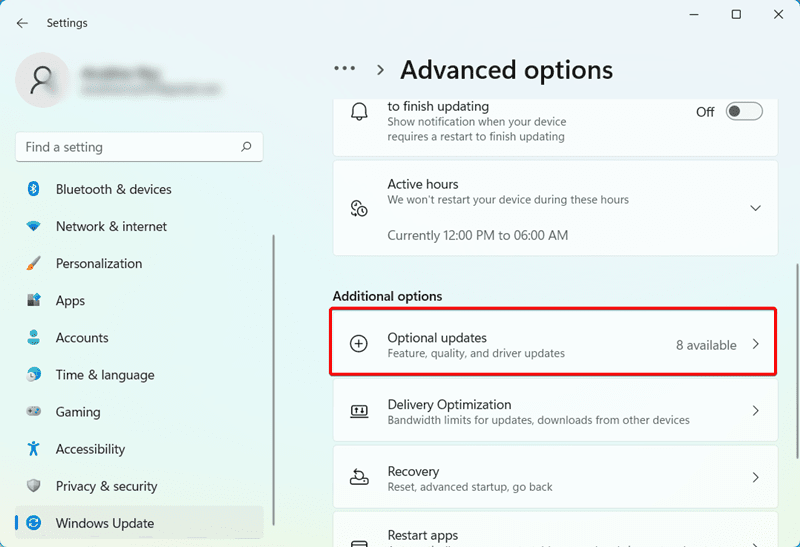
- Here, scroll down to the Additional Options section and click on Optional Updates.

- You will find all the driver updates here. You can download and install all the driver updates from here.
- After updating the drivers, restart your PC and the issue should be fixed.
2. Run SFC and DISM Scan
Another troubleshooting step to follow is running the SFC and DISM scan. Both of these scans form the pillar of troubleshooting the issues on Windows. They scan your PC for issues due to corrupted files and fix them. To run the SFC scan, follow the steps given below-
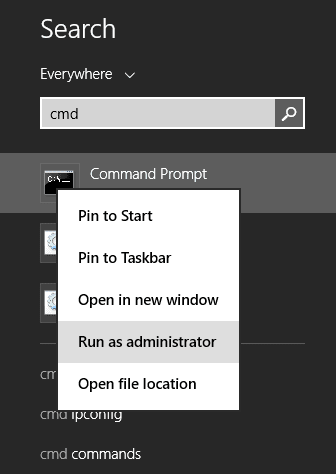
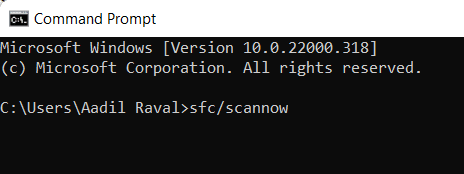
- Open the Start Menu and search for CMD. Right-click on CMD and then click on Run as administrator.

- In the Command Prompt, type and execute the command sfc /scannow

- This will scan your PC for errors and fix them. Wait for the process to complete and then restart your PC.
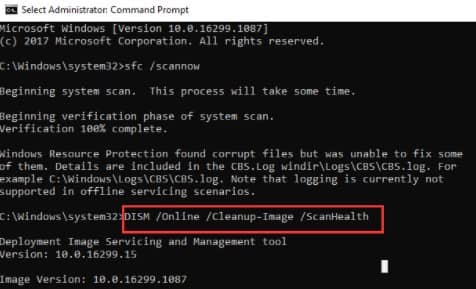
After you restart your PC, you will no longer encounter the issue. However, if you still face this issue then you should try running the DISM scan. To perform a DISM scan, follow the steps given below-
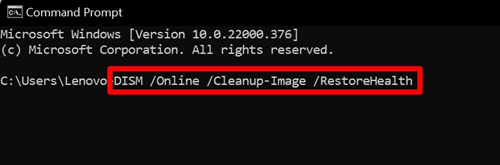
- Run the Command Prompt with administrative privileges.
- In the Command Prompt, type and execute the following commands one by one-
DISM /Online /Cleanup-Image /CheckHealth
DISM /Online /Cleanup-Image /ScanHealth
DISM /Online /Cleanup-Image /RestoreHealth


- After running the above commands, restart your PC and the issue should be fixed by now.
3. Update Windows
You may also face the issue if you are running on the outdated version of Windows. You should try updating the Windows and then check if you still face the issue or not. To update Windows, follow the steps given below-
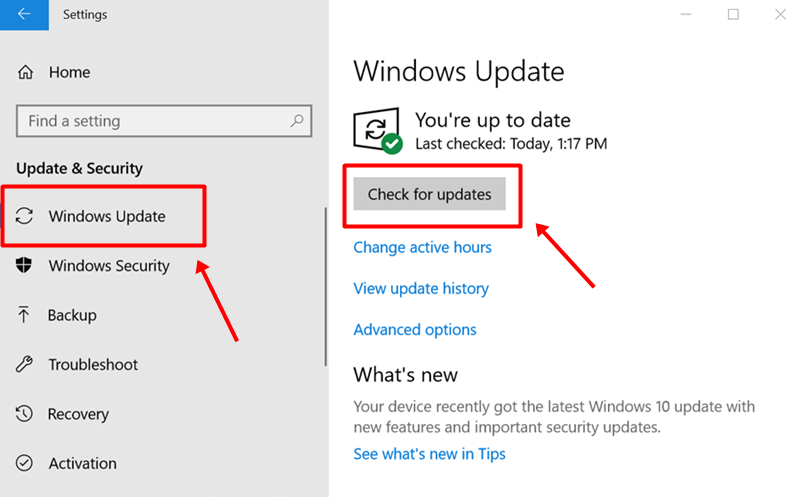
- Press the Windows + I key combo to open the Settings app.
- In the Settings app, click on the Windows Update on the left sidebar.
- Now on the right side, click on Check for updates.

- After doing so, download and install all the updates your PC finds and restart your PC.
4. Perform A System Restore
If you still face this issue, then you should try performing a system restore. Performing a system restore will revert your system to the point when it was working fine. Do note that you wil need a restore point to perform the system restore. To do so, follow the steps given below-
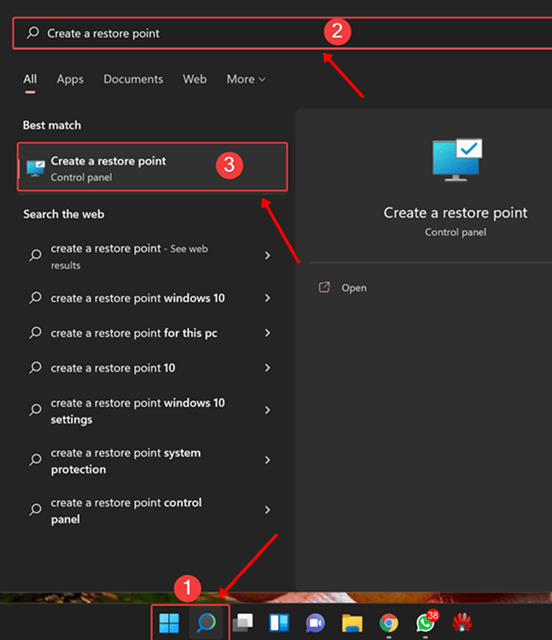
- In the Start Menu, search for Create a restore point and open it.

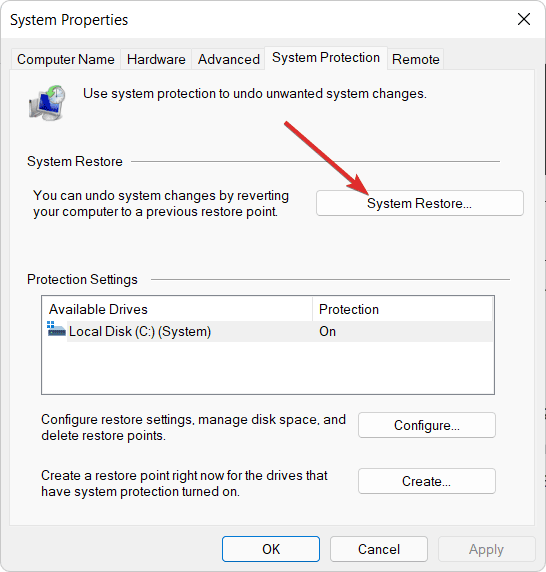
- Here, click on the System Restore button.

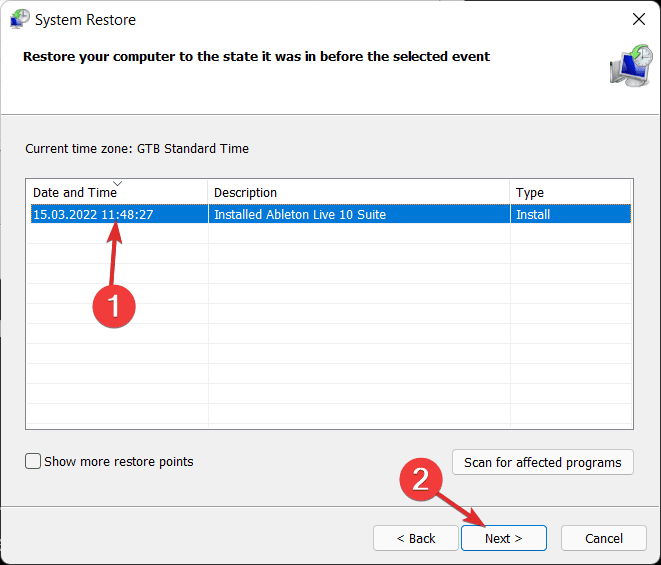
- Now, select the restore point. Click on Scan for affected programs to see what programs will be installed and what programs will be uninstalled.
- Now, click on Next and follow the on-screen instructions to perform the system restore.

Your PC will restart after the system is restored, and you should now no longer face the issue.
5. Reset Your PC/ Re-install Windows 11
If none of it helps you, then you should reset your PC. Ensure you have a backup of your data before you continue ahead with resetting your PC. To reset your PC, follow the steps given below-
- Open the Settings app on your Windows 11 PC.
- Ensure you are on the System tab in the Settings app.

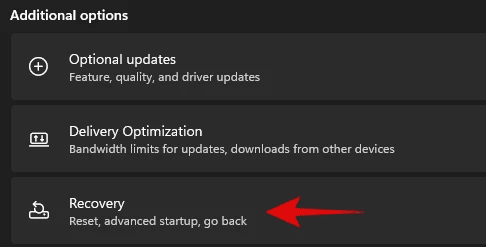
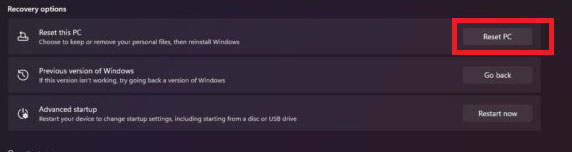
- Here on the right side, click on the Recovery option.

- Next, click on the Reset PC button.

- Now, follow the on-screen instructions to reset your PC.

Resetting your PC will most probably fix the issue. You can either try re-installing the Windows 11 on your PC.
Final Words
These were some ways to fix the Windows 11 Error System Thread Exception Not Handled. If you are facing this issue, then you can follow the steps in this article and your issue will be fixed.


