Is your Windows 11 not activated after the upgrade? Users have reported facing this issue stating that when they upgraded to Windows 11, their Windows was not activated. This error usually occurs whenever your device tries to activate the operating system with an OEM (original equipment manufacturer) Activation Digital Product Key.
If you use a PC with pre-installed Windows and you started facing this issue, then this article will help you with it. In this article, we will be discussing various troubleshooting steps to help fix Windows 11 not activated after upgrading.
Also Read- SCNotification Has Stopped Working – 5 Best Quick Fixes
Fix Windows 11 Not Activated After Upgrade
If you find your version of Windows 11 not activated after the upgrade, then follow the steps given below to fix it-
1. Activate Windows Using CMD
If Windows 11 is not activated after the upgrade you can use the Command Prompt to activate it. For this, the steps are given below-
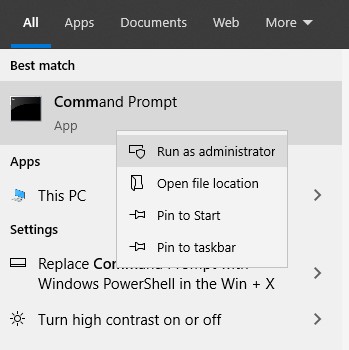
- Open Start Menu, search for Command Prompt and run it with administrative privileges.
- Now, type and execute the following command-
-
vbs -rearm
-
- When given a prompt, click on OK and restart your device.
- Once done, check if the Windows is activated or not.
2. Check Your Edition Of Windows
You need to check the edition of Windows you are on. If your Windows 11 PC does not have the same edition as the previous edition to which you upgraded. To check your edition of Windows follow the steps given below-
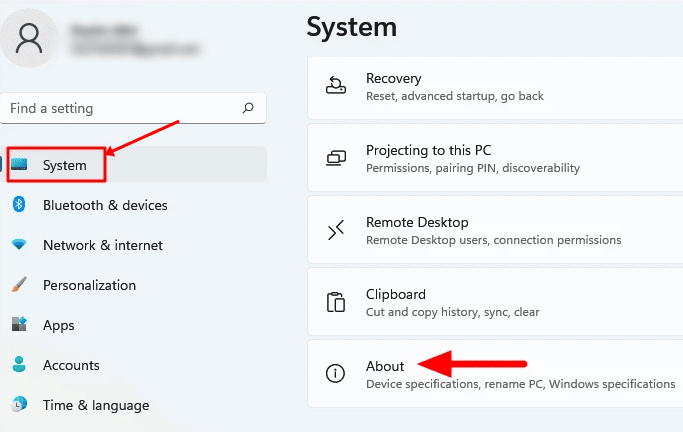
- Press Windows + I key combo and this will open the Settings app.
- In the System tab, click on the About option.
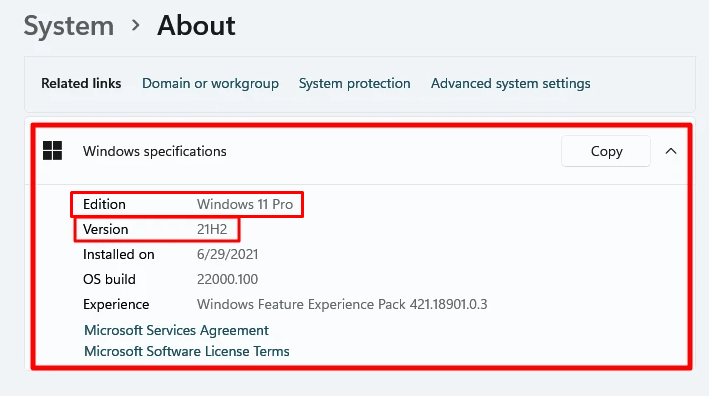
- Look out for Windows specifications and expand them.
- Check the edition and ensure it matches the previous edition to which you upgraded to.
If the edition matches the previous one, then this is probably not the reason behind the issue.
3. Switch To Windows 11 Home
If you were previously on Windows 11 and after the upgrade, you are on Windows 11 Pro, then you should probably try downgrading to Windows 11 Home or reinstalling Windows 11 Home.
You can use the Windows 11 media creation tool to switch to Windows 11 Home. To do so, you can follow our guide to using Windows 11 Media Creation Tool and then see if you still face the issue or not. You can either use Windows 11 ISO to switch to Windows 11 Home.
4. Use Registry Editor
You can switch to Windows 11 using the Registry Editor as well. To do so, follow the steps given below-
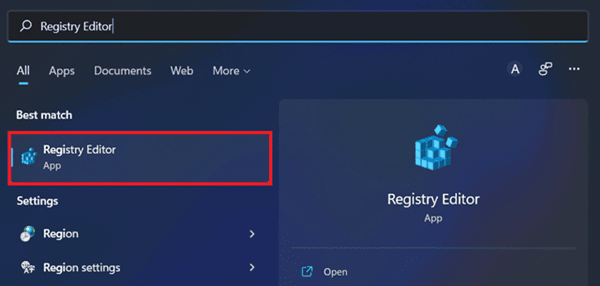
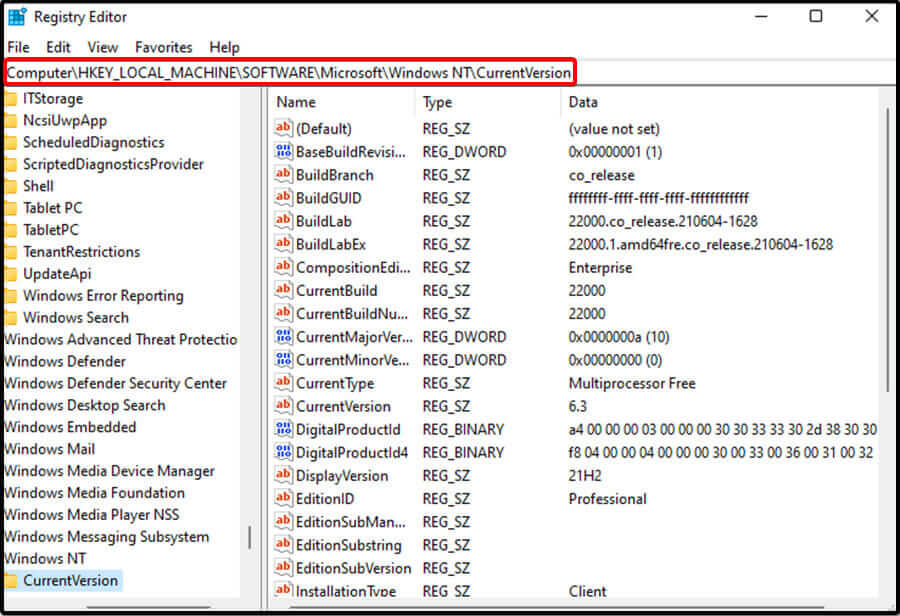
- Open Start Menu, search for Registry Editor, and click on it to open it.
- Head to the following address-
-
Computer\HKEY_LOCAL_MACHINE\SOFTWARE\Microsoft\Windows NT\CurrentVersion
-
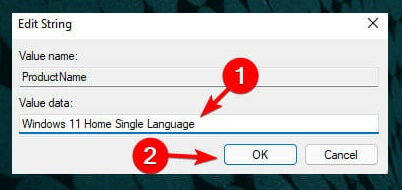
- On the right side, double-click on ProductName and change the Value Data to Windows 11 Home Single Language. Save changes by clicking on OK.
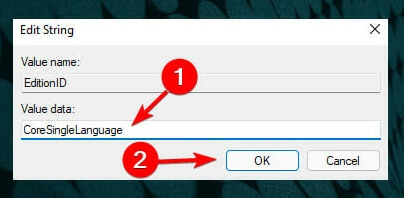
- Now, double-click on EditionID and change the Value Data to CoreSingleLanguage, and then click on OK.
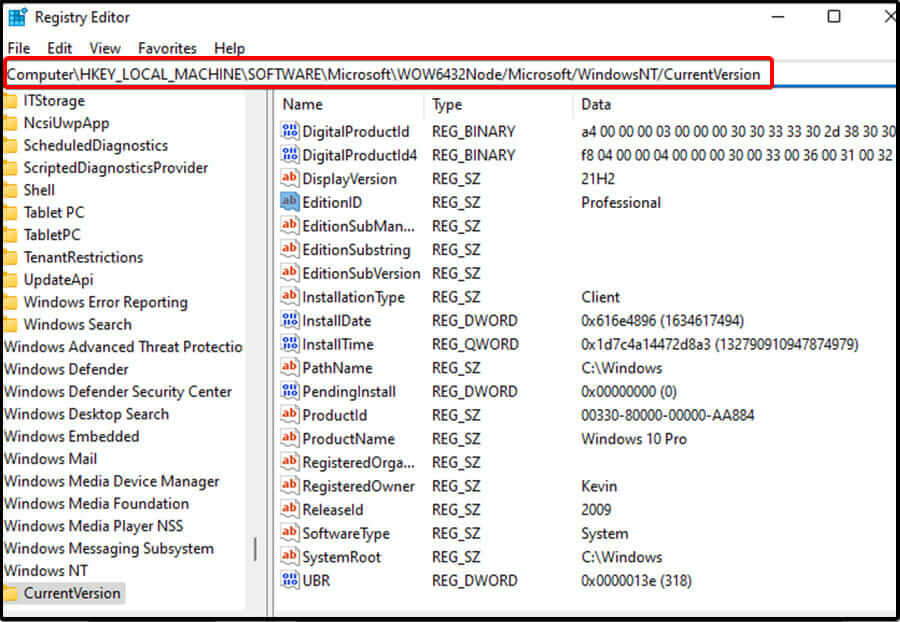
- Next, head to the following address-
-
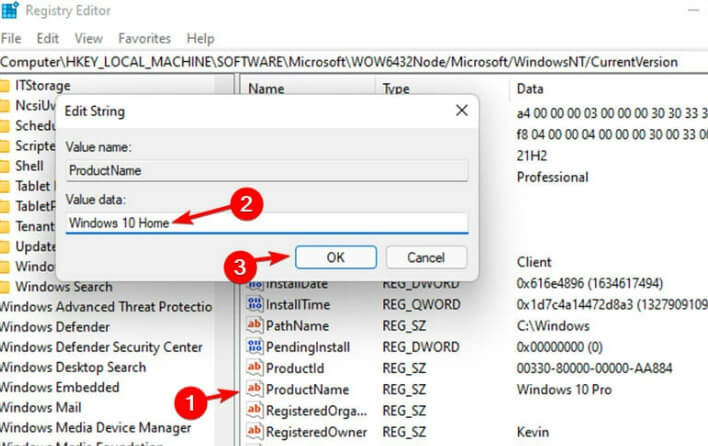
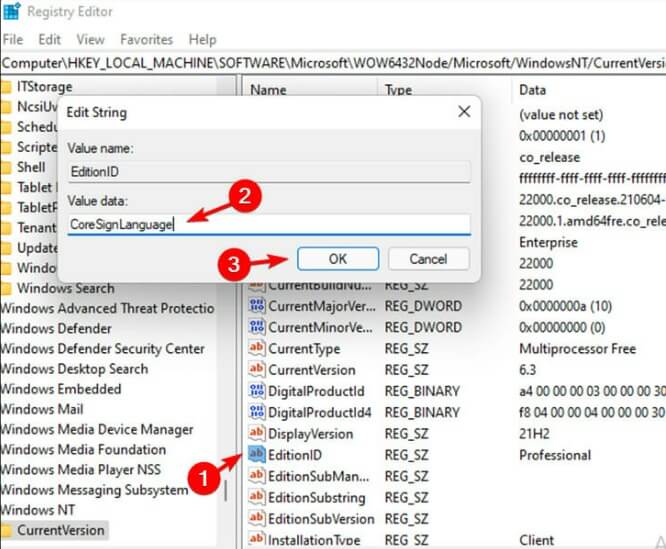
Computer\HKEY_LOCAL_MACHINE\SOFTWARE\WOW6432Node\Microsoft\Windows NT\CurrentVersion
-
- Here on the right side, double-click on ProductName and change the Value Data to Windows 10 Home. Once done, click on OK.
- Next, double-click on EditionID. Change the Value Data to CoreSingleLanguage and click on OK.
- Once done, close the Registry Editor and restart your PC to save the changes.
Conclusion
If Windows 11 is not activated after the update, then it is nothing to be worried about. We have mentioned some troubleshooting steps above, that you can follow to fix the issue you have been facing.

