Date and time are automatically updated on your Windows 11 PC and you won’t find the need to update it manually. However, the problem arises when Windows 11 is not updating time automatically. This issue is reported by many users saying that the time and date do not get updated.
This issue is not new to Windows PC and if you have been facing this issue, then this article will help you fix it. In this article, we will be discussing how you can fix Windows 11 not updating time error.
Also Read- Touchpad Not Working in Windows 11
Fix Windows 11 Not Updating Time Error
There are certain troubleshooting steps that you can follow to fix the Windows 11 not updating time error.
1. Ensure Time Settings are Not Set to Manual
The very first thing that you should ensure is that the time settings are not set to manual. To do so, follow the steps given below-
- Press Windows + I key combo to open the Windows 11 Settings.
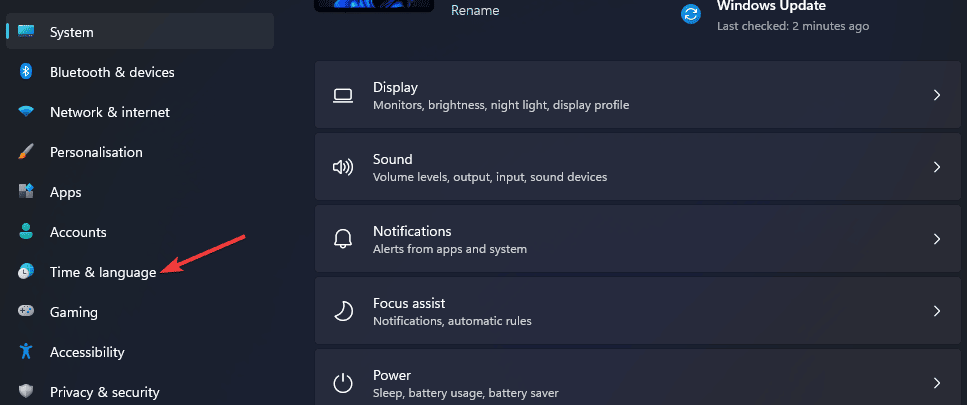
- Head to the Time & Language tab from the left sidebar of the Settings app.

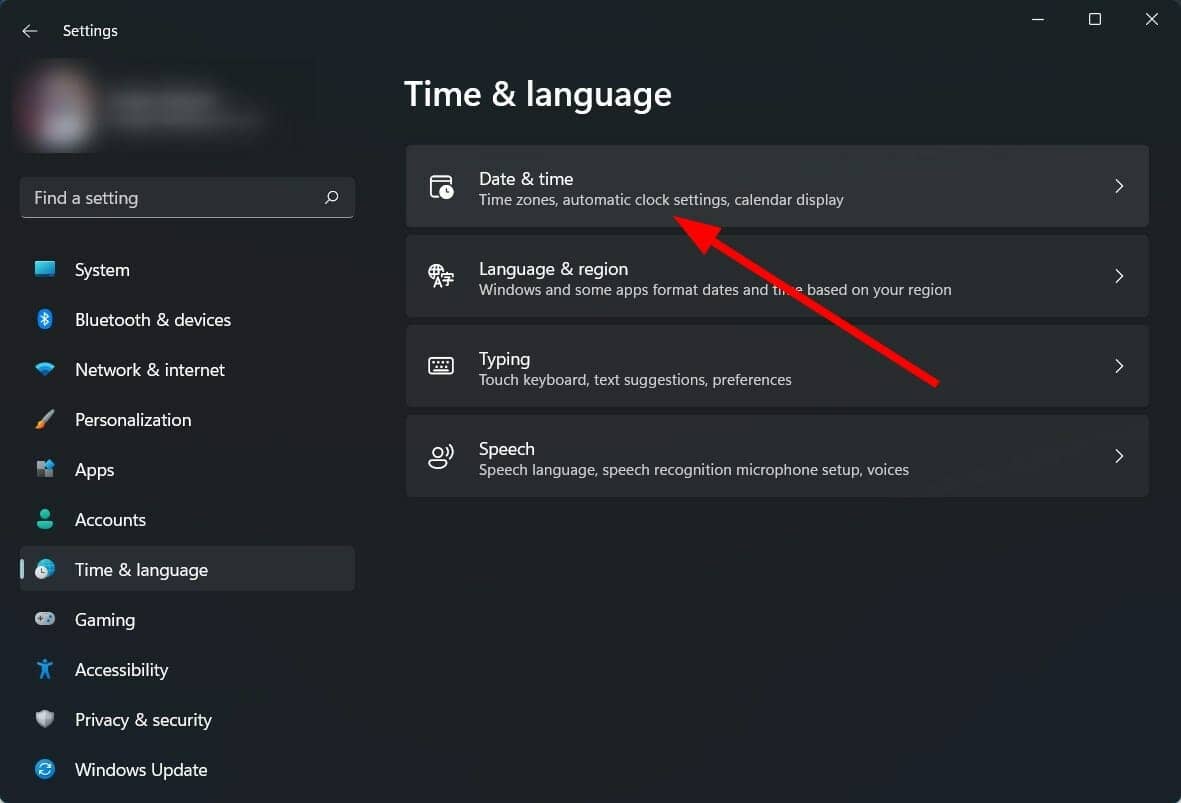
- Here on the right side, click on the Date & Time option.

- Next, turn on the toggle for the Set the time automatically.

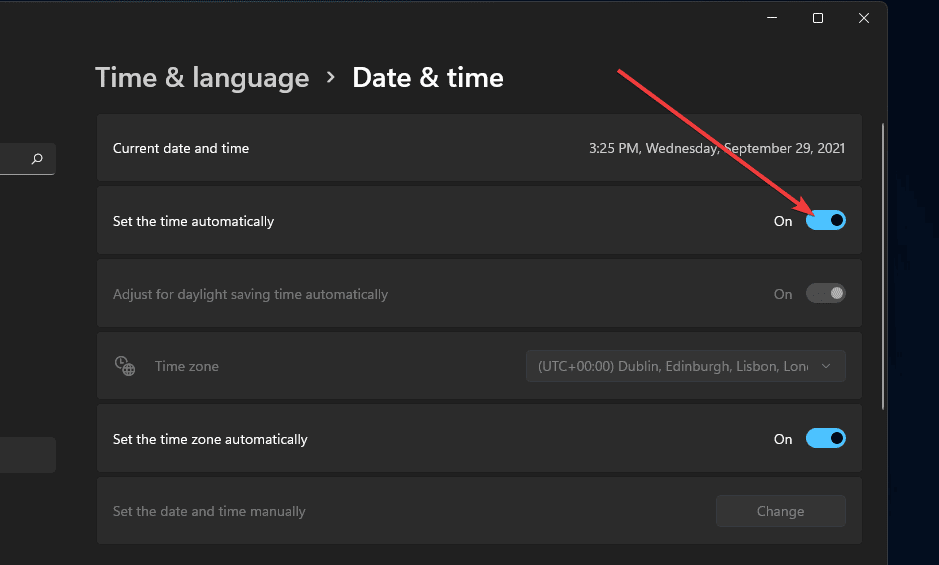
This would enable the time to be set automatically if it was not turned on by default. However, if this option was enabled by default and this is not the reason for facing this issue, you should move to the next troubleshooting step in this article.
2. Try Using Different Time Server
If you face this issue, you should try using a different time server. To do so, follow the steps given below-
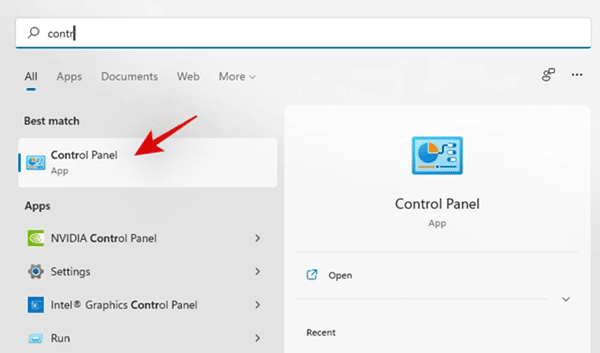
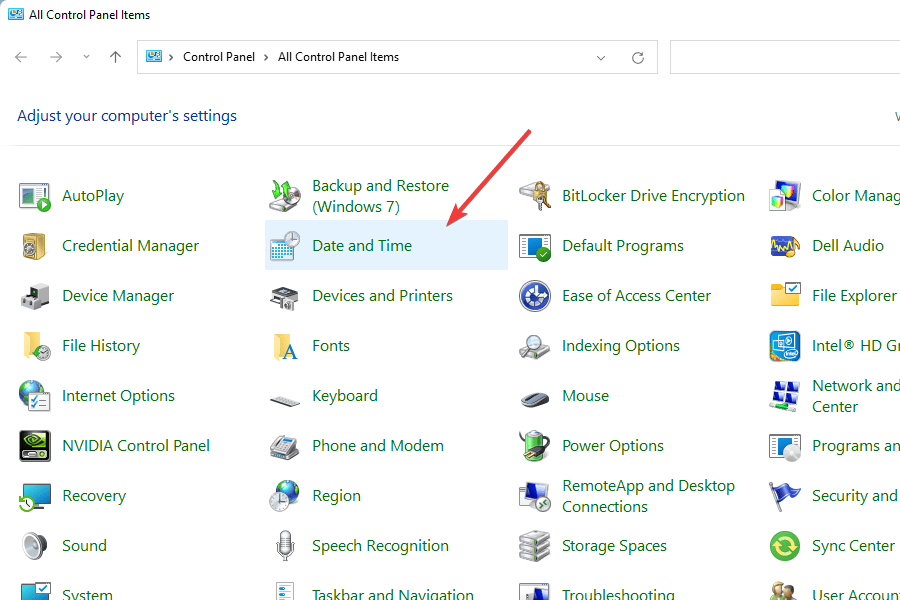
- In the Start Menu, search for and open Control Panel.

- In the Control Panel, search for and open Date and Time.

- Here, head to the Internet Time > Change Settings.

- Once done, click on Update Now to update the time.

3. Start Windows Time Service
Another troubleshooting step to fix Windows 11 Not Updating Time error is starting the Windows Time service. To do so, follow the steps given below-
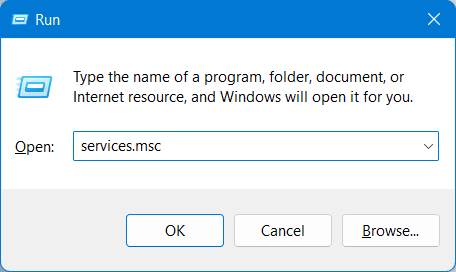
- In the Start Menu, search for Services and open it.

- Navigate to the service named Windows Time.

- Right-click on this service, and then click on Properties.
- Here, set the Startup type to Automatic.
- Click on the Start button to start the service.
- Once done, click on Apply and then on OK to save the changes.

4. Reset w32time.dll
You can also try resetting the w32time.dll if you still face the issue. To do so, follow the steps given below-
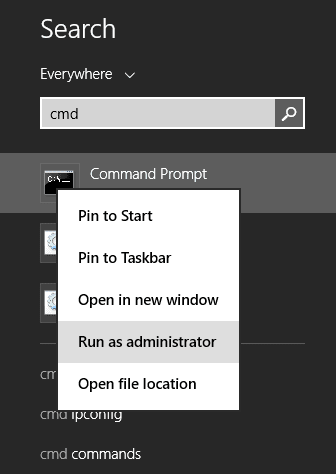
- Press the Windows key and search for Command Prompt and Run as administrator.

- In the Command Prompt, type and execute the command
regsvr32 w32time.dll - Now, restart your PC and the issue will be fixed.
5. Run SFC
Corrupted system files may also be the reason behind facing this issue. You can try performing an SFC scan to fix the issue you face.
- Open Start Menu and search for SFC.
- Now, click on the very first option from the search result to run the SFC scan.
- Wait for the process to complete, and then restart your PC.
6. Fixing Using Registry Editor
Another way to troubleshoot this issue is by using the Registry Editor. Follow the steps given below to fix the problem by using the Registry Editor-
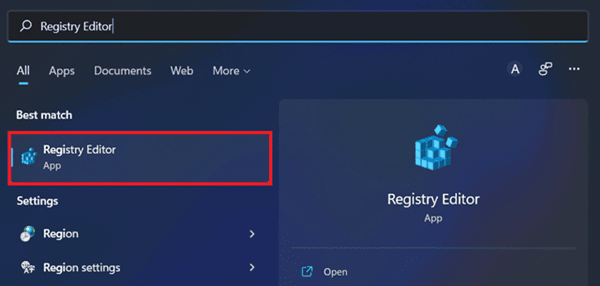
- In the Start Menu, search for and open Registry Editor.

- Now in the Registry Editor, head to the following path-
HKEY_LOCAL_MACHINE\SYSTEM\CurrentControlSet
- Lookout for ControlTimeZoneInformation on the left side and select it.
- If the ControlTimeZoneInformation option is not available on the left sidebar, then right-click on the CurrentControlSet and click on New and Key.
- Now, rename the new key you created to ControlTimeZoneInformation.
- Right-click on the empty space on the right side and click on New. Now, click on Dword (64-bit).
- Rename the value as RealTimelUniversal.
- Double-click on this value and then change the Value Data to 1.
Final Words
We have discussed some ways to fix Windows 11 not updating time error. If the time is not updated automatically on your Windows 11 PC, this article will help you solve the issue.


