The startup folder not working is a commonly faced issue in Windows 11 that many users have reported facing. When your PC boots up, certain apps get booted along with it, and all these apps are stored in the startup folder. However, if the startup folder is not working in Windows 11, then these apps might not start when your PC starts. This will make your experience with your PC less smooth and you may face problems with these apps.
If the Windows 11 Startup Folder is not working, then the reason behind it may be missing files, misconfigured registry, administrative privileges not given, and various others. This issue can easily be fixed by making some changes to the system. In this article, we will guide you through the step-by-step process to fix Windows 11 startup folder not working.
Also Read- How to Launch Apps At Startup in Windows 11
Fix Windows 11 Startup Folder Not Working
Given below are the troubleshooting methods to fix Windows 11 Startup Folder not working-
1. Ensure Startup Apps Are Enabled
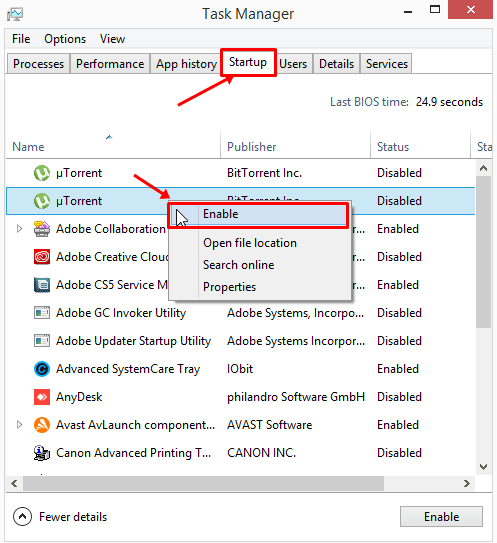
The very first thing that you should check for is whether the startup apps are enabled or not. You can check these using the Task Manager, and if they are not enabled then you should enable them. To do so, follow the steps given below-
- Press the Windows + X key combo, and then from the menu that opens up, click on Task Manager.

- Head to the Startup tab in the Task Manager and check what apps are disabled here.
- Right-click on the disabled app, and then click on Enable. Do this for all the apps that do not start with your PC booting up.


2. Add The Shortcut To The Startup Folder Manually
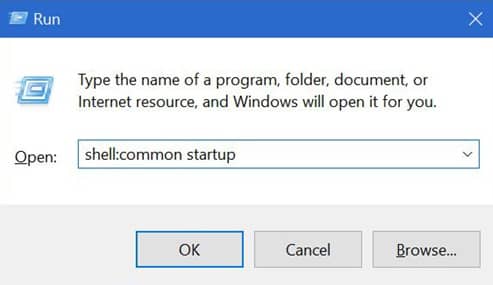
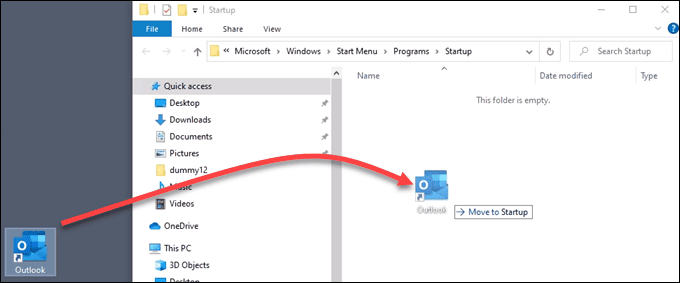
The very next thing that you should try doing is adding the shortcut to the startup folder manually. You can do so by following the steps given below-
- Head to the installation folder of the program you are facing problems with at the startup. Here copy the .exe file of the program you are facing the problem with.
- Now, press the Windows + R key combo, and in the Run Dialog box type shell:common startup and hit Enter.

- Here, paste the shortcut for the app you copied, and then restart your PC.

3. Disable UAC
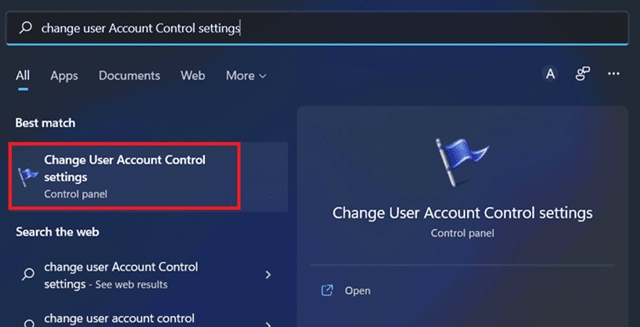
If you have not been given administrative privileges then also you are likely to face the issue. You should try disabling UAC and then see if you face the issue or not. To do so, follow the steps given below-
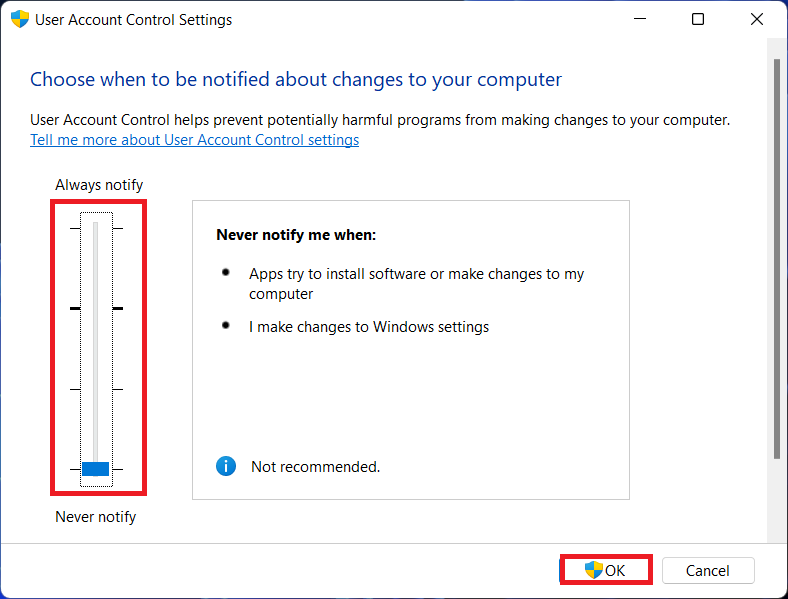
- In the Start Menu, search for Change user account control settings and hit Enter to open it.

- Here, drag down the slider to the bottom (Never notify) and click on OK to save changes.

- When given the UAC prompt, click on Yes to continue ahead.
4. Run SFC And DISM
SFC and DISM are two basic pillars of troubleshooting Windows. If you face any issue due to corrupted files, then running the SFC and DISM scan will help fix the issue. Firstly, run the SFC scan, and if it didn’t help you then you should run the DISM scan. To do so, follow the steps given below-
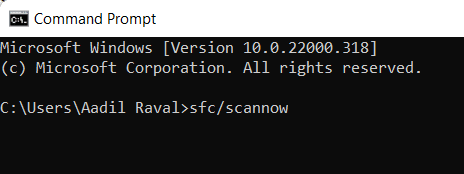
- Open the Start Menu, and search for CMD. Right-click on Command Prompt from the search result, and then click on Run as administrator.
- In the Command Prompt, execute the command sfc /scannow

- Wait for the process to end. After the process ends, restart your PC.
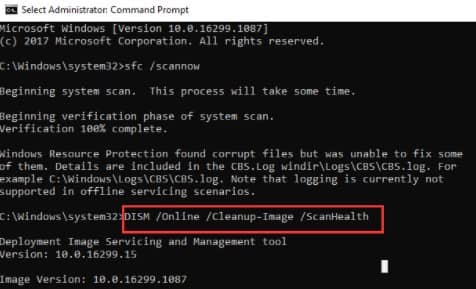
This should most probably fix the issue. However, if you still face the issue, then you should try running the DISM scan. Given below are the steps to run the DISM scan-
- Run the Command Prompt with administrative privileges.
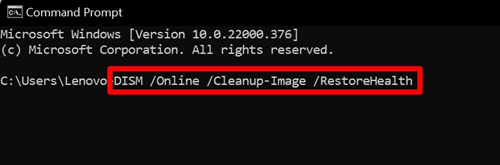
- Now in the Command Prompt, type and execute the given below commands one by one.
DISM /Online /Cleanup-Image /CheckHealth

DISM /Online /Cleanup-Image /ScanHealth

DISM /Online /Cleanup-Image /RestoreHealth


- After executing the above commands, restart your PC and you will no longer face the issue.
5. Make Changes To The Registry
If you still face the issue, then you should try making changes to the Registry. You should make the following changes to the Registry and check if you still face the issue or not-
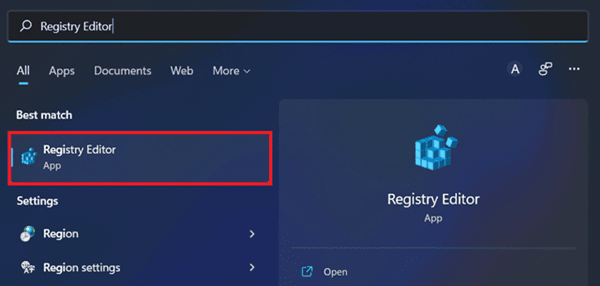
- Open Start Menu and search for Registry Editor and open it.

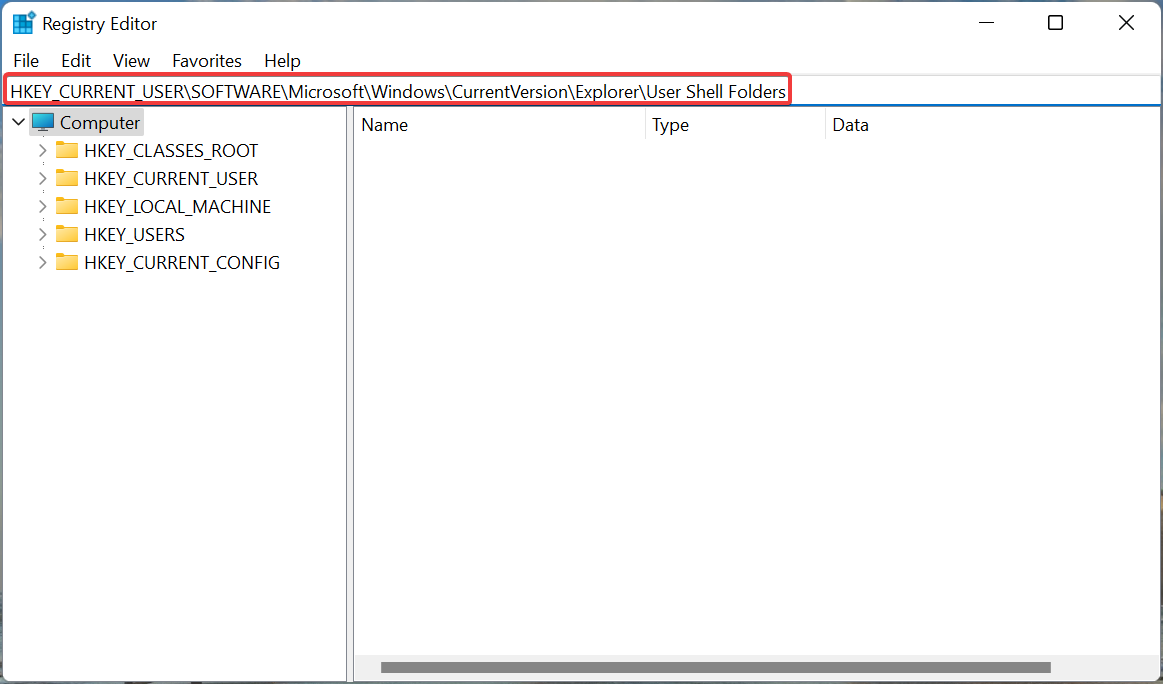
- In the Registry Editor, head to the following address bar-
HKEY_CURRENT_USER\SOFTWARE\Microsoft\Windows\CurrentVersion\Explorer\User Shell Folders

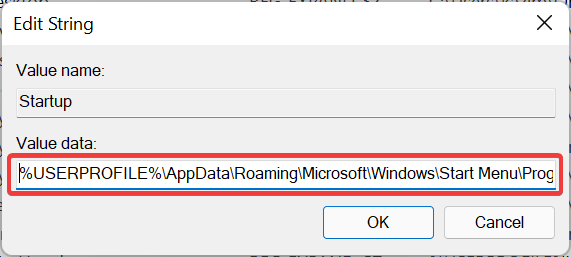
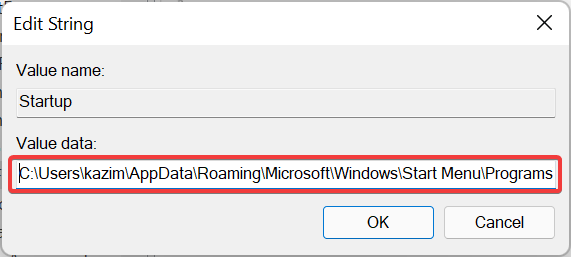
- Now, on the right side, double-click on the Startup string to edit it. Here, ensure its value data is as the following-
%USERPROFILE%\AppData\Roaming\Microsoft\Windows\Start Menu\Programs\Startup

- If the value data is not the same, then change it and click on OK.
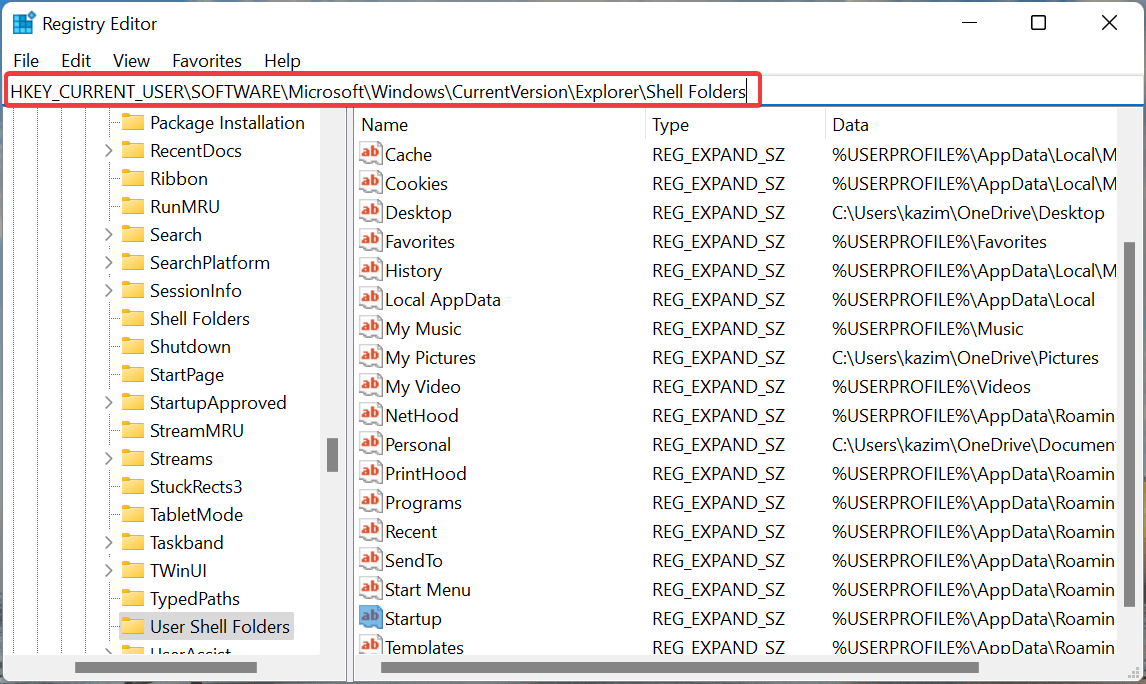
- After doing so, head to the following path in the Registry Editor
HKEY_CURRENT_USER\SOFTWARE\Microsoft\Windows\CurrentVersion\Explorer\Shell Folders

- Here, double-click on the Startup string on the right side, and ensure the Value Data is the same as the following-
C:\Users\User\AppData\Roaming\Microsoft\Windows\Start Menu\Programs\Startup
- Next, head to the following path in the Registry Editor-
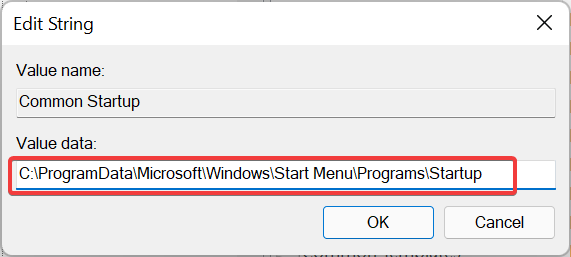
HKEY_LOCAL_MACHINE\SOFTWARE\Microsoft\Windows\CurrentVersion\Explorer\Shell Folders
- Now, double-click on the Common Startup string on the right side, and make sure the value data is the same as the entry given below-
C:\ProgramData\Microsoft\Windows\Start Menu\Programs\Startup
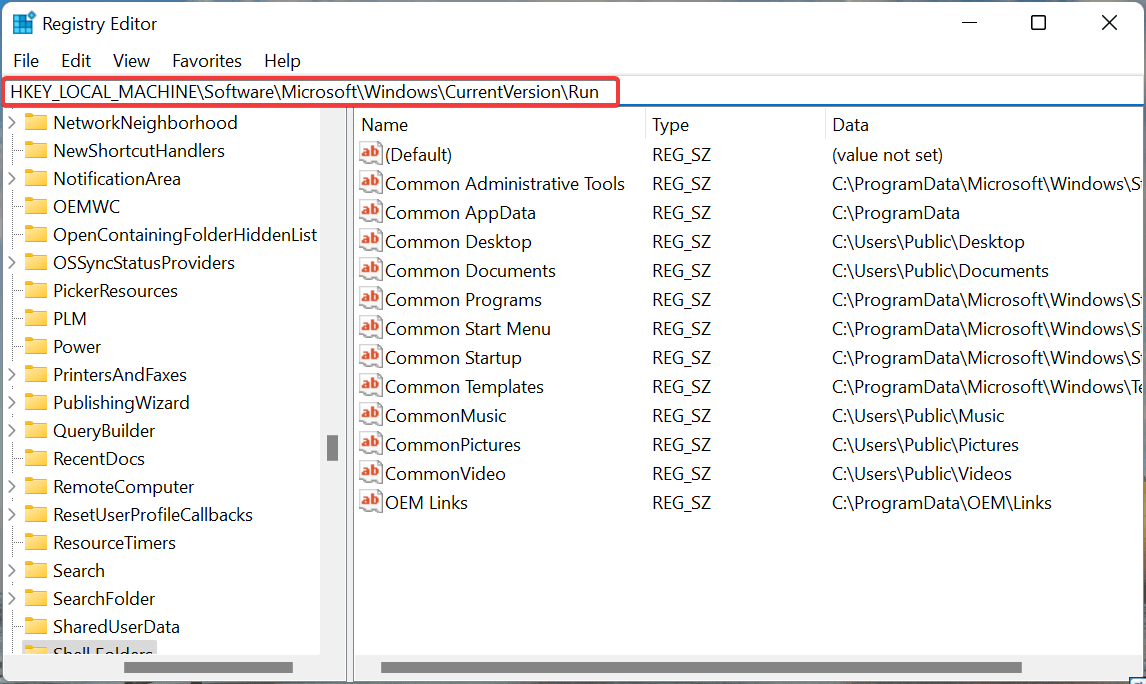
- Ensure that all the values are as mentioned. If everything is in place, then you can also add the apps manually in the Registry Editor. To do so, head to the following path-
HKEY_LOCAL_MACHINE\Software\Microsoft\Windows\CurrentVersion\Run
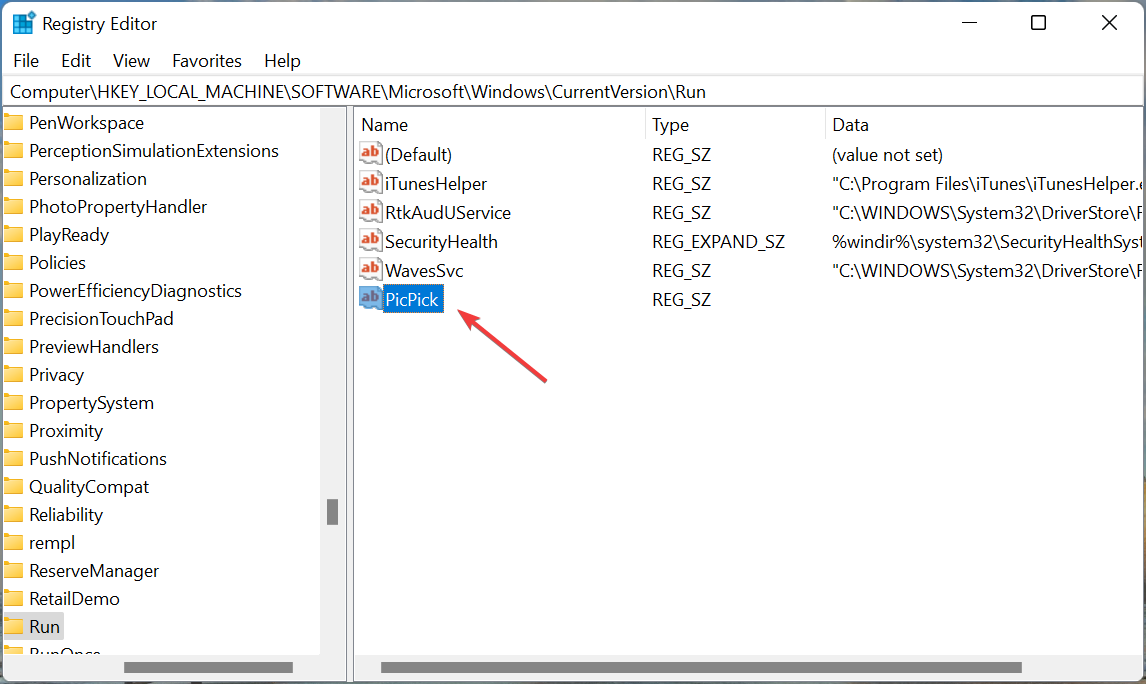
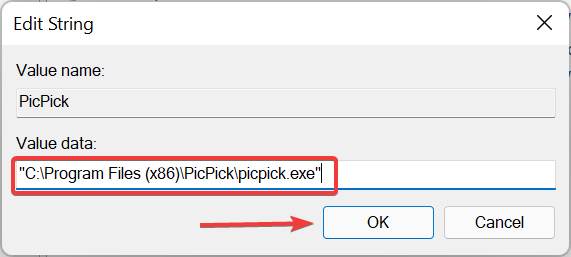
- Right-click on the empty side on the right section. From the menu that opens up, click on New and then click on the String value.
- Now, enter the name of the app you are facing the issue with.
- Head to the File Explorer and then head to the installation folder of the app. Copy the path to the installation folder.
- Now, head back to the Registry Editor and double-click on the new String Value you created.
- Enter the value data as the path to the installation folder of the app you copied.
- Click on OK and restart your PC.

Final Words
This is how you can fix the Windows 11 startup folder not working. If you have been facing issues with the Windows 11 start folder, then you can follow the steps in this article and the issue will be fixed.


