Today we have Windows 10 and 11, the new generation of Windows operating system. But a decade ago, Windows XP was the most popular operating system.
No wonder XP was regarded for its speed, workability, performance, and stability. Currently, XP has the end of its life and is outdated. Even with all these, Windows XP can only be used for testing and educational purposes.
Having said that, such an app won’t function properly on Windows 10. Still have ways to use Windows XP through virtualization on Windows 10. Otherwise, the dual boot method and compatibility mode also come in handy.
The compatibility won’t work now on Windows 10 because it supports Windows 8 and earlier versions. So let’s see how to use the Windows XP emulator on Windows 10.
Prerequisite Things to Emulate Windows XP on Windows 10
First and foremost, have all resources in your hand before jumping into the setup process. Otherwise, you may end up in a mess.
1. Download Windows XP ISO Image
This is the first thing you should have on your hand immediately. Download the Windows XP ISO Image from the Internet Archive. It’s freely available there and quite safe to use. The recommendation will be to use Windows XP as an alternatives OS, not for daily use.
2. Download and Install Virtual Box
Various virtual machines are available to use. Here we will use Virtual Box by Oracle to emulate Windows XP. Other than that, Vmware Player and Hyper-V are also good choices.
Hyper-V is an inbuilt program in Windows 10, so if you don’t use third-party programs, you have the option to choose from.
Well, download Virtual box from here, and install it. Installing an executable file on Windows, like any other program, is simple.
3. Storage
Here is another important thing that you should be aware of. You need to allocate adequate RAM and space for the new OS. However, free space wouldn’t be a problem. But ensure you have at least 512 MB RAM to run all essential elements smoothly.
How to Set Up Windows XP Emulator on Windows 10 using Virtual Box
After downloading and installing the virtual box and other prerequisites, we can set up everything peacefully. Now follow this process carefully.
Creating Virtual Box
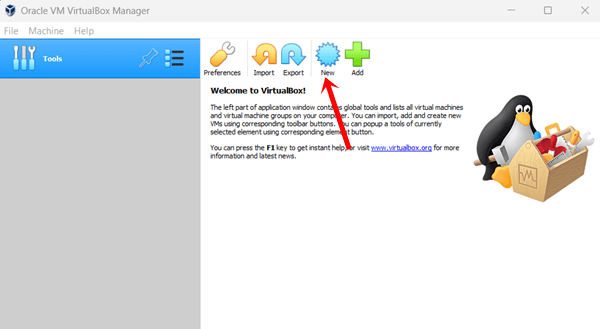
- Open the virtual box, and click the New button to create a virtual machine.

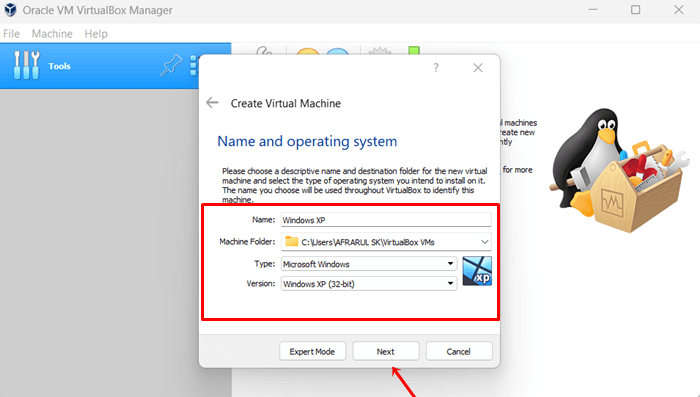
- A pop-up will appear to ask for some basic information.
Name: Give it a name to understand and be recognizable.
Machine Folder: It will automatically create a dedicated folder; you can change it accordingly. Right now, I am keeping it the same.
Type: Microsoft Windows.
Version: Windows XP (32-bit). When everything is ready, now click on the Next button.
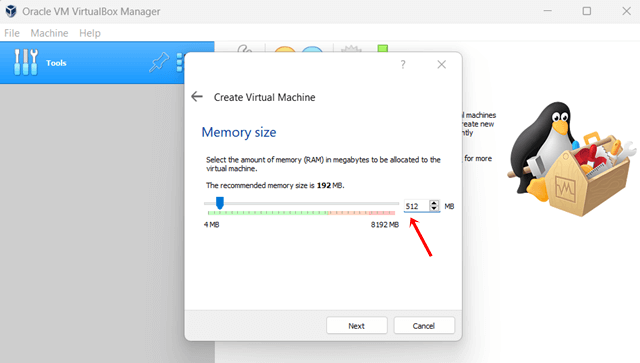
- Here you have to provide the proper amount of RAM. The virtual box will ask for 192 MB, but giving at least 512 MB is ideal because it lets the Virtual box run smoothly.

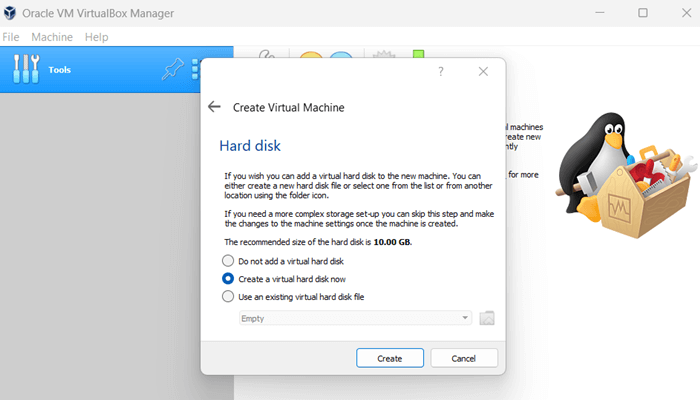
- So we have given enough RAM. Now time to choose a virtual hard disk size for the virtual machine to keep data there. Click on Create a virtual hard disk now.

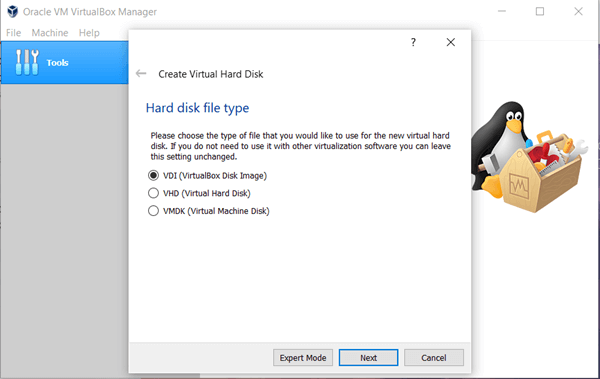
- After that choose Virtual Disk Image (VDI), and hit next.

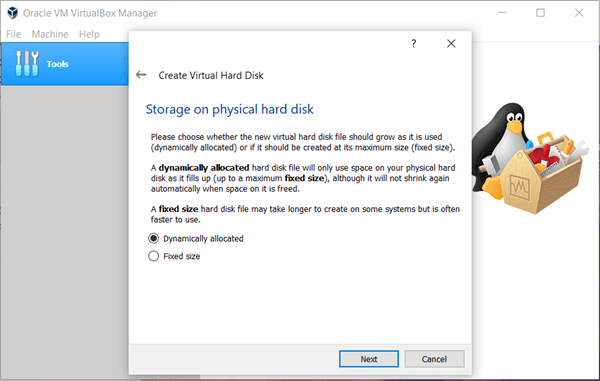
- Here you will get two options to choose the virtual disk from, one is Dynamically allocated and another is Fixed size. Click on the Dynamically allocated.

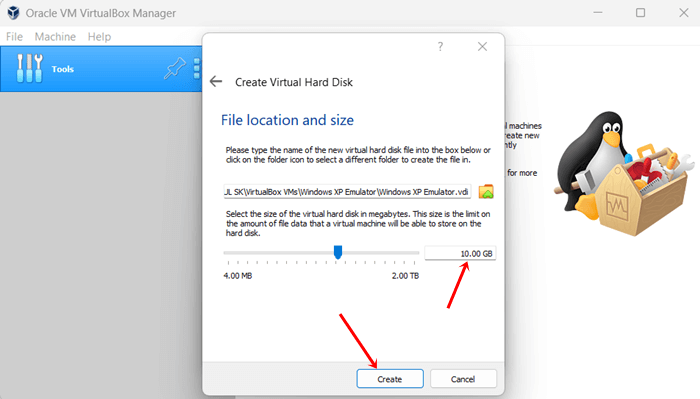
- Next, you can choose a disk size of up to 2 TB; here, we select 10 GB. Now simply click on the Create button. Boom, you have successfully created the virtual machine.

Installing Windows XP on The Virtual Machine
As of now, we have successfully created the virtual machine. Here we will install Windows XP ISO image on the virtual machine. This is what you need to follow.
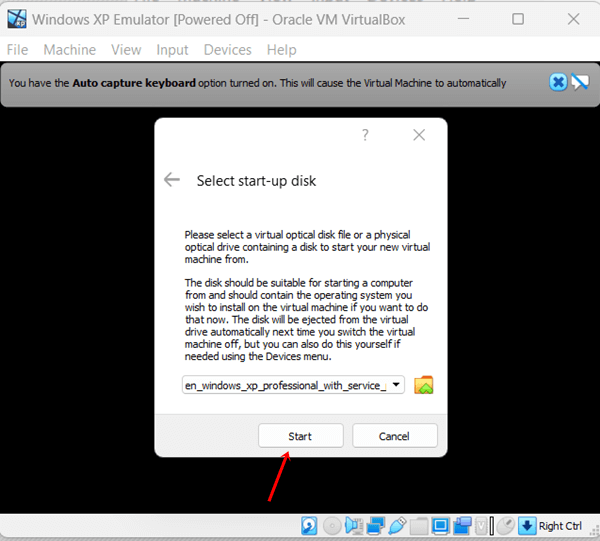
- First, click on the Start button on the virtual machine.

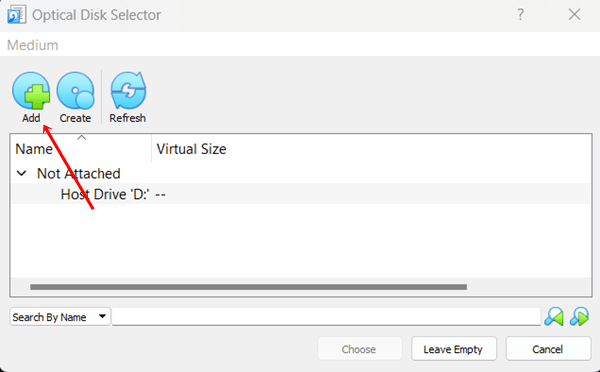
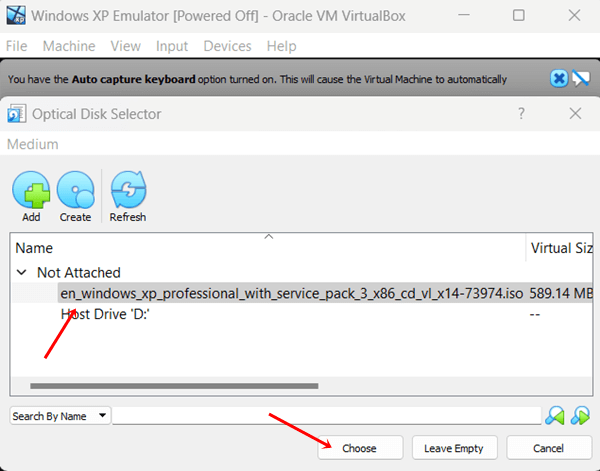
- A dialog box will open as Select start-up disk, click on the folder icon.

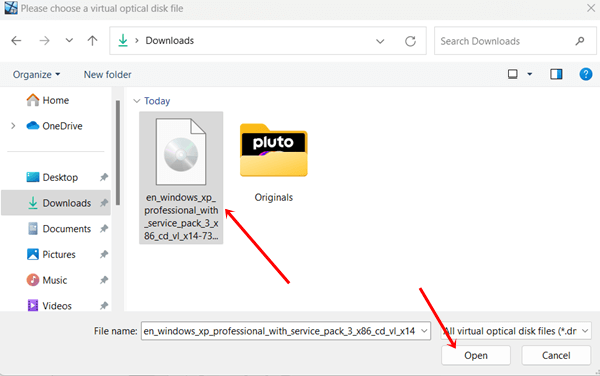
- Next, click on the Add option to add your Windows XP ISO image.

- Select Windows XP ISO Image file, and click on Open.

- Then click on Choose.

- Once the Windows XP ISO Image file is uploaded, click the Start button.

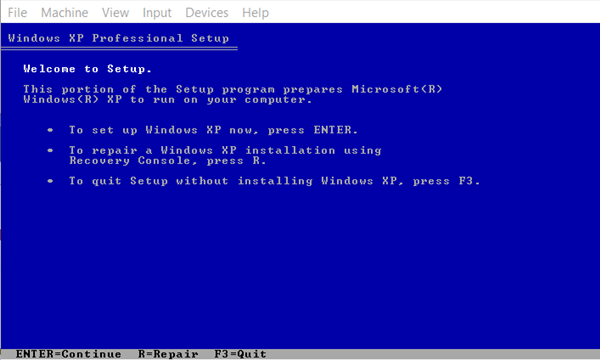
- On the next screen, Windows XP will greet you.

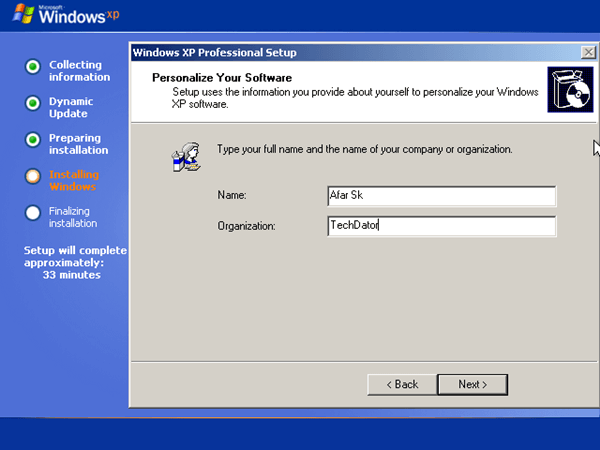
- Now finish the setup of Windows XP as usual. However, it will ask about disk partition, language, region, etc.


Final Words
This is how you can use a Windows XP emulator on Windows 10. Several methods are available to obtain Windows XP, but this is a pretty straightforward and easy process. If you face any issues, let us know in the comment section.


 2024")