Dealing with all the clutter in your PC can sometimes be tough. You may have hundreds of files deleted since they’re useless, and they all end up in recycle bin to give us a second chance. While this helped some people to recover accidentally deleted ones, many wanted the deleted files to be gone forever.
For that, we’re supposed to empty our recycle bin once again. While we think of this as a usual process, realize that there’s an automated deleting option available on your Windows 10 PC. Named Storage Sense, users can set a frequency for automatically deleting their recycle binned files. Here’s how;
Also Read- How To Schedule Automatic Shutdown in Windows 10
Steps to Schedule Recycle Bin To Empty Automatically on Windows 10
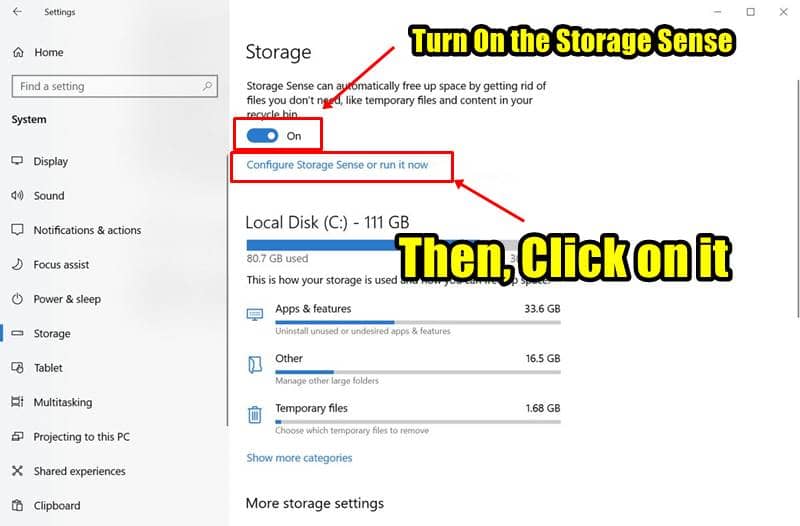
- Power up your PC and go to Settings. For this, either go from the Start Menu or try the keyboard shortcut, Windows key + I.
- Go to System, and then navigate to the Storage section from the left pane.
- In the Storage section, toggle on the Storage Sense under Storage, and click on
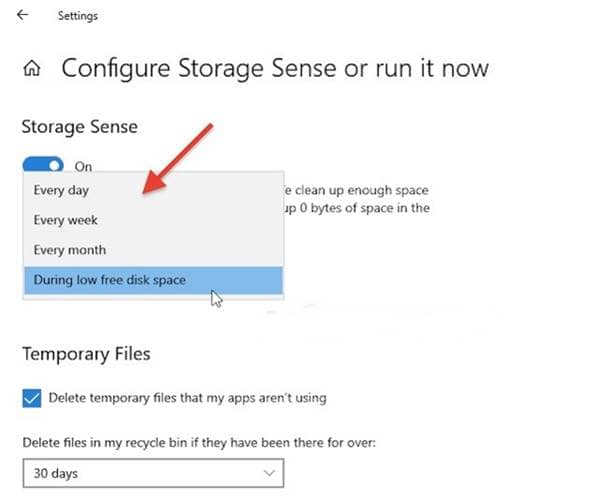
Configure Storage Sense or run it now, which is right beneath the Storage toggle. - This would open the configurations of Storage Sense, where you can set the frequency of deleting the binned files automatically.
- Right under the Storage Sense toggle, click on the drop-down menu to check the available frequency options.
- There will be four options available, ranging from one day to weekly once, monthly once, or when the disk space is low. Set the desired frequency.
That’s it. You can now safely return to your work and continue without any thought of cleaning your bin frequently. Your Windows 10 PC will automatically delete the files forever once the pre-set frequency is reached. Be aware that files once deleted from Recycle Bin are deleted forever! Unless you have file recovery software like these.


