Corsair develops various computer peripherals dedicated to gaming. These peripherals come with RGB lights which can be controlled using the Corsair iCUE software. However, many users have reported facing issues with the Corsair iCUE, stating that iCUE is not detecting devices in Windows 11.
If you use Corsair devices, you will need the Corsair iCUE application to connect your devices to your PC and unleash their full potential. If Corsair iCUE is not detecting devices in Windows 11, you will not be able to use your device and manage them properly.
You are likely to encounter this issue when there is a compatibility issue between the device you use and the iCUE version you have installed on your PC. Users have reported facing this issue with various devices, including keyboard, fans, mouse, RAM, headset, and CPU cooler. In this article, we will be discussing all the troubleshooting methods to help fix Corsair iCUE not detecting devices in Windows 11.
Also Read- How To Disable Superfetch (SysMain) in Windows 11
Fix Corsair iCUE Not Detecting Devices in Windows 11
Given below are all the methods to help fix Corsair iCUE not detecting devices in Windows 11-
1. Update Windows
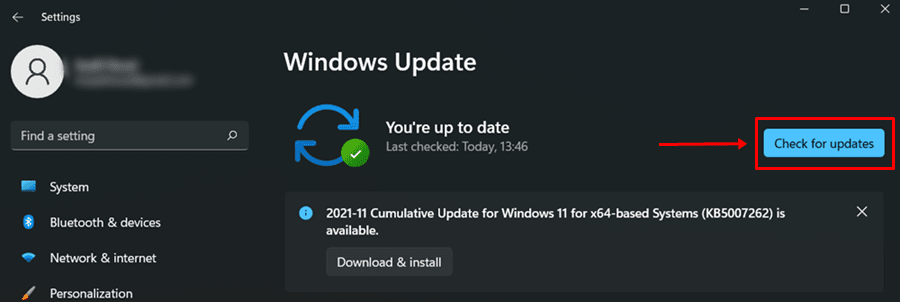
If you have been facing this issue, then the very first thing that you should try doing is updating the Windows. To update Windows, follow the steps given below-
- Open Settings by pressing the Windows + I key combo.
- Head to the Windows Update tab, and then on the right side, click on Check for Updates.

- Now, download and install all the updates that the settings app shows.
- After the updates are installed, restart your PC to apply the changes.
2. Update Driver
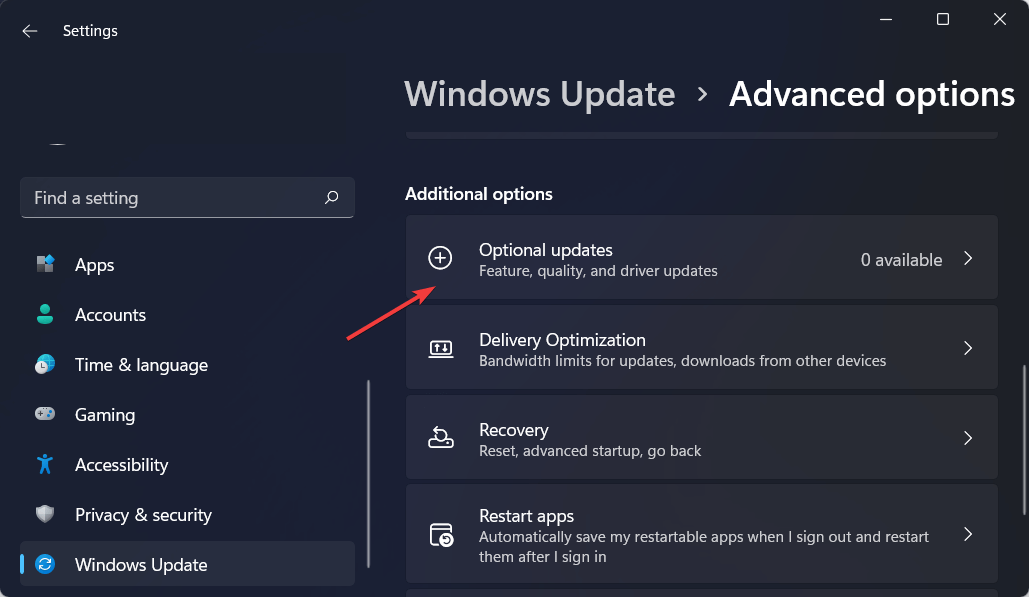
You may also face the issue due to outdated drivers. To fix this issue, you must try updating the drivers. Follow the steps given below to update the drivers on your PC-
- Press Windows + I keyboard shortcut to open the Settings app on your PC.
- On the left sidebar, click on the Windows Update tab.
- Here, click on Advanced Options and then on Optional Updates.

- Next, click on Driver Updates. Download and install all the driver updates from here.
- Once done, restart your PC and check if you still face the issue or not.
3. Perform Force Updates
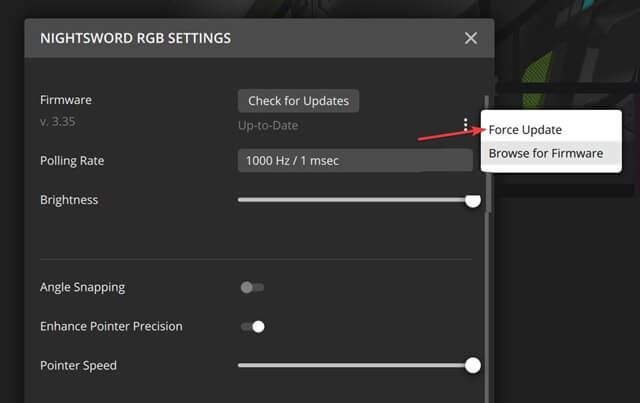
Another troubleshooting step to follow is performing force updates. To do so, follow the steps given below-
- Open Start Menu, search for the iCUE app and open it.
- Head to the Settings and then select the device you face any issue with.
- Next, click on three ellipses next to Check for Updates, and then click on Force Update.

- Do this for all the devices you are facing issues with.
4. Reinstall the iCUE app
If you still face the issue, the last resort will be to reinstall the iCUE app. To reinstall the iCUE app, follow the steps given below-
- Press Windows key, and then from the Start Menu, open the Settings app.

- Head to the Apps section, and then click on Apps & Features.

- Search for the iCUE app, click on three ellipses next to the app, and click Uninstall.
- Once uninstalled the app, head to the Corsair website and download the Corsair iCUE software.

- Install the software on your PC and then check if you still face the issue or not.


Final Words
If Corsair iCUE is not detecting devices in Windows 11, then this is the guide to help you with it. If you have been facing this issue with the Corsair iCUE, the troubleshooting steps mentioned in this article will help you fix this issue.


