Steam makes PC gaming more enjoyable and fun, as it is a wholesome marketplace for PC games and digital content. The subscription-based platform allows users to download games and play along. It has over 30,000 games with controllers, VR technologies, and even the gaming community.
Right now, Steam is winning the gaming industry. However, many users face network connection problems, and you are one of them. But fret not, we have some method where you can fix it easily. Let’s see how we can fix this – could not connect to Steam network.
How to Fix Could Not Connect to Steam Network
Normally, it can be a network issue for sure of your internet and network or the server. You can see this error when you frequently change the game’s configuration. However, here is we got the error. There will be a fix as well. Without delaying time, jump into the process.
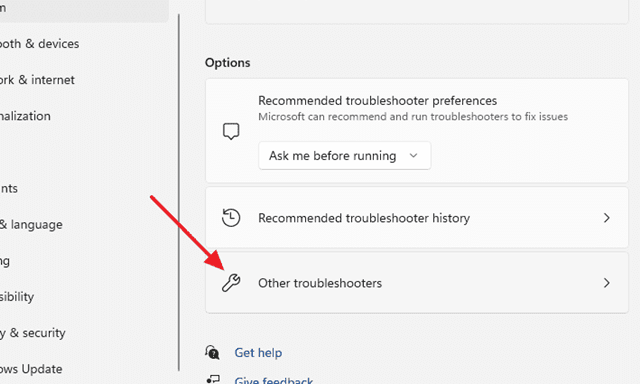
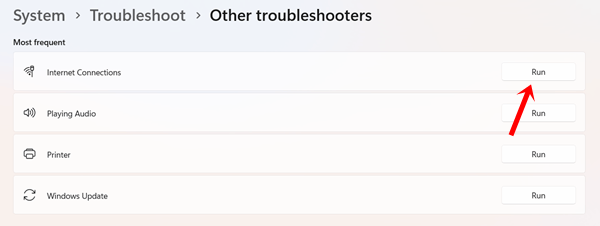
1. Troubleshoot the Internet Connection
Detecting the possible problem is very easy in Windows 11, be it an internet connection or another issue. It will detect the problem and give a way to act upon it.
- Press Windows start > Settings > System >Troubleshooters.
- Then click on Other Troubleshooters.

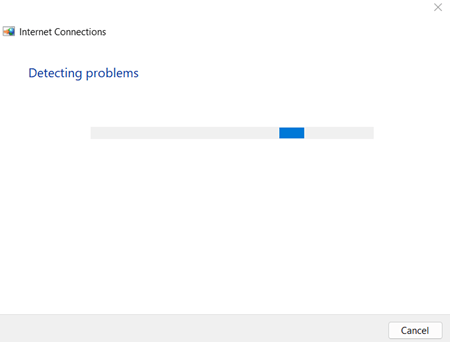
- Now simply click on the Run button of Internet Connections.

- It will detect the internet connection problem if your system has any. Then you need to follow the onscreen instructions.

2. Restart the System
Restarting the system is one of the underrated processes to fix all problems like lagging, app crashing, driver issues, network problems, and many other issues.
You can restart the system when you cannot connect Steam with an internet connection and check whether it is all fine or if you need to do more settings for it.
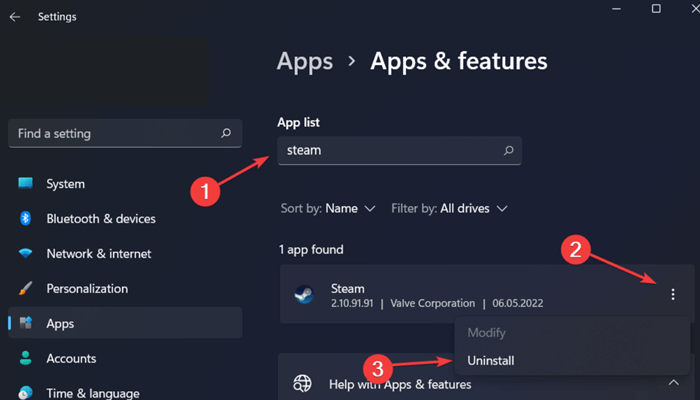
3. Reinstall Steam
It is one of the best to solve the problem. Uninstalling the app clears out corrupt files and bugs, which may be the occurring problem in the same. It is even more easy to do.
- Press Windows start > Settings > Apps.
- Now click Installed apps.
- You will get the list of all installed apps. Now search Steam on the list, and click on vertical three dots. Then click on uninstall.

- A new box will open for confirmation to uninstall. Click on uninstall once again.
- Now download and install Steam once again.
4. Update Network Driver
You can also update the network driver. An outdated network drive can be a reason for could not connect to the Steam network.
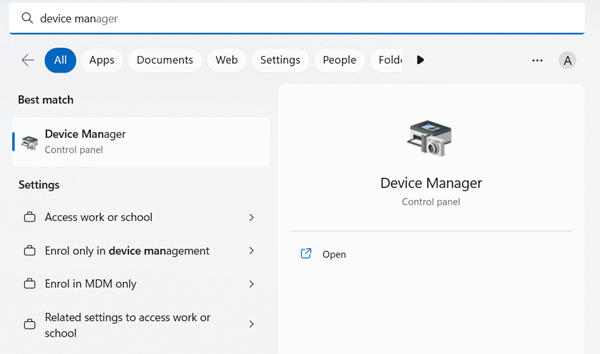
- Press Windows Start, and type Device manager on the search bar. Otherwise, Windows start button + X to select the Device Manager. Open the app.

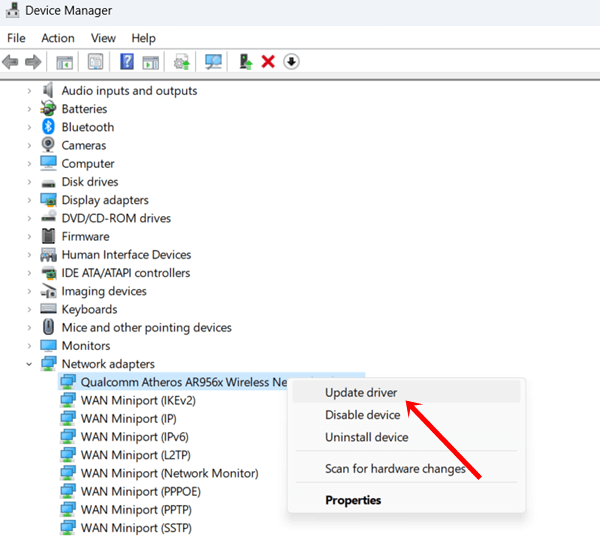
- Now click on the small arrow of the Network adapter to expand the other options. Now right-click on any network driver options, and then click on update.

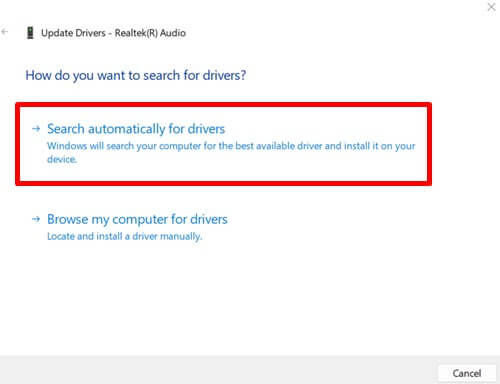
- Then click on the search automatically for drivers to get the update.

5. Disable Windows Firewall
The firewall works as the security tool for all incoming and outcoming networks. It takes care of all of them and even unauthorized access. But they check whether the problem still exists by simply disabling the Windows firewall for a while.
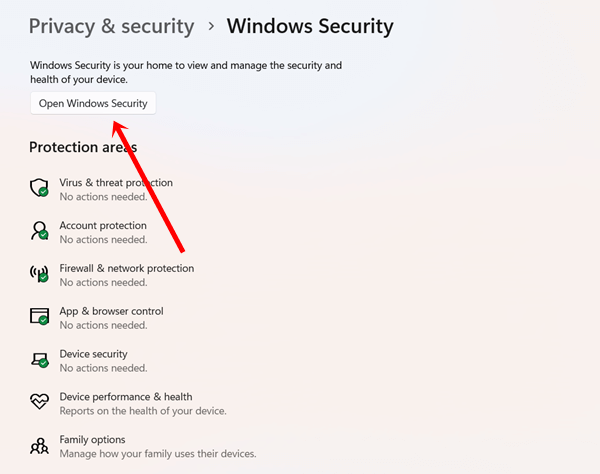
- Press Windows start > Privacy & Security > Windows security.
- Now click on Open Windows Security.

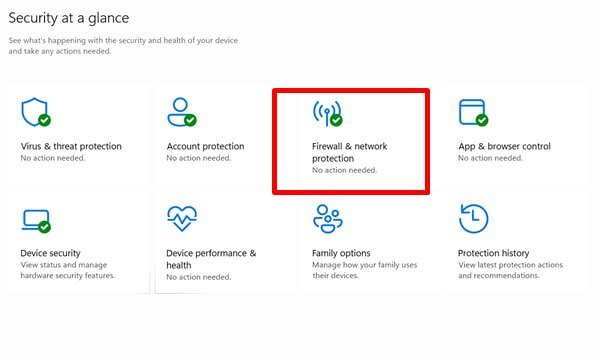
- Then click on Firewall & network protection.

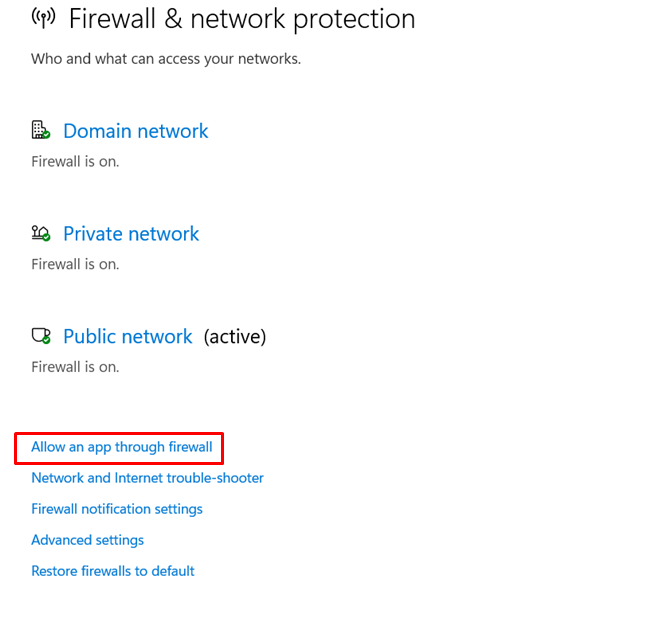
- Next, click on Allow an app through the firewall.

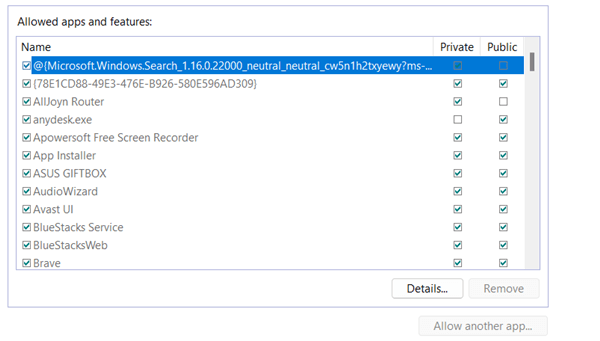
- Now find the Steam app from the list and checked both boxes. And click on Ok to perform these changes.

6. Update Steam Client
A recommendation will be to use the updated version of any apps. It gives you more compatibility and smoothness, along with other features. If you have not updated the Steam client, the time has come to do so.
It updates automatically, but it won’t in rare cases. Here is how to update the Steam client.
First, open Steam, then select Steam, and now click Check for Steam Client Updates. That’s it. You can update the Steam client easily.
7. Start Steam using TCP
It may sound weird, but problems can lie down underneath TCP. Here’s what you need to follow.
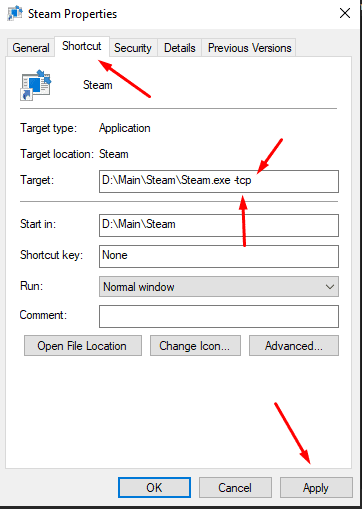
- Right-click on the app icon on the desktop.
- Then click on Properties.
- Under the Shortcut tab, add tcp at the end of the target field. Next, click on Apply, and then Ok.

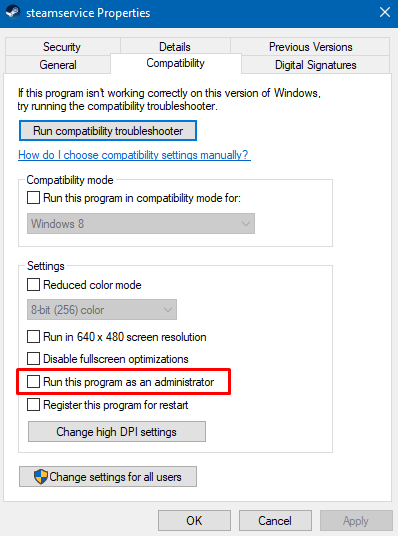
8. Run Steam as an Admin
Here is another considerable method that you can try to fix the issue.
- Right-click on the app icon on the desktop.
- Then click on Properties.
- Under Compatibility, choose Run This Program As Administrator. And then click on apply & Ok.

8. Disable VPN & Proxy Network
Using a VPN or proxy network, your connection will go through the tunnel of the network where you can be untraceable. However, the Steam connection failed to recognize your IP and location. This could be another reason for showing the error message.
Disable the VPN and proxy network. As Steam can run perfectly on normal internet connections. It might solve the error problem.
Final Words
This is how you can fix the issue of could not connect to Steam network. Although all methods are proven to fix the problem. If you have any problem now, let us know in the comment section.


