DirectX is a collection of APIs for handling multimedia tasks that require GPU usage, like gaming and playing video. This is required for a better gaming experience on your PC. If you do not have the correct DirectX version installed on your PC, then your games might not be able to utilize GPU properly and you may face issues like frame drops and lags.
DirectX 12 Ultimate)is the latest version of DirectX released by Microsoft. You must have a high-end graphics card like Nvidia GeForce RTX 30 series and GeForce RTX 20 series or AMD Radeon RX 6800 series GPU. If you have a graphics card compatible with DirectX 12 Ultimate, this guide will help you install it on your Windows 11 PC.
How to Install DirectX 12 Ultimate on Windows 11
DirectX 12 Ultimate is the new API of DirectX. It enhances your experience with next-generation games by supporting ray tracing, variable-rate shading, sampler feedback, and mesh shaders.
DirectX 12 Ultimate is compatible with Windows 11 and Windows 10 version 2004. If you want to install DirectX 12 Ultimate on your Windows 11, then you will be able to do so by following the steps given below-
1. Through Windows Update
The very first way to install DirectX 12 is through the Windows Update. To do so, follow the steps given below-
- Press Windows + I key combo to open the Settings app.

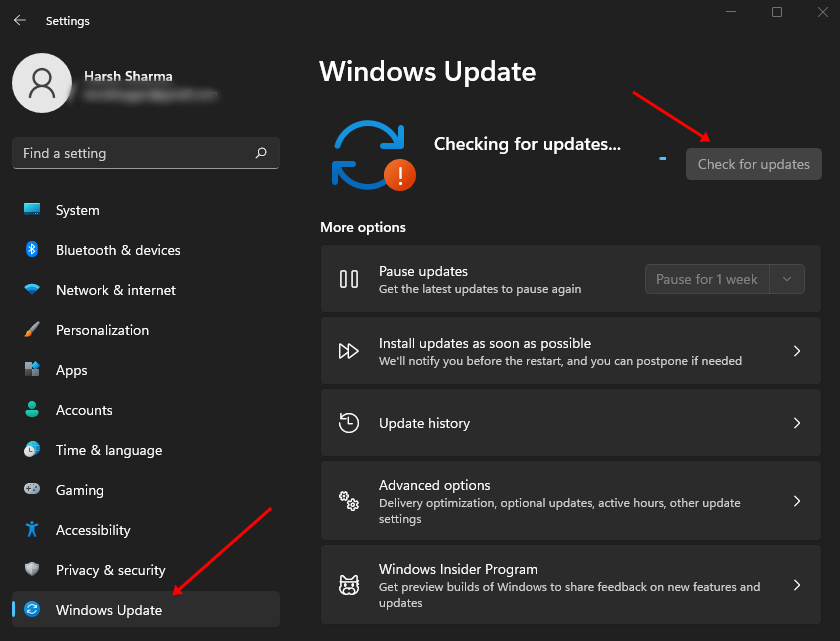
- Here, on the left sidebar, click on Windows Update.
- On the right side, click on Check For Updates to scan your PC for updates.

- Download and install the update for DirectX 12 Ultimate.
- Once done, you can restart your PC.

2. Through the Installer
If you didn’t find the update for DirectX 12 Ultimate, then you can use the installer to install it on your PC. You can use this method when the update is not found in the Windows Update, even if you have a compatible graphics card. To do so, follow the steps given below-
- Click on this link to head to the download page of DirectX 12 Ultimate. DirectX 12 will automatically start downloading when you click on this link; if not, you can also download it manually.
- Now, open File Explorer by pressing the Windows + E key combo.
- Head to the location where the downloaded file has been saved. Double-click on the file to run the installer.
- Follow the on-screen instructions to install DirectX 12 Ultimate on your PC.
How to Check which DirectX Version is Installed on your PC?
If you want to confirm which DirectX version your PC has, whether DirectX 12 Ultimate has been installed or not, then you can follow the steps given below to do so-
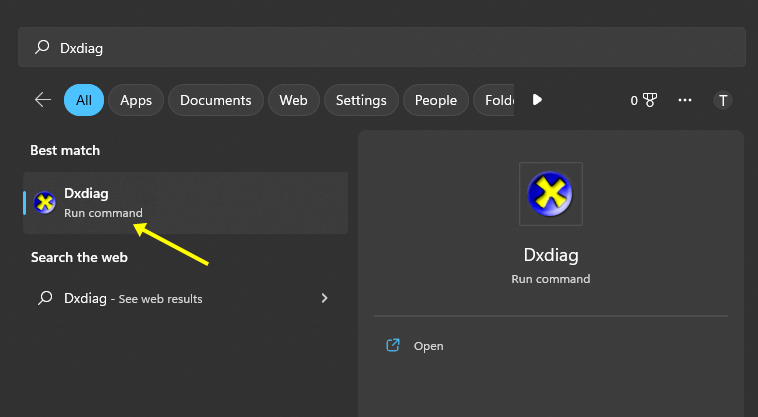
- Press the Windows key on your keyboard, search for Dxdiag and open it. This will open the DirectX Diagnostic Tool.

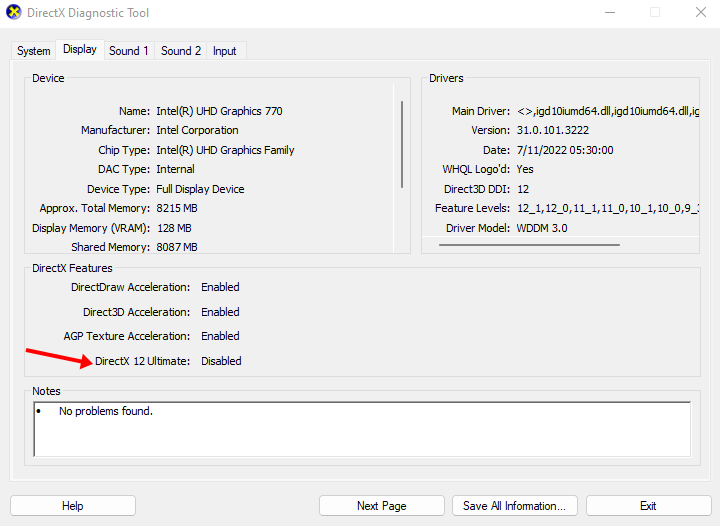
- Under the Display tab, you will find the version of DirectX installed on your PC.

Final Words
In the end, you can easily install DirectX 12 on your Windows PC if you have a compatible graphics card. This article will offer download links and other documentation of DirectX 12 Ultimate. If you face any problems while downloading and installing, let us know in the comments.


