If you spend most of your time at a computer or laptop for work, especially at night, you will likely experience eye strain and fatigue. So, the Windows Night Light feature can protect your eyes because it reduces the amount of blue light from the display.
Blue light from the computer screens can harm your eye and disrupt your sleeping pattern. Most of you already know that exposure to blue light emitted from screens can disrupt the production of the sleep hormone melatonin, leading to various health problems.
If your Windows night light feature is not working then you must read this article. We have researched this topic and made an effective list of methods that are 100% working and will definitely solve your problem.
Best Ways to Fix Night Lights Not Working in Windows
Here, we have provided the best methods to fix the Night Light feature not working in Windows 10 and Windows 11. To get rid of this problem make sure you read the entire article thoroughly.
1. Check Night Light Strength
If you’ve set a time for Night Light, and it’s still not working, check its capability. Sometimes, the Night Light strength is not set to an appropriate level, which can cause this issue.
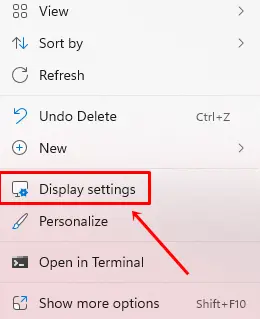
- Right-Click on the Desktop and Select Display Settings.

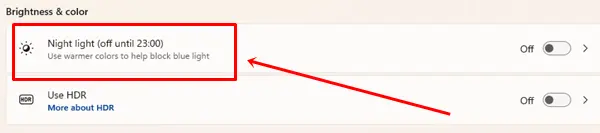
- Click on the Night Light option.

- Now adjust the Strength of the night light as per your need and if you want the night light now then click on the Turn on Now button.


2. Check Night Light Schedule
If the Night Light feature isn’t working even though it’s on, it could be because of a previously set schedule. Let’s suppose you have already set the schedule for Night Light from 10 pm to 5 am, and you are trying to turn it on at 9 pm, then it will not work. To fix this issue, follow the steps below.
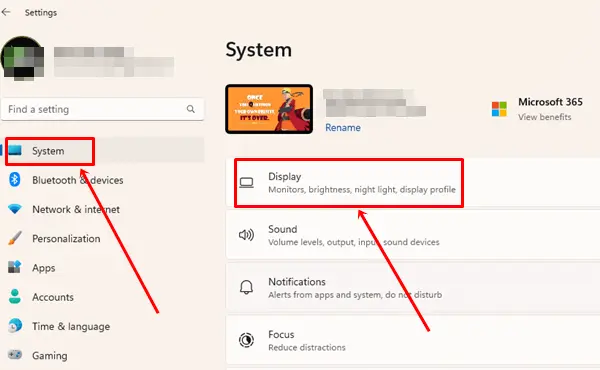
- Press the Windows button on the keyboard and click on the Settings option. You can also press Windows+I to directly open the Display Settings.

- Click on System > Display.

- Now, Select the Night Light option.
- Turn on the scheduled Night Light toggle button and set the hours according to your preference.

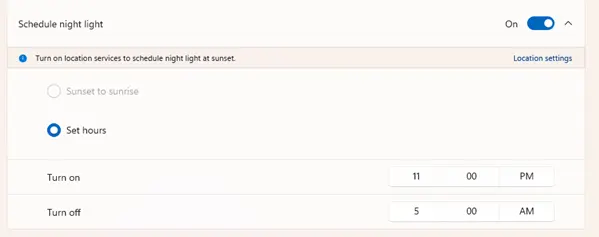
You can also choose the Sunset to Sunrise option, which will automatically turn on Night Light mode at 6:35 and turn it off at 5:29. If it is grayed out like in the above screenshot then follow the methods given below.
3. Check Your PC’s Time Settings
If you have set Night Light to automatically turn on and off, then the wrong timing could be causing this problem. If the time on your PC is incorrect, follow these steps:
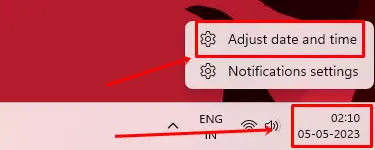
- Go to the Taskbar and Right-click on the Time and Date option. Then, select Adjust date and time.

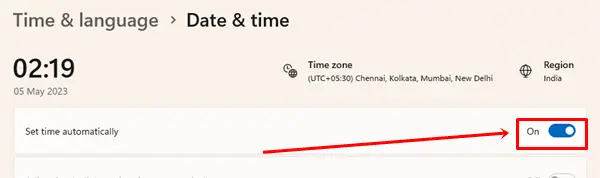
- Click on the Toggle button to turn on the Set time automatically option.

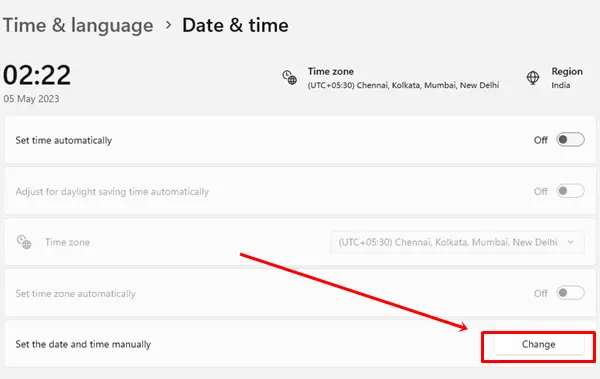
- If you want to set the date and time manually, click on the Change button next to Set the date and time manually. Make sure you have turned off the Set date and time automatically option to set it manually.

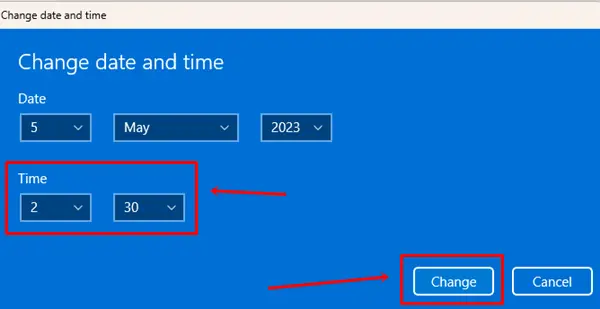
- Now set your preferred time and click on the Change button.

4. Enable Location Service
For those who have set the Night Light feature to the Sunset to Sunrise option, then the location should be enabled. When your location is disabled, the Sunset to Sunrise option is grayed out.
If you are manually enabling the Night Light option then you can skip this method as in this case, you won’t need to enable the Location option.
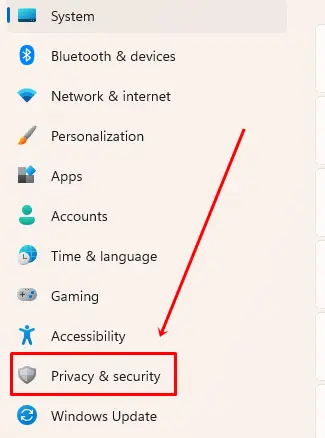
- Press Windows + I to go to settings and click on Privacy & Security.

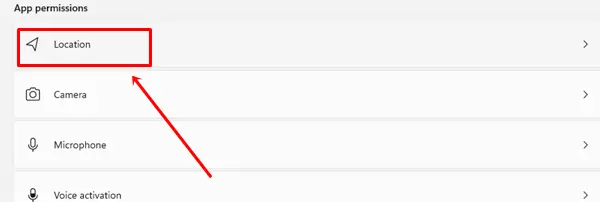
- Scroll down and click on Location.

- Now, click on the Location Services toggle button to turn it on.

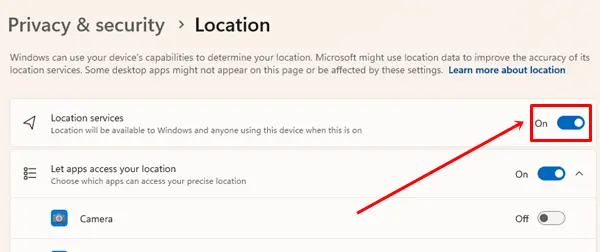
After turning it on, you will see that the sunset to sunrise option is no longer grayed out.
5. Update Your Graphics Drivers
Corrupted and outdated graphics drivers can cause this problem. So make sure you have the latest version of your graphics drivers. If you don’t know how to update your graphic drivers, follow the steps below.
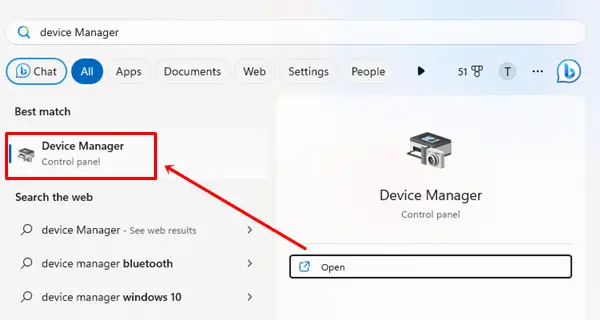
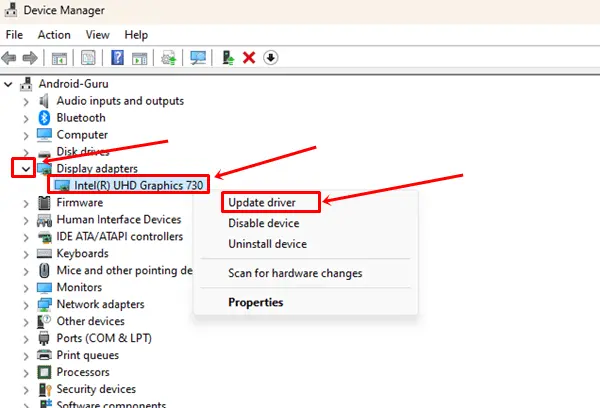
- Press the Windows button and search Device Manager then click on it.

- Now, click the arrow next to Display Adapters to expand the category, right-click on Graphics Driver and, click on the Update Driver option.

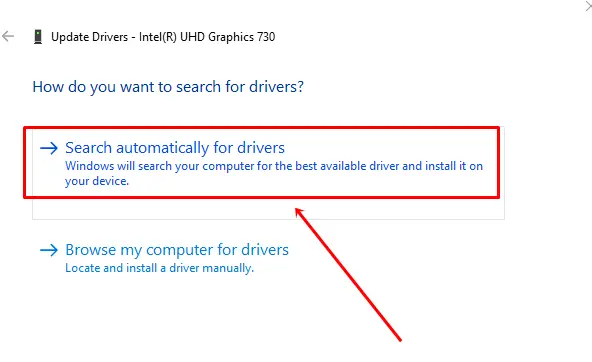
- Select Search automatically for the driver. Windows will automatically download and install the driver on your computer if it’s outdated.

6. Reinstall The Graphics Drivers
If updating the driver doesn’t solve the problem, you can try reinstalling the graphics driver, which may solve the problem. To do follow the steps.
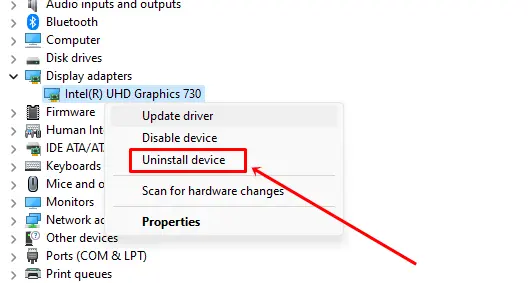
- Go to Device Manager and expand the Display Adaptor category.
- Right Click on Graphic driver and select uninstall driver option.

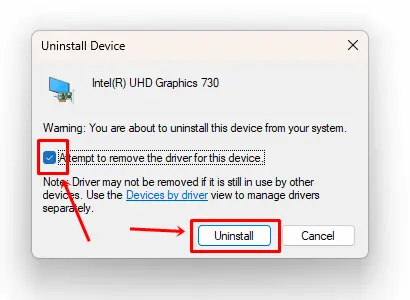
- Select Attempt to remove the driver for the device option and click on Uninstall button.

After uninstalling the driver, restart your computer. Windows will automatically install the missing graphics driver upon restart, or you can download it from the Internet. To download drivers online, here are some brand links: Intel drivers, Nvidia drivers, and AMD drivers.
7. Reset Night Light Settings
If none of the methods work or the Night Light feature is completely grayed out, you can reset the Night Light settings from the Registry Editor.
Note: Making changes to Registry Editor can corrupt your Windows system, so it is important to back up the registry before resetting Night Light settings.
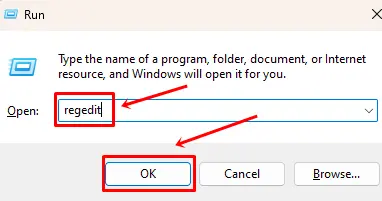
- Press Windows+R to launch Run and type Regedit and click on the OK button.

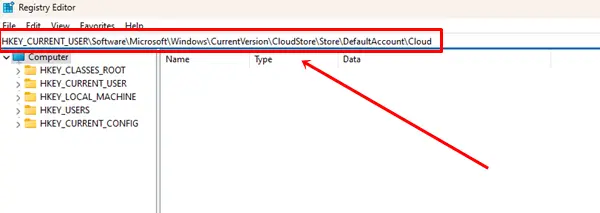
- Copy the below link and paste it into the registry address bar and hit enter.
HKEY_CURRENT_USER\Software\Microsoft\Windows\CurrentVersion\CloudStore\Store\DefaultAccount\Cloud.

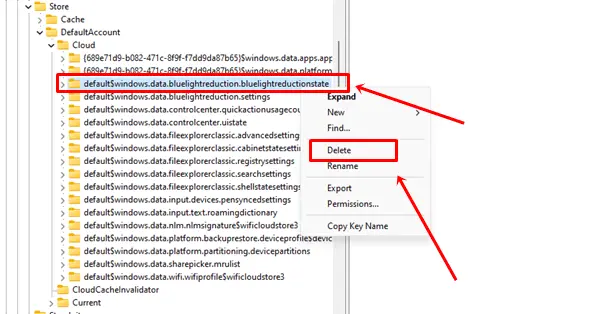
- Locate two folders named:
default$windows.data.bluelightreduction.bluelightreductionstate
default$windows.data.bluelightreduction.settings. - Right-click on these folders one by one and click on the Delete button.

Now, restart your computer and try the Night Light feature again.
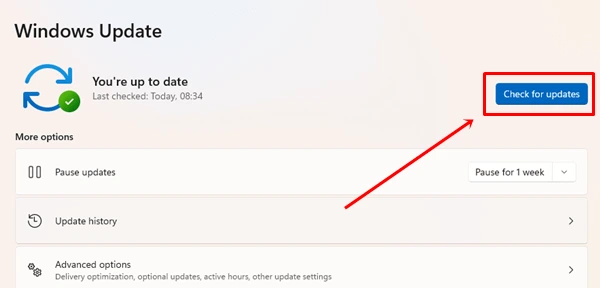
8. Check for Windows updates
Lastly, if you are still facing this problem and none of the methods are working, then updating Windows is your last option. If you are using an older version of Windows, update it because Windows Updates can fix bugs and also resolve issues with the Night Light feature.
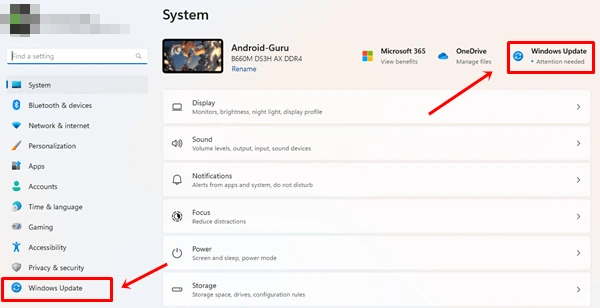
- Go to Windows Settings and click on Windows Update.

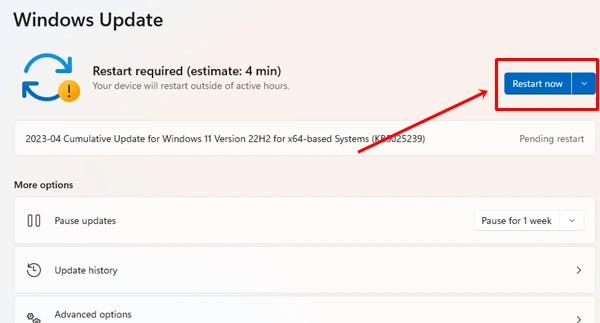
- Select the Check for Updates option. It will begin downloading the latest version of Windows, if available.

- After successfully downloading, click on the Restart button to start installing the update.

Conclusion
All these methods are working and useful to fix Night Lights Not Working in Windows. I hope you found this article helpful and your night light problem got resolved. You can use these methods very easily on Windows 10 and Windows 11.
Let us know in the comment section if you have successfully resolved your issue or have any questions regarding this guide.


