Libraries folder in the File Explorer lets you access various folders like Music, Videos, Camera, and Saved Pictures. You can also add other folders to the Libraries folder you think are important to you. Adding more folders to the Libraries won’t add to the storage but will help you easily access it.
When you switch or upgrade to Windows 11, you may not find this folder in the File Explorer, but that doesn’t mean it is not there. Like Windows 10, the Libraries folder is hidden by default. The good news is, that you can easily unhide the Libraries folder in Windows 11.
This article discusses the steps to help you show or hide the Libraries folder in Windows 11. Above all, we will also discuss the steps to help you add more folders to the Library folder in Windows 11.
Also Read- Fix Blue Screen of Death (BSOD) Error in Windows 11
Show or Hide Libraries Folder in Windows 11
Given below are the steps to show or hide the Libraries folder in the Windows 11-
1. Show Libraries Folder
If the Libraries folder is hidden by default in Windows 11, then you can follow the steps given below to unhide it-
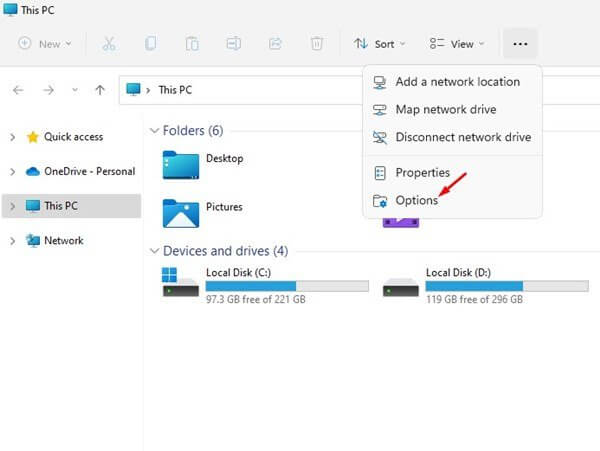
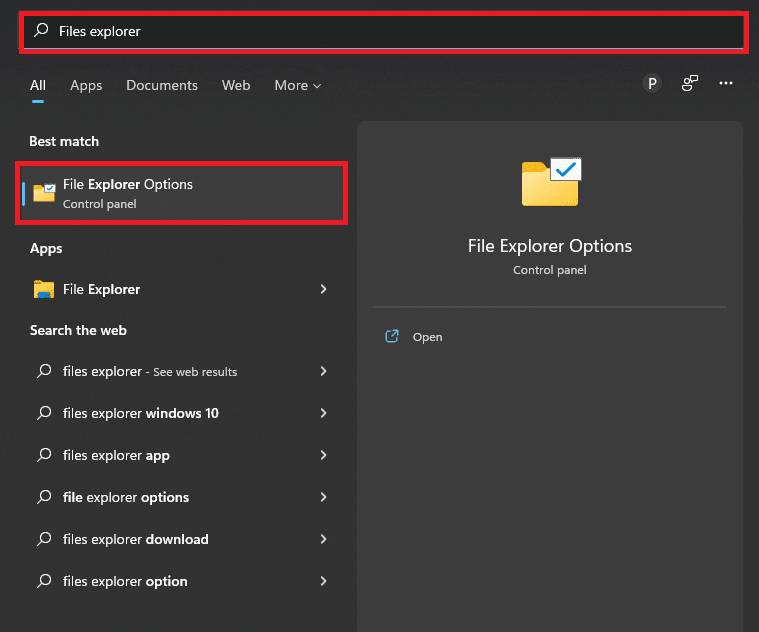
- Open Start Menu, search for File Explorer Options and open it.

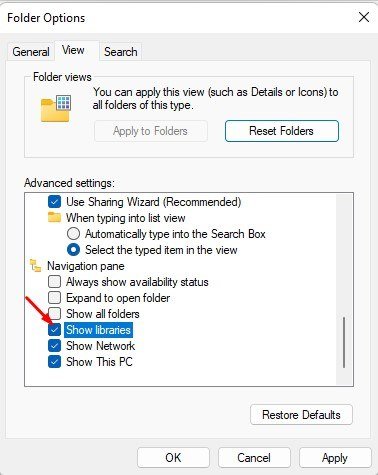
- Here, click on the View tab.
- Under the Advanced Settings tab, check the checkbox for Show Libraries.

- Click on Apply and then on OK to save the changes.
- Now open File Explorer by pressing the Windows + E key combo, and you will find the Libraries folder on the left sidebar.


2. Hide Libraries Folder
If you want to hide the libraries folder from the File Explorer in Windows 11, you do have the option to do that as well. Given below are the steps to help you hide the Libraries folder in Windows 1-
- Press the Windows key, and then search for and open File Explorer Options.

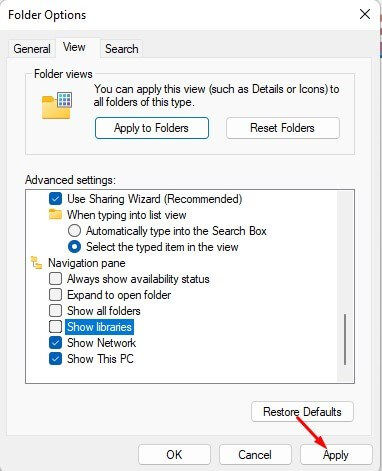
- Head to the View Tab.
- Under the Advanced Settings section, uncheck the checkbox for Show Libraries.

- Once done, click on Apply and OK to save your changes.
3. Add or Delete Folders in Libraries Folder
As we discussed, you can also add you’re essential folders to the Libraries folder. To do so, follow the steps given below-
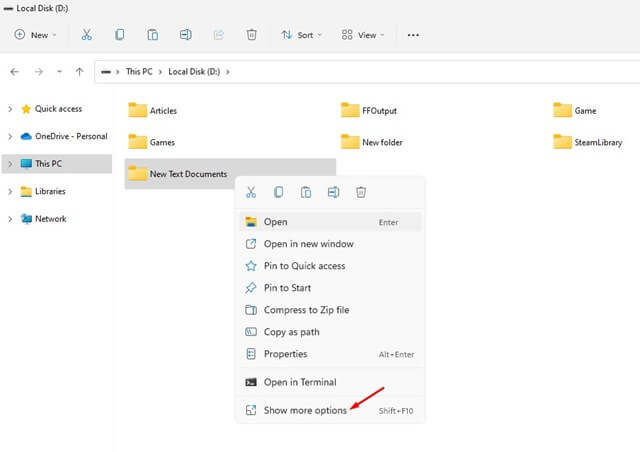
- Press the Windows + E key combo to open File Explorer. Here, head to the folder location you want to add to the Libraries.
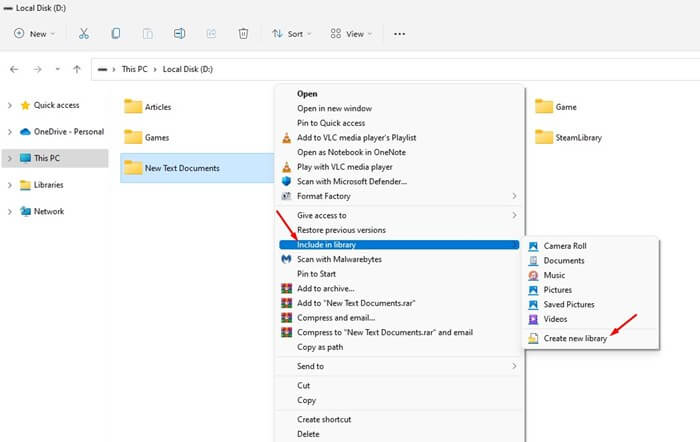
- Right-click on the folder. Then, click on Show More Options > Include in Library > Create New Library.


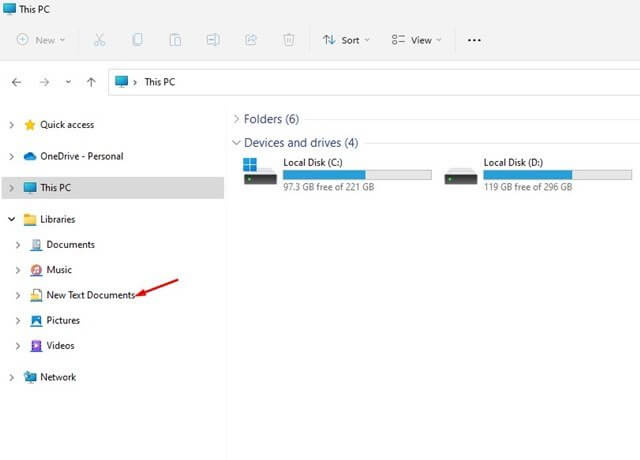
- Once done, you will find the folder in the Libraries folder.

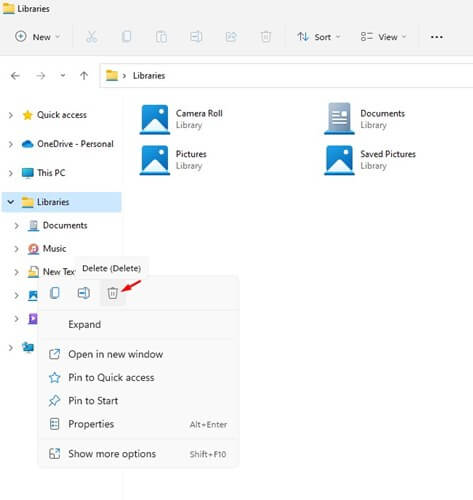
In case you want to delete the folder added to the libraries, then follow the steps below-
- Open File Explorer on your PC
- Right-click on the folder in the Libraries, and then click on the Delete icon.

Conclusion
This article discusses a step-by-step guide to help you show or hide libraries folder on Windows 11. Moreover, we have also discussed how you can manually add or delete the folders in the libraries folder.


