TLS (Transport Layer Security) 1.2 is an internet security protocol usually designed to secure a user’s data when transferred over the network. It secures the information and data between clients and the server side. These will help you protect against various online malware, spyware and viruses.
You can enable TLS 1.2 on your Windows PC within a few steps. However, before you enable this feature, you must check what version of TLS is present on your Windows. This article will guide you through the complete process to check and enable TLS 1.2 in each Windows Edition, such as Windows 11, 10, 7, 8 Server 2019, and Server 2016.
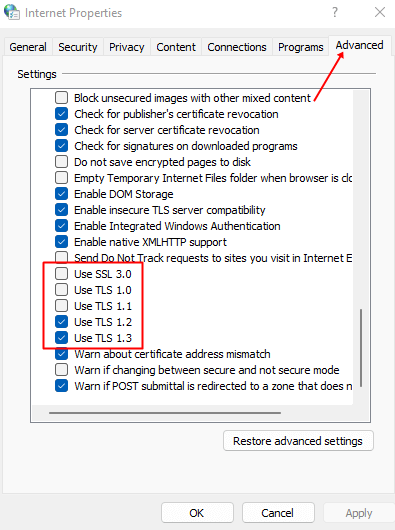
Check Version of TLS Used in Windows
The user can also check which TLS Protocol is used in their system. For that, the steps are given below –
- Press the Windows key on your keyboard, search for Internet Properties and open it.
- Here, click on the Advanced button.
- Check which TLS Protocol is used by the checkboxes scrolling down that window.

Ways to Enable TLS 1.2 on Different Windows
The process to enable TLS 1.2 can differ for various Windows versions. Let’s discuss how you can enable TLS 1.2 on Windows 11, 10, 7, and various others-
1. For Windows 11
To enable TLS 1.2 on Windows 11, follow the steps given below-
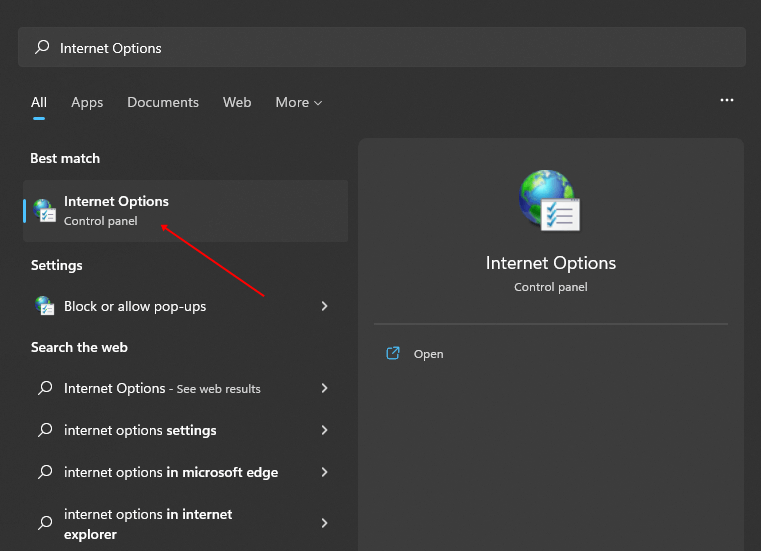
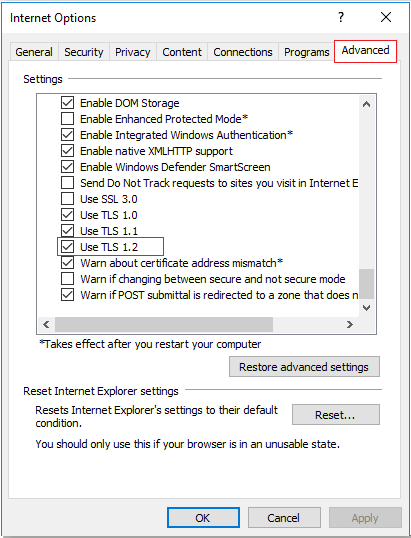
- Open the Start Menu, search for Internet Options and open it.

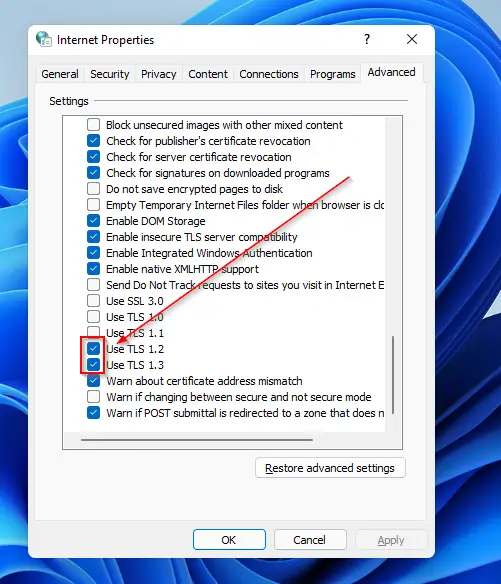
- Here, head to the Advanced tab, and search for TLS. Check the checkbox for TLS 1.2.
- Click Apply and then click on OK to save the changes.

- Now, restart the browser, and TLS 1.2 will be enabled.
2. For Windows 10
To enable TLS 1.2 version in Windows 10, follow the steps given below-
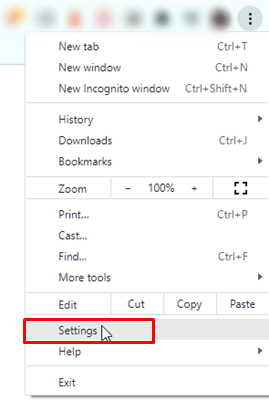
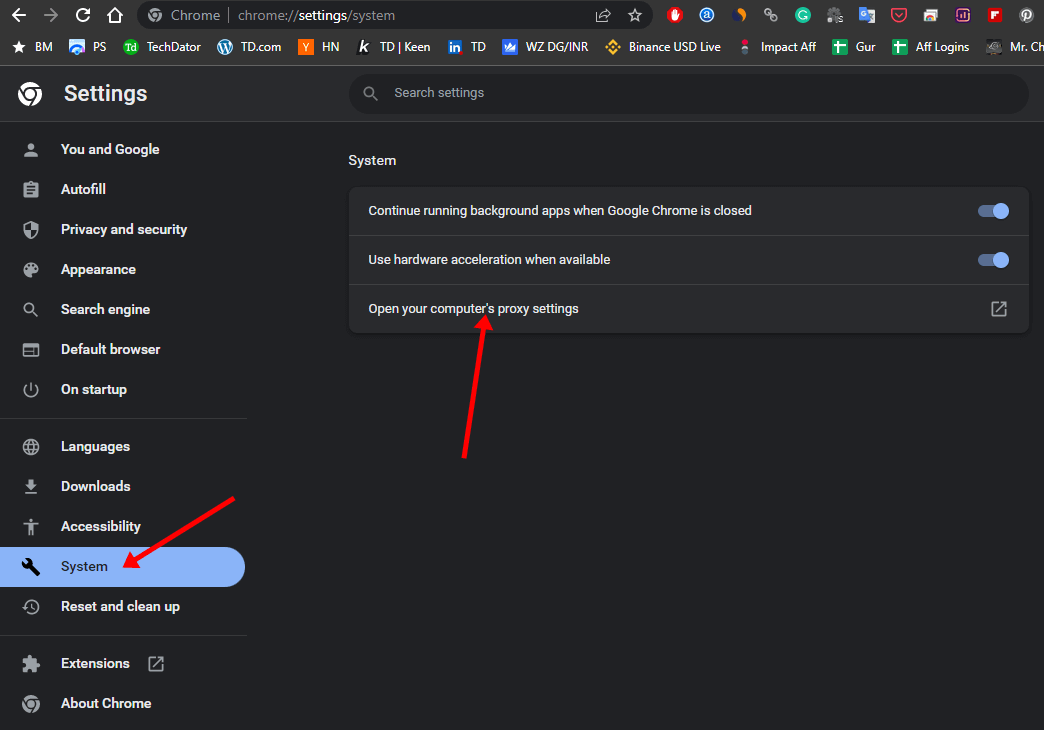
- Launch the Google Chrome on your PC.
- Click on the three dots at the top right corner, and select the Settings option.

- Here, click on the Advanced option. Then scroll down and select the System option.
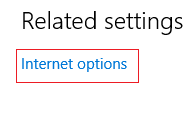
- Then, select the Open your computer’s proxy settings option and click on the Internet options.


- Under the Advanced tab, select the Security option.
- Now check the checkbox for Use TLS 1.2 checkbox.

- Click Apply and then on the OK button.
- Once done, relaunch the Google Chrome Browser, and the issue will be fixed.
3. For Windows 7
Given below are the steps to enable TLS 1.2 on Windows 7. Before proceeding with these steps, take a backup of your registry.
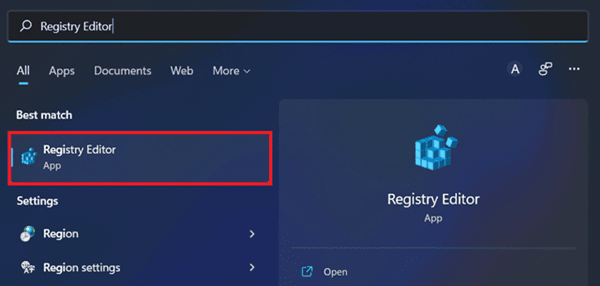
- Press the Windows key and search for Registry Editor and open it.

- Head to the following address-
-
HKEY_LOCAL_MACHINE\SYSTEM\CurrentControlSet\Control\SecurityProviders\SCHANNEL\Protocols
-
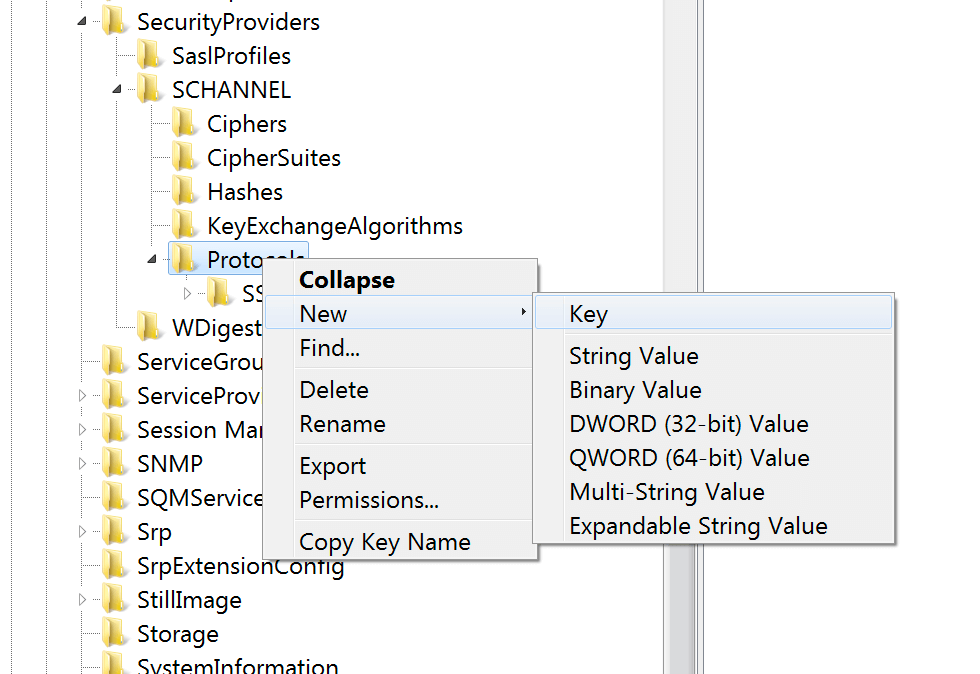
- On the left sidebar, right-click on the Protocols, click on New and select the Key option.

- Rename the new key you created as TLS 1.2.
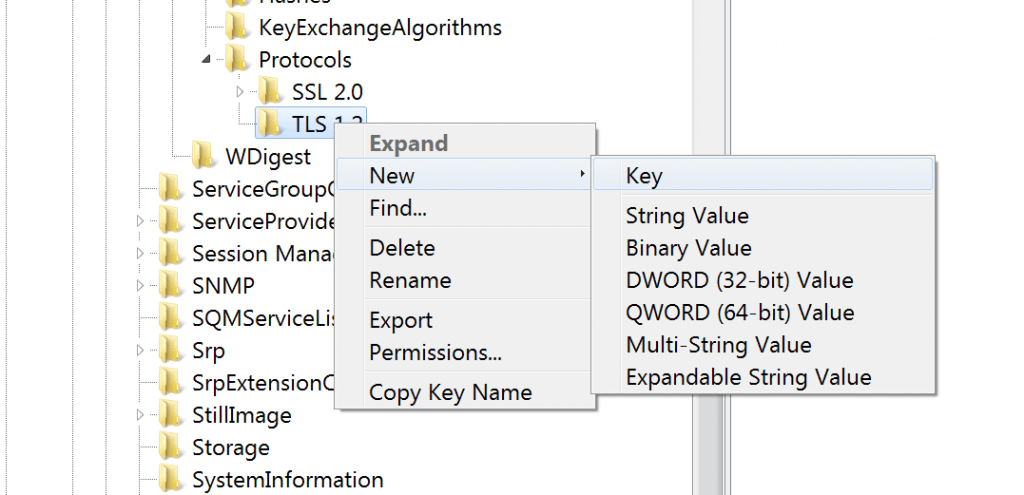
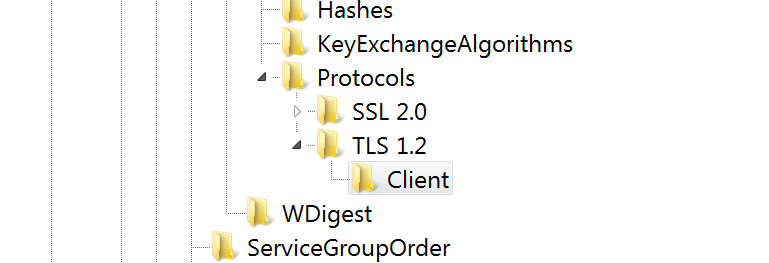
- Now, right-click on TLS 1.2, click on New, and then on Key.

- Rename the new key created as Client.

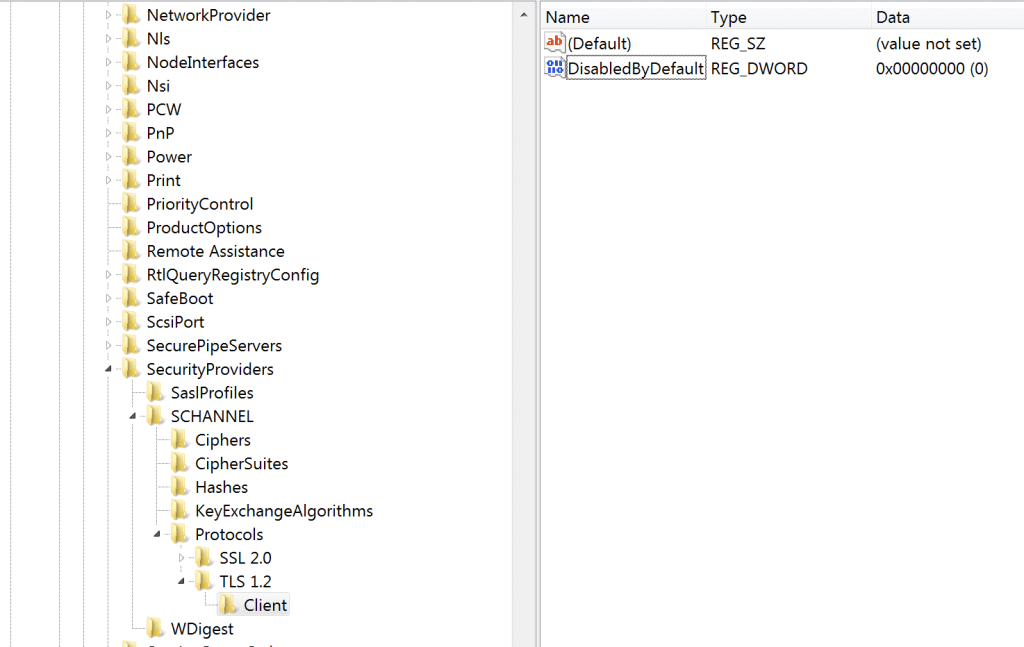
- Right-click on Client, click on New, and then on DWORD (32-bit) Value.
- Change the name of the new DWORD name to Disablebydefault

- Once done, close the Registry Editor and restart your PC.
4. Windows Server 2019
The steps to enable TLS 1.2 on Windows server 2019 are as follows-
- Press the Windows key+R combo, type Regedit and hit Enter.
- Head to the following address –
-
Computer\HKEY_LOCAL_MACHINE\SYSTEM\CurrentControlSet\Control\SecurityProviders\SCHANNEL
-
- Then, right-click on the right pane, select the New option, and click on Key.
- Rename the new key to TLS 1.2
- Right-click on TLS 1.2 and then on New, and then select Key. Name the key as Client
- Then, right-click on the Client, select the New option, and click on DWORD(32-bit) Value.
- Set DisableByDefault as the name of DWORD.
- Double-click on the DWORD you created to edit it.
- Here, set the base as Hexadecimal and change the Value Data to 0.
- Again right-click on Client, click on New, and then on DWORD (32-bit) Value. Set its name as enabled.
- Double-click on it to edit it. There, make sure the base is set as hexadecimal and assign the Value Data as 1 and click on OK.
- Do the same for the server key.
- Lastly, close the Registry Editor and restart your PC.
5. Windows Server 2016
For enabling TLS 1.2 on Windows server 2016, follow the steps given below-
- Firstly open the Registry Editor on your PC.
- Navigate to the following address-
-
Computer\HKEY_LOCAL_MACHINE\SYSTEM\CurrentControlSet\Control\SecurityProviders\SCHANNEL\Protocols
-
- There, right-click on the right pane. From the menu that opens up, click on the New option and then click on Key.
- Rename this new key to TLS 1.2.
- Then, again right-click on the empty right pane and, this time, create two new keys. Name one of them as a Client and the other one as a Server.
- Right-click on the Client key, click on New and select the DWORD(32-bit) value option.
- Rename the DWORD to the DisabledByDefault.
- Double-dir. There, ensure that the base is set to hexadecimal and the value is set to zero.
- After this, create another DWORD file and rename it as Enabled.
- Ensure that the base is hexadecimal and set the value to 1.
- For Server Key, repeat the above steps and assign the same values.
- Now, restart your PC, and TLS 1.2 should be enabled.
Conclusion
These were all ways to enable TLS 1.2 on all Windows versions, such as Windows 11, 10, 7, Server 2019, and Server 2016. Moreover, we have also discussed how you can check which version of TLS is supported on your PC.


