There are so many users of Nvidia Graphics cards around the world. Many users have seen Nvidia Control Panel Not showing issues in Windows 10. With the Control panel, the users can control the properties of the Graphics card installed on their PC.
But, the users have been facing the issue of not showing the control panel in the Desktop Context menu or Start menu. Here, we will show you the solution to fix this problem. The Nvidia control panel should always work, as it is the only way to change the properties of the Graphics card.
Causes of Nvidia Control Panel Error
Multiple reasons can cause the NVIDIA Control Panel missing on Windows 10 error. Let us see the causes of this error.
- There might be an issue with your graphics card driver. For example, there can be corrupted driver files, out-of-date drivers, or compatibility problems.
- If you have recently updated to Windows 10, then the graphics card driver might not be compatible with the system.
- The registry entries in your PC might be wrong or missing.
- The NVIDIA Control Panel itself can be corrupted.
These are the possible causes, but don’t worry; we have the best methods to solve NVIDIA Control Panel missing error on the Windows system.
Best Ways To Fix NVIDIA Control Panel Missing
The following procedures cover both fundamental fixes and more complex methods. Do not skip the advanced ones if the easier ones do not help to restore back your missing NVIDIA Control Panel.
1. Restart NVIDIA Services
Sometimes, the NVIDIA Control Panel goes missing from the Desktop context menu and System Tray. At this time, you can restart the Nvidia services. Follow the steps to restart the services on the PC:
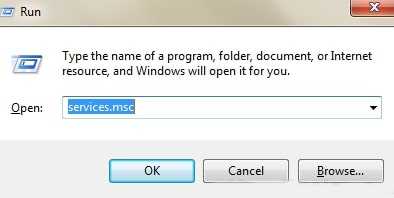
- First of all press Windows + R keys and open the Run box

- Type services.msc in the box and click on OK.
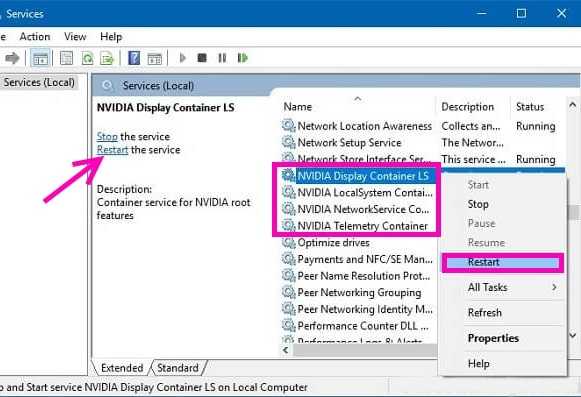
- The Services window will be opened; there, you will see all the running services on the PC.
- Scroll down and search for Nvidia services

- Select each Nvidia service and click on the Restart option.
- Once you finish restarting all four services, check if you can see the control panel in the desktop context menu or system tray.
2. Unhide the NVIDIA Control Panel
This is the standard method you must try before trying any other way.
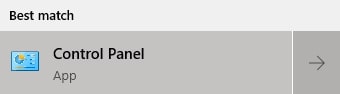
- In the taskbar, go to the search menu and look for Control Panel.

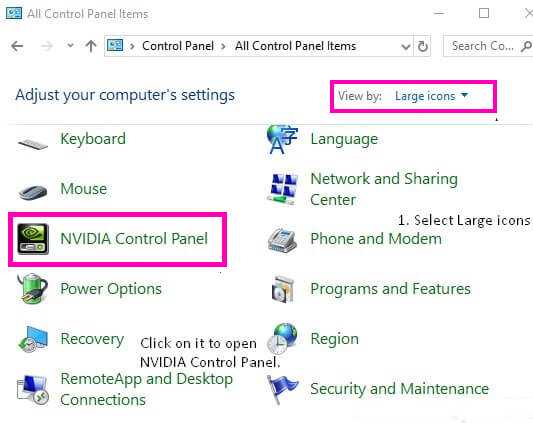
- Launch the app and click on the view mode option on the right side
- There select view “large icons” options.

- After that, scroll down and click on Nvidia Control Panel.
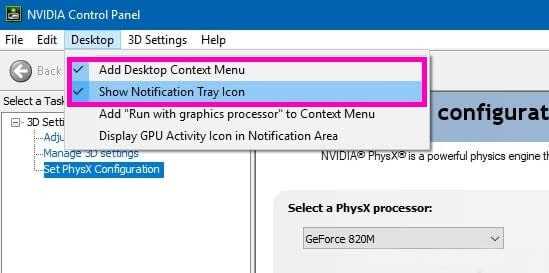
- Once it is open, click on the Desktop menu.

- Under the Desktop option, make sure there is a checkmark next to Add Desktop Context Menu and Show Notification Tray Icon.
- If the checkmark is not there, click on the options.
- Now, close the panel and try to open it by doing right-click on your desktop.
3. Open Control Panel Manually
You can try to launch the Nvidia Control Panel on your system manually.
- Do right-click on your taskbar and select Task Manager to open it. ( You can also use the shortcut Control + Shift + Esc)
- Scroll down and look for Nvidia Container. You will see multiple ones with the same name.

- Right-click on any Nvidia Container processes and click on the Open file location option.
- The File Explorer will open the following location:
C:\Program Files\NVIDIA Corporation\Display.NvContainer
- There click on Nvidia Corporation.
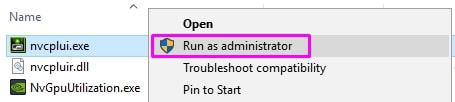
- Now, double-click on the Control Panel Client folder and look for nvcplui.exe
- Do right-click on nvcplui.exe on the file and select Run as administrator. If it asks, then enter your account password.

- Now, check whether the Nvidia Control Panel is shown in the system or not.

4. Reinstall Nvidia Control panel App from Microsoft Store
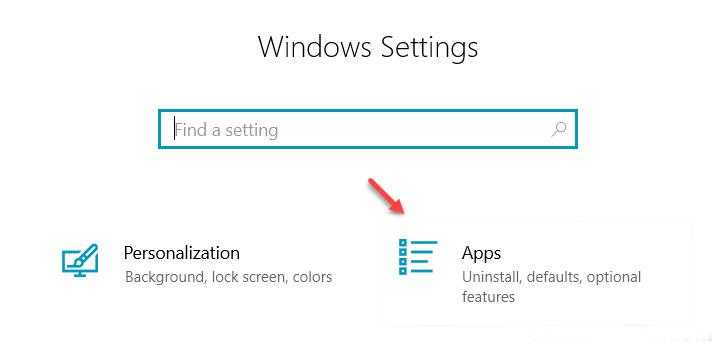
- Click on the Start button and open Settings.
- Now click on Apps.

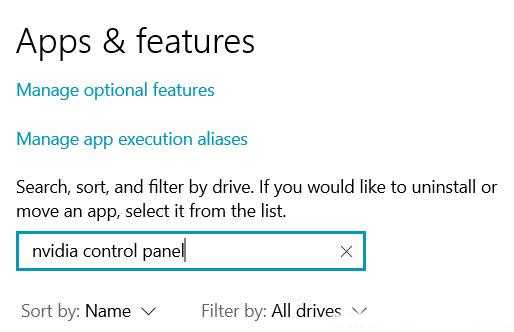
- From the left menu, click on Apps & Features.
- In the search box, type Nvidia Control Panel and search.

- If the Nvidia Control Panel is installed in your system, uninstall it.
- Now, go to Microsoft Store and install Nvidia Control Panel.
5. Use NVIDIA Support
Some of the users got the error repeatedly, so NVIDIA support provided a permanent solution to solve the error. Try out this method by following the steps:
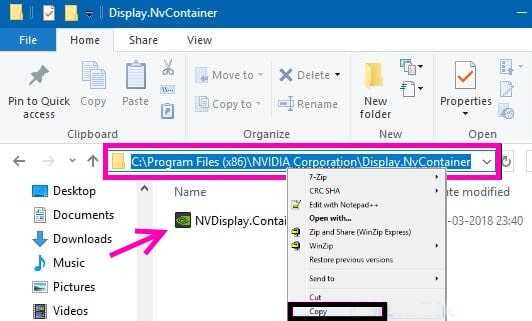
- First, open My Computer and then go to Program Files (x86) >> NVIDIA Corporation >> Display.NvContainer. (If you don’t get the Nvidia folder in program files (x86), search in the Program Files folder.)
- In the Display.NvContainer folder, you will see a file named Display.NvContainer.
- On that file, do right-click and click on the Copy option.

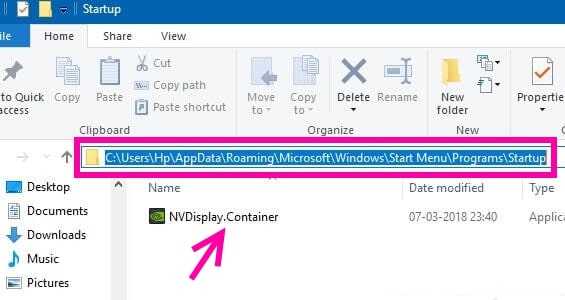
- Now, open the Startup Folder by pressing Windows + R keys and open Run Box.
- There type shell: startup and click on OKK.

- As the startup folder is opened, right-click and paste the copied file.

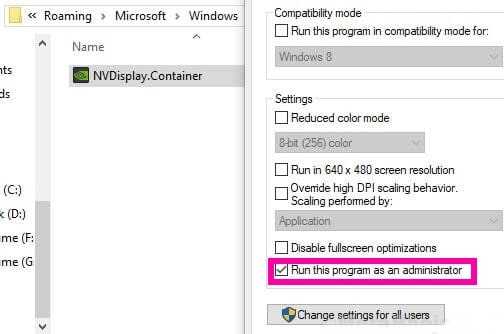
- Do right-click on the Display.NvContainer file, which you pasted in the Startup folder and clicked on Properties.
- In Properties, go to the Compatibility tab.
- You will see Run this program as administrator. Click on it, and checkmark the option.

- Click on change settings.
- Once you complete these steps, restart your PC and see NVIDIA Control Panel is back.

So, these are the few methods that will help you to solve the NVIDIA Control Panel missing issue on a windows computer. We hope this article was helpful to you. Let us know in the comment section if you have any other way to fix this.


