Gdi32full.dll is a DLL file part of the Microsoft Graphics Device Interface. When this file gets corrupted or is deleted by mistake, you may get Gdi32full.dll missing or not found error. The full error message may read-
“This application failed to start because gdi32.dll was not found. Re-installing the application may fix this problem.”
If you keep getting this error, this article will help you fix it. This article will mention various troubleshooting steps to help fix Gdi32full.dll missing or not found errors in Windows 11.
Fix Gdi32full.dll is Missing or Not Found Error in Windows 11
If you keep on facing Gdi32full.dll missing or not found an error in Windows 11, then you can follow the steps given below to fix it-
1. Perform SFC Scan
The user can run the SFC Scan on their system to fix this error. SFC (System File Checker) is Windows’s built-in tool to scan and fix issues due to corrupted files. To perform the SFC scan, follow the steps given below-
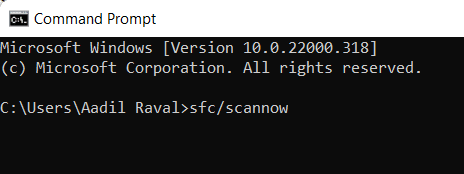
- Go to the Start menu, search for Command Prompt and run it with administrative privileges.
- Here, type the command given below and press Enter to execute it. –

-
sfc /scannow
-
- This will scan your PC, detect the corrupted files on your system, and fix them.
- Once done, restart your PC and check whether the error is fixed or not.
2. Update Graphics Driver
If the above method does not work to fix the error, then the user should try updating the graphics driver. To do so, follow the steps given below-
- Go to the Start menu, search for the Device Manager and open it.
- Then, expand the Display Adapter by double-clicking on it.
- Here, right-click on the Graphics card, and then on Update Driver.

- Now, click on Search Automatically for drivers to update the graphics on your PC.
- Once done, restart your PC and check whether the issue gets fixed or not.

3. Scan your PC for Virus
This error might occur due to the virus on the computer. The virus or malware may delete the file or get corrupted. You can try scanning your PC for the virus to fix the issue.
You can use Windows Security to scan your PC for viruses. This can be done by following the steps given below-
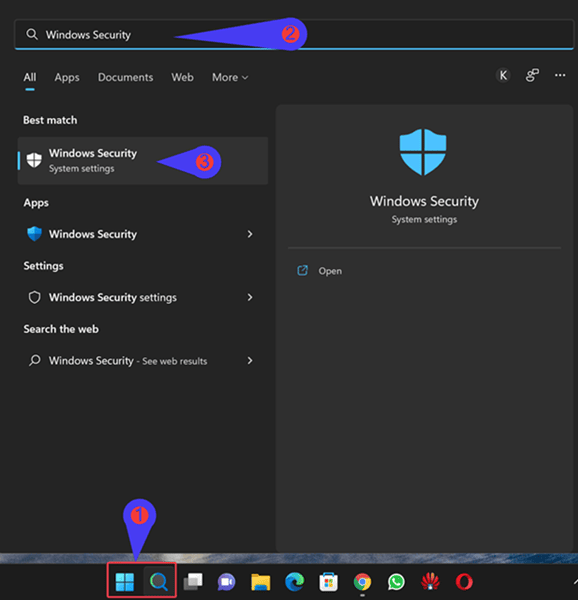
- Open the Start Menu, search for Windows Security and open it.

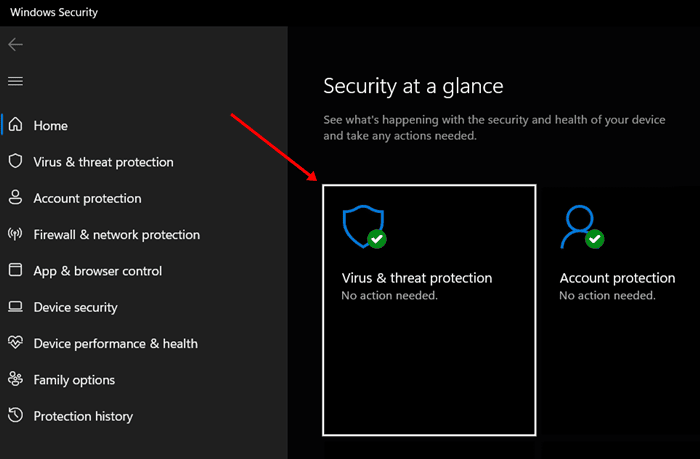
- Here, click on Virus and Threat Protection option.

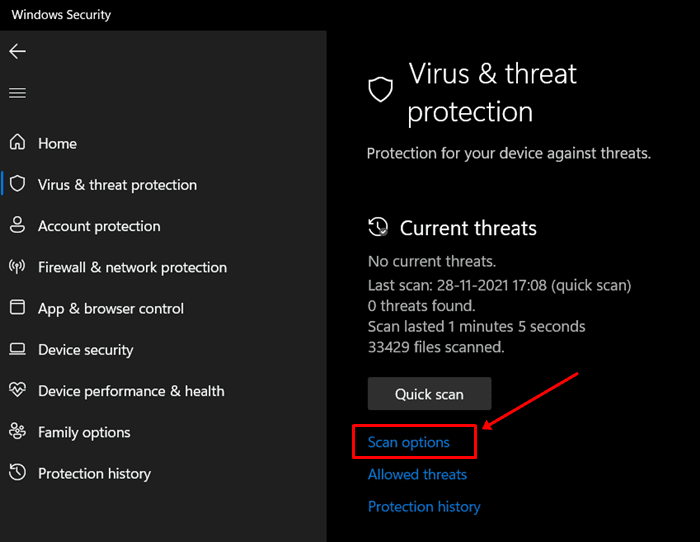
- Click on Scan Options and then select Full Scan. Click on Scan now to run the scan.

- Once done, the issue should be fixed.
You can use any third-party antivirus on your PC to scan your PC for the virus.
4. Update Windows
Windows update brings patches to the bugs. If the issue is caused due to bugs and technical glitches, it may be fixed by updating Windows. To update Windows, follow the steps given below-
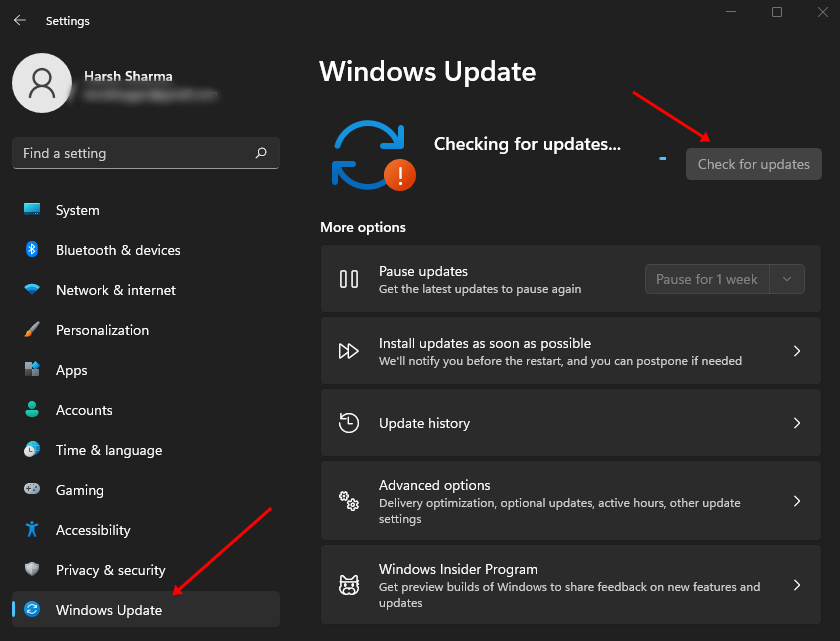
- Open the Settings app by pressing Windows + I key combo.
- Click on the Windows Update from the left sidebar, and then click on Check for updates option.

- Download and install all the updates available here and then restart your PC.
5. Clean Boot your PC
If any third-party services or program is causing this issue, then you can try clean booting your PC. When you clean boot, your PC will start without third-party services and programs. To clean boot, your PC, follow the steps given below-
- Go to the Start Menu, search for System Configuration, and open it.
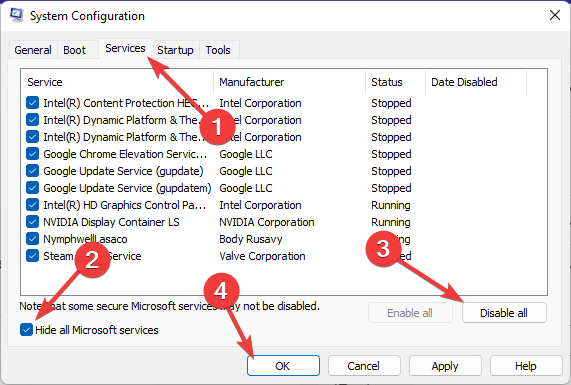
- Here, click on the Services tab.
- Next, click on the check box next to Hide all Microsoft services and then click on the Disable all option.

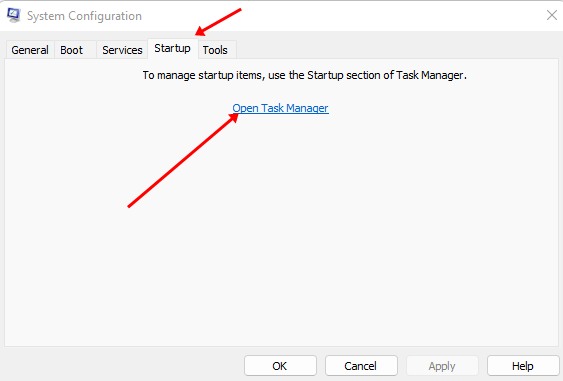
- Now, move to the Startup tab and click on the Open Task Manager.

- Right-click on startup programs here, and then click on Disable. Do this individually for all the startup programs.
- Once the above steps have been performed successfully, restart your PC.
6. Perform System Restore
The last resort will be to perform a system restore. This works if you start facing this issue after making changes to the system. If you face this issue after updating Windows, updating drivers, or making such changes, performing the system restore will fix it.
You need to have a restore point to perform system restore. The restore point must be created before the changes are made to your system. To perform the system restore, follow the steps given below-
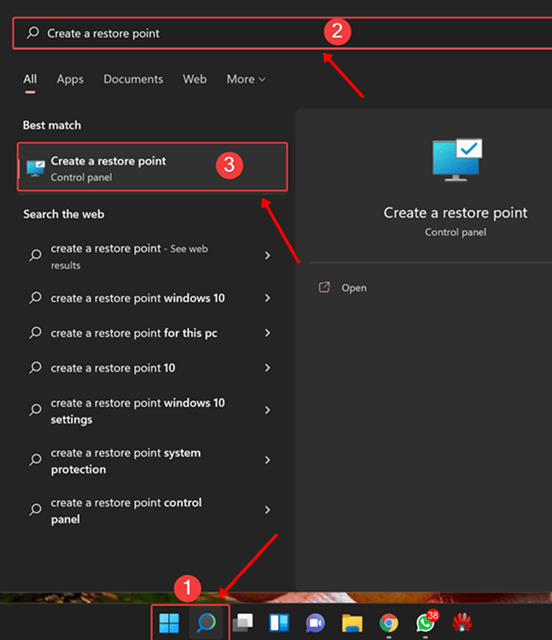
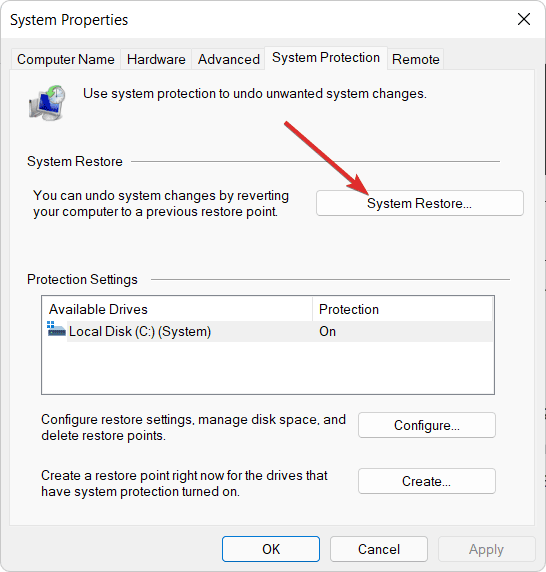
- Open the Start Menu, search for and open Create a restore point.

- Here, click on the System Restore button.

- Click on Next to continue ahead.
- Select a restore point on the next screen.
- If you want to check what programs will be uninstalled and reinstalled, click on Scan for affected programs.
- Click on Next to continue ahead and then finally click on Finish.
- Your system will now be restarted.
- Once the system is restored, the issue will be fixed.
Conclusion
That’s how you can fix Gdi32full.dll missing or not found error on Windows 11. This issue is encountered when this DLL file is missing or corrupted. If you have been facing this issue, then you can follow the steps above to fix this issue.


