The more Microsoft pushes to buy its authentic Windows Operating System, the more cunning users find to get through. If you’re using the trial version of Windows 10 OS, which hasn’t been bought from Microsoft or any other vendor, you’ll be shown the “Activate Windows” watermark in most of the applications you use.
These include the Windows Defender, which protects you, and many other settings that allow for system customization. While unblocking them happens only after paying for the original version, you can remove the “Activate Windows- Go to settings to activate windows” watermark at least. Below we are going to use the windows registry method to remove this watermark. Here’s how to do it;
Steps to Remove Activate Windows Watermark in Windows 10
- Open Registry Editor through Start Menu by typing ‘Regedit‘ in the search box. Click on Registry Editor to open.

- Now, navigate to the
HKEY_CURRENT_USERControl PanelDesktop - Here, click on the “Desktop” folder from the left and open the “PaintDesktopVersion” option from the right window by double-clicking on it.

- Opening it shows a dialogue box, which has the “1” number set in Value data. Change it to “0” and press OK.

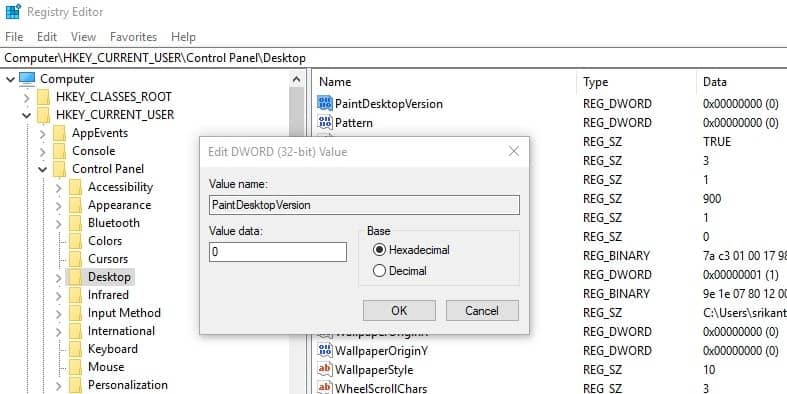
This change removes the Activate Windows watermark in your Windows 10 after restarting your computer.
To note, these changes only removes the watermark prompts and don’t get you the original Windows 10 OS. Users are advised to upgrade to an original Windows 10 OS from either Microsoft or the official third-party vendors to benefit from it.
This including the Windows Defender, which regularly scans and notifies users about any potential risks. Running on the original OS means you can upgrade to the latest software, including new productivity features and security patches from Microsoft.


