As we’ve seen from all the monthly updates from Microsoft updates this year, Windows 10 updates can be daunting sometimes. Issues in beta and preview build like in the Windows Insider program can be justified, as they come with warnings of such. But issues in stable versions?
If you’re using a stable version of the latest Windows 10 or some beta version from the preview channels, realize that you can always roll back to earlier builds if you face any issues. Though Microsoft tries its best to address all the bugs before releasing the update, it’s common that some can sneak in and give nightmares to users.
 The reason for the wake up of most issues is unsupportive firmware. The software builds that your system is running on may not support the OS you wanted to try, thus invoking issues from simple app crashes to ultimate Blue Screen of Death. And if you wanted to avoid that from happening, here’s how to roll back to a supported version;
How to Rollback to Earlier Version of Windows 10?
- Open Settings on your computer.

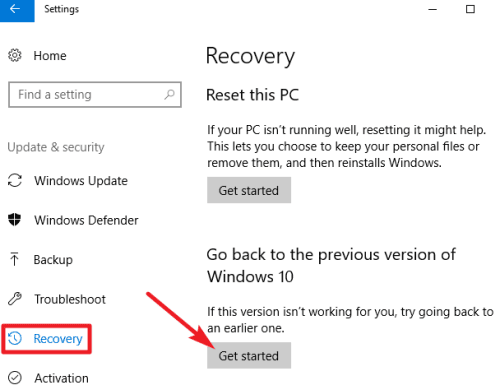
- Click on the “Update & Security” and then on the “Recovery” tab.

- In the right side window, you’ll see the “Go back to the previous version of Windows 10” section and a button of “Get Started” to continue.

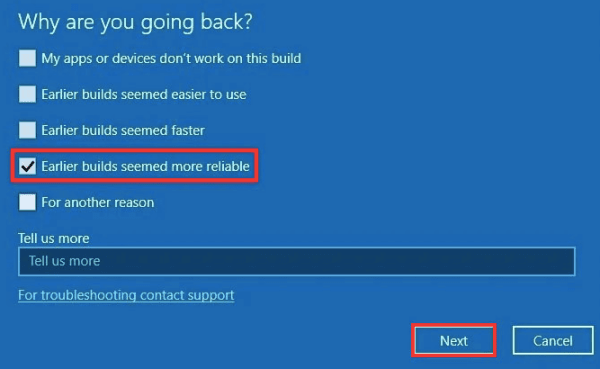
Pressing “Get Started” starts the process, with a dialogue box asking you why you are rolling back.
- Check the relevant reason and proceed by clicking Next.

- Click Next on the following screens until you get the final “Go back to earlier build” button.

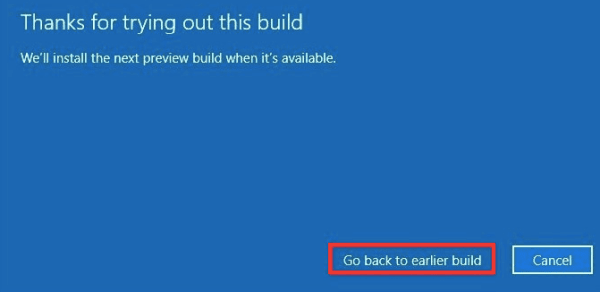
Clicking on it will start the process of reverting your Windows 10 Operating System to an earlier version. You may be asked to restart the computer to adjust all the old settings and featured. Do it when promoted, and you’ll be good.


