Many users have reported facing Dism.exe Error 1392 on their Windows 11. This issue may lead to signs like system freeze, unresponsive Windows, frequent restarts, slow performance, issues with apps, and others.
If it remains unfixed, this error may also cause your system to crash, causing data loss and sometimes hardware failure.
The issue can be encountered for various reasons, including corrupted system files, third-party antivirus, virus infection, etc. There are certain troubleshooting methods that you can follow to fix Dism.exe Error 1392 on Windows 11.
How to Fix Dism.exe Error 1392 on Windows 11/10
To fix Dism.exe Error 1392 on Windows 11, follow the steps given below-
1. Run CHKDSK
The first method to fix the Dism.exe Error 1392 on Windows 11 is to run a check disk to check and fix the disk errors. To do so, the steps are as follows-
- Go to the Start menu, search for the Command Prompt and run it as administrator.
- Execute the following command. Do note the h should be replaced with the drive partition letter.

-
chkdsk /f h:
-
- Once the above steps are performed, the check disk will analyze the disk and fix any issue if encountered.

2. Scan for Virus
You may encounter this error due to viruses on your PC. In this case, you should scan your PC for the virus to fix the issue. You can run the scan using Windows Security by following the steps given below-
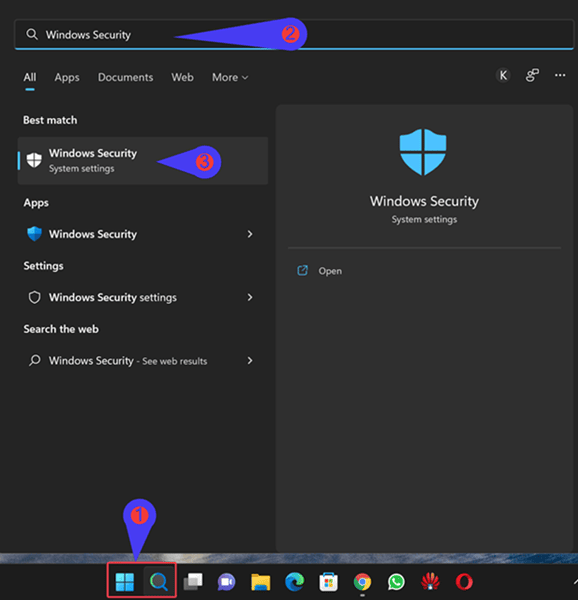
- From the Start Menu, open Windows Security.

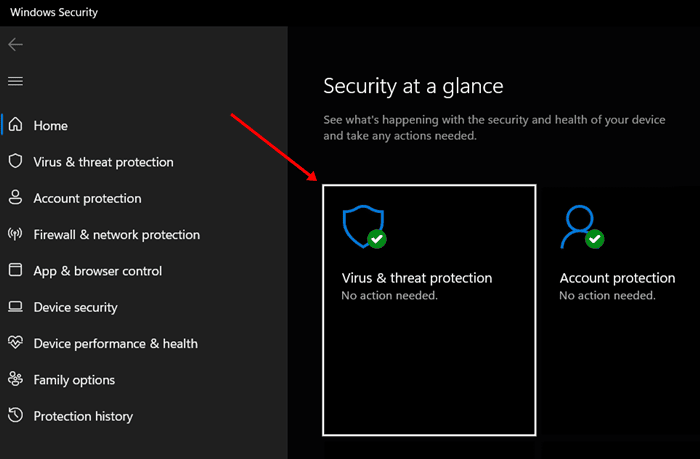
- Here, click on Virus & threat protection.

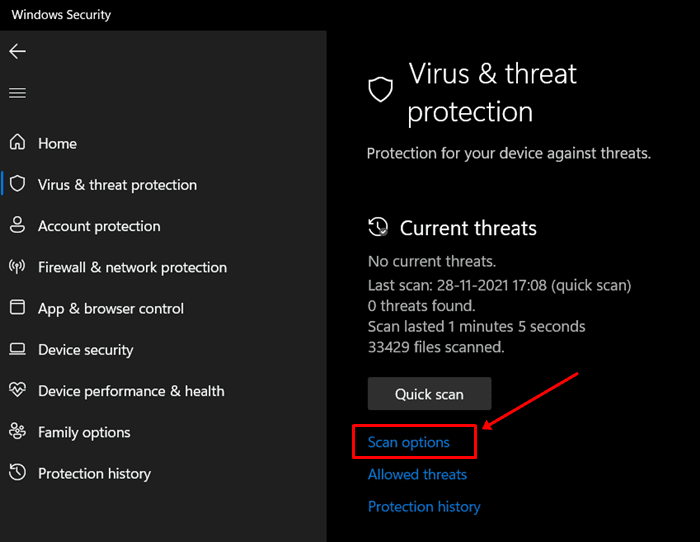
- Click on Scan Options, and then select Full Scan.

- Now, click on Scan Now to run the virus scan.
- Once done, restart your PC and check if you still face the issue or not.
If you have a third-party antivirus installed on your PC, you can use that as well to scan your PC for the virus.
3. Run SFC Scan
As discussed above, you can face this error due to corrupted files. You can try running the SFC scan to fix the issue if encountered due to corrupted files. To run the SFC scan, follow the steps given below-
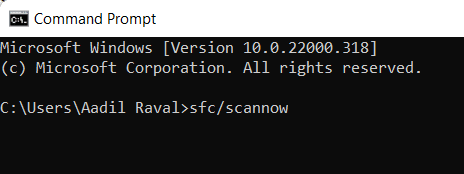
- Press the Windows key, and search for CMD. Right-click on Command Prompt and then on Run as administrator.
- Here, execute the following command-

-
sfc /scannow
-
- This will scan your PC for corrupted files and fix them.
- After the process is completed, close Command Prompt and restart your PC.
- You should now no longer encounter this issue.
4. Update Windows 11/10
Another thing that you can do is update Windows. If the issue is encountered due to bugs, then the latest update may have the patch for it. You can try updating the PC to fix the issue. To do so, follow the steps given below-
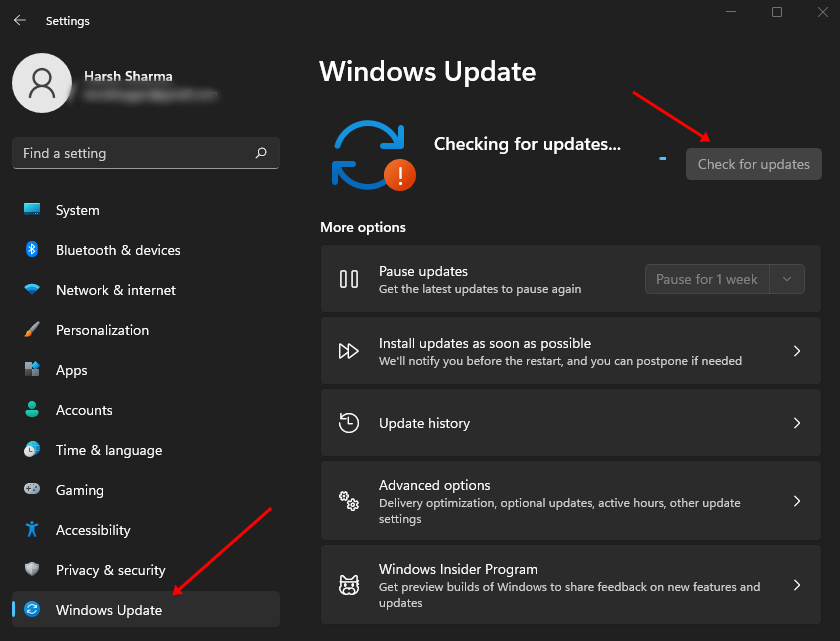
- Go to the Start menu, search for the Settings app and open it.
- Under the Windows Update section, click on Check for Updates.

- Install all the updates listed here.
- Once done, restart your PC and check if you still face the issue or not.
5. Perform System Restore
Another method for fixing the Dism.exe Error 1392 on the Windows 11 PC is to perform a system restore. System restore will revert all the changes made to your PC.
You need to have a restore point to perform system restore. Performing system restore will revert your PC to the point when the restore point was created.
You can follow the steps given below to perform a system restore-
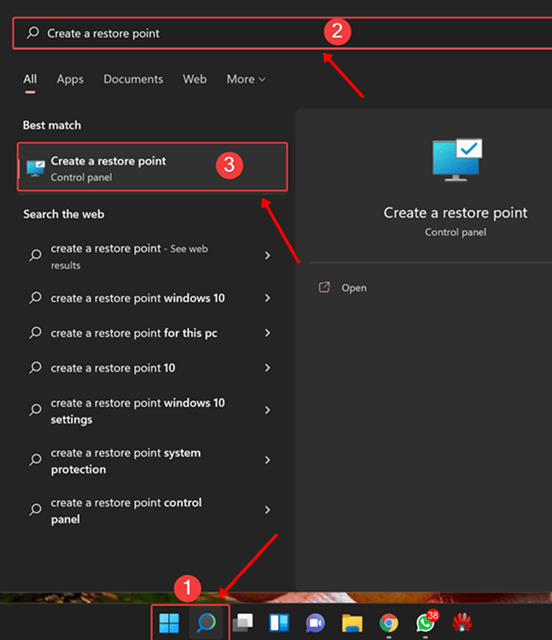
- Press the Windows key, search for Create a restore point and open it.

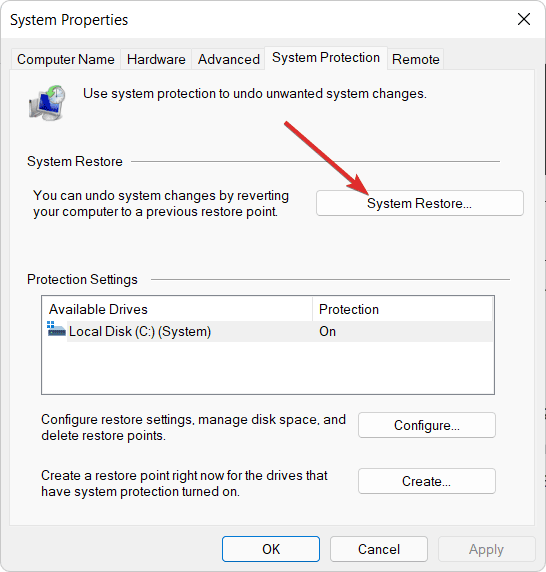
- Click on the System Restore button here.

- On the System Restore window, click on Next.
- You will now have to select a restore point; select a restore point to continue ahead.
- Now, click on Scan for affected programs to know what changes will be made to your system.
- Click on Next to perform system restore.
- Now, click on Finish to continue with the system restore.
- Your PC will now restart. After the process is completed, your system will be restored.
- You should now no longer face the issue.
6. Reset PC
The last troubleshooting method to fix errors is to reset Windows. This particular method will surely work if none of the above methods work.
Resetting your PC will remove the settings and the apps and revert your system to the factory settings. You must have a backup before resetting your PC. The steps for the same are as given below-
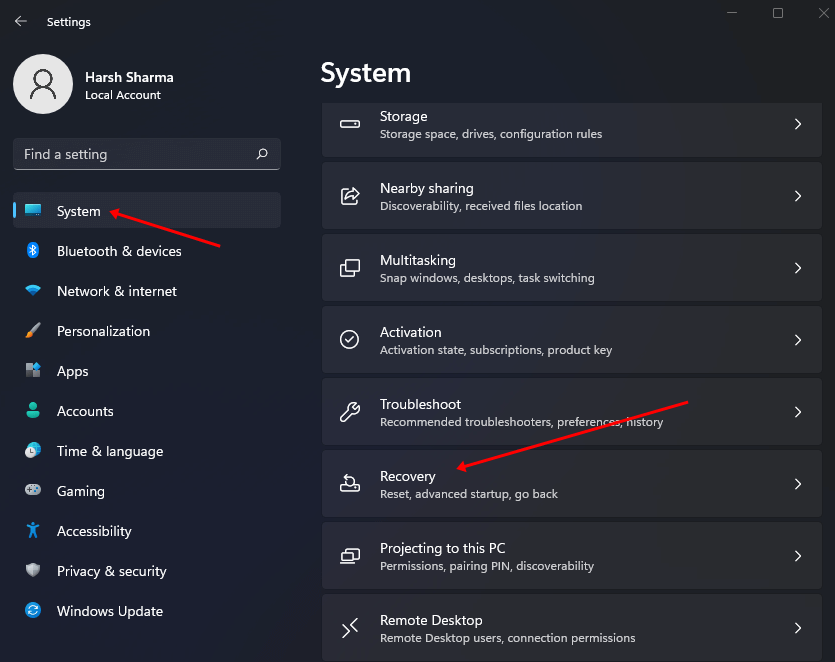
- Go to the Start Menu, search for Settings and open it.
- Under the System tab, click on Recovery.

- Under the Recovery Options, click on the Reset PC button.

- You will now see two options- Keep My Files and Remove Everything. Select either of the two options as per your preference.
- Follow the on-screen instructions to reset the PC.
- Once done, the issue should no longer be encountered.

7. Stop Antivirus Service Temporarily
Microsoft Defender offers a range of protective features for our system, but it may occasionally involve other functions.
This involvement could potentially lead to DISM.exe errors caused by antivirus software. Let’s stop its service for a while and check whether the error has gone or not.
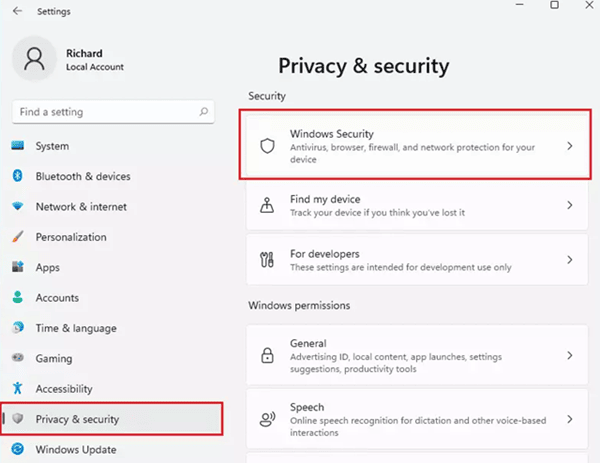
- Press Windows start > Settings > Privacy & Security.
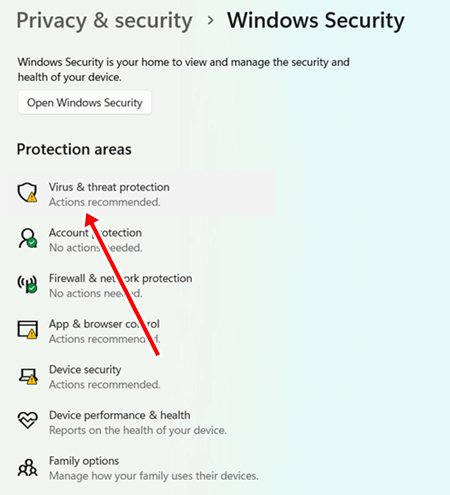
- Next, click on Windows Security.

- Then, select Virus and Threat Protection.

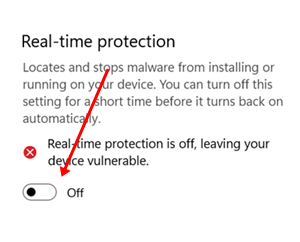
- Scroll down and click on Manage Settings.

- Now turn off the toggle button of Real-time protection.


8. Update Your System Driver
An outdated and corrupted system driver could be a possible reason for the DISM.exe error. Consider updating it, as doing so could potentially fix the error.
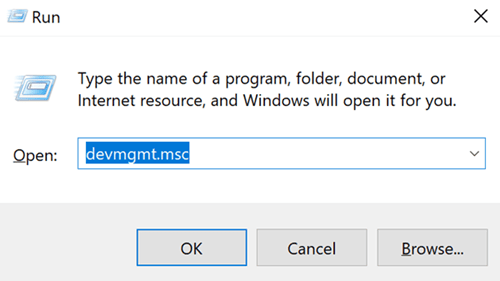
- Press the Windows + R button to open the Run Dialog box.
- Then type devmgmt.msc, and hit the enter button.

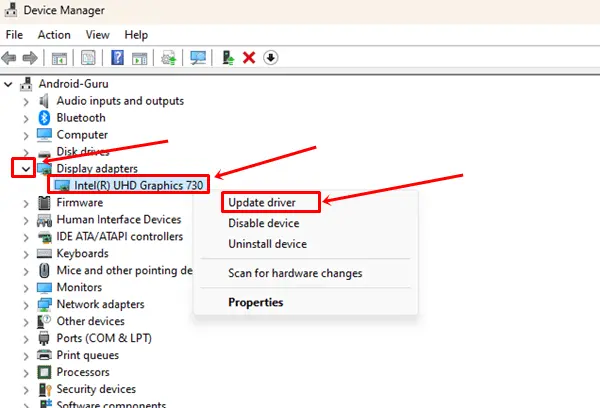
- Now you will see Device Manager; Right-click on any driver and select Update driver.

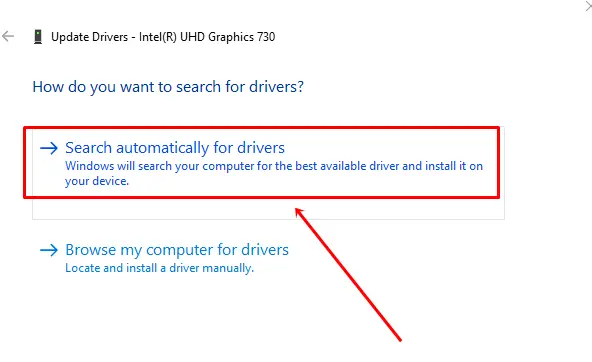
- Next, select Search automatically for updated driver software to update the driver automatically.

9. Clear Out All Junk Files
It has been proven that if you’re not clearing unnecessary and unwanted files for a while, they start conflicting with each other and lead to an error like DISM.exe error 1392 on Windows.
So clearing junk files is very important to keep our system free from any errors. Moreover, it also enhances our system performance drastically.
To clean temporary files, you can make use of the System’s Cleanup recommendation. Otherwise, there are many third-party PC cleaner tools available in the market to use.
10. Perform a long DISM scan
If none of these methods are working for you, performing a long DISM scan can help you.
Note: This method is only for Windows 10/11 users. Now follow this:
- Visit the Microsoft Official Download page, and click Download Now under the Windows 10 Installation Media.

- After downloading the file, Run it with Administrator privileges.
- Click on the Agree button of the Terms and Services.

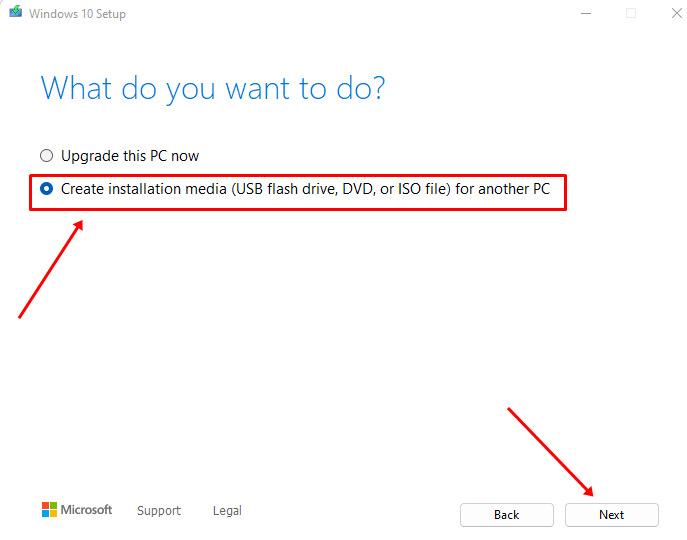
- Click on Create Installation Media and the Next button.

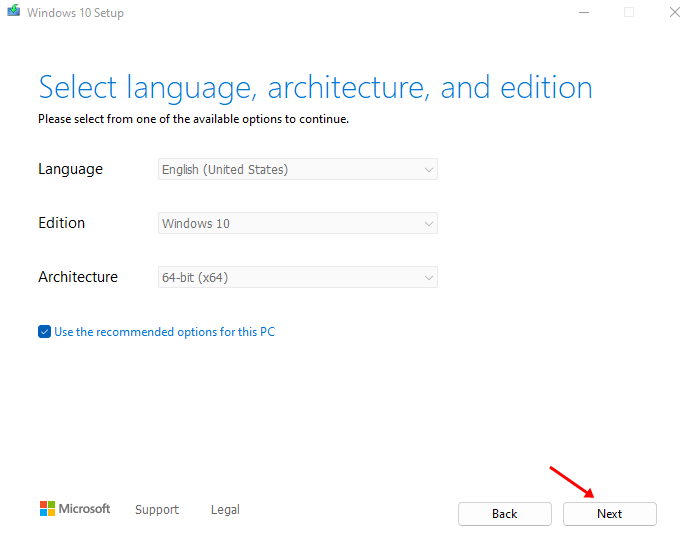
- Again, you have to submit language, edition, and architecture according to your system. And click on Next.

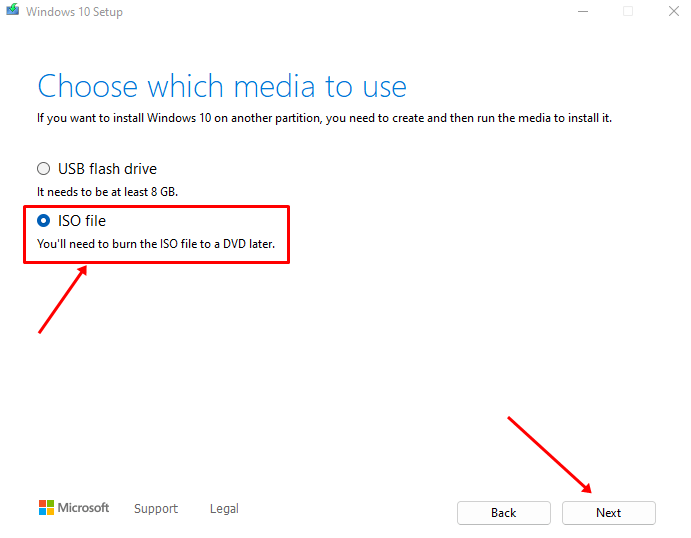
- Then, select ISO file > Next.

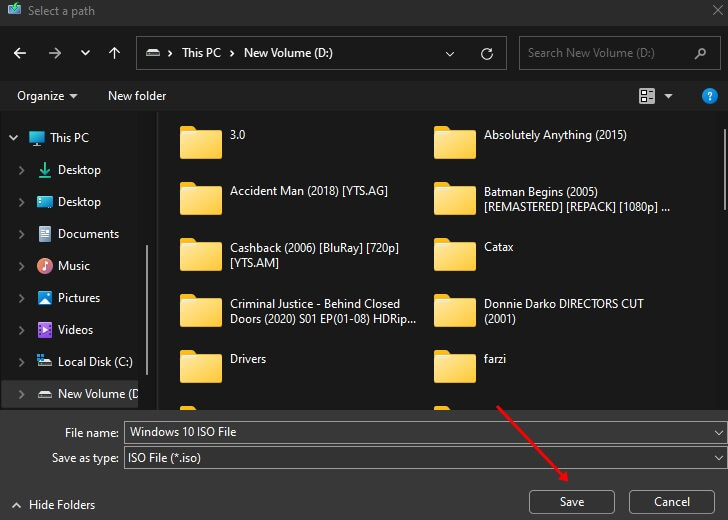
- Next, choose the file destination for the ISO file; depending on the network speed, Media installation will be created in ISO format.

- Double-click on the ISO file, select Mount and confirm it.
- Now press Windows start, search for Command prompt, and select Run as administrator.
- Then, type the below command on CMD and hit Enter. Also, replace the D drive with the drive you have selected while mounting the ISO file.
DISM /Online /Cleanup-Image /RestoreHealth /source:WIM:D:\Sources\Install.wim:1 /LimitAccess
- Now sit it out for some time; it may take some time, might take more than hours.
- After the successful DISM scan, restart your system.


This is how you can perform a long DISM operation, and hopefully, the error will be resolved by now.
Conclusion
These were some troubleshooting methods to fix the Dism.exe Error 1392 on Windows 11/10. This can occur for various reasons. If you encounter this issue, you can follow the above steps to help solve it. You can let us know if you have other methods in the comments.


