Windows 10 introduced the fingerprint sensor in 2015. Many users reported that their fingerprint not working after the Windows 11 update. Although you can reboot your computer using the “Restore from a previous time” option, it may not always work. Rarely, other programs like antivirus programs can also cause the problem.
The worst thing about Windows 11 is its sensitivity to touch. The program will not start if there is even a little dust on the sensor. The problem is that the sensor isn’t actually sensing your touch but is also sensing repeated touch patterns.
Many users noticed bugs and missing features in the new Windows version. Previous posts have discussed Windows 11 issues such as Scanner not working and missing clock and date, File Explorer lag, and Scanner not being able to detect fingerprints. Users discovered that their fingerprint readers had stopped working in mysterious ways. Users report that the option to add or remove a fingerprint is no longer clickable.
Also Read- Disable Driver Signature Enforcement in Windows 11
Best Ways to Fix Fingerprint Sensor Not Working in Windows 11
We compile the best methods to fix Fingerprint Sensor Not Working issue in windows. You can try each way one by one. We include images with each step to make it easy to follow up on the steps.
1. Add New Fingerprint
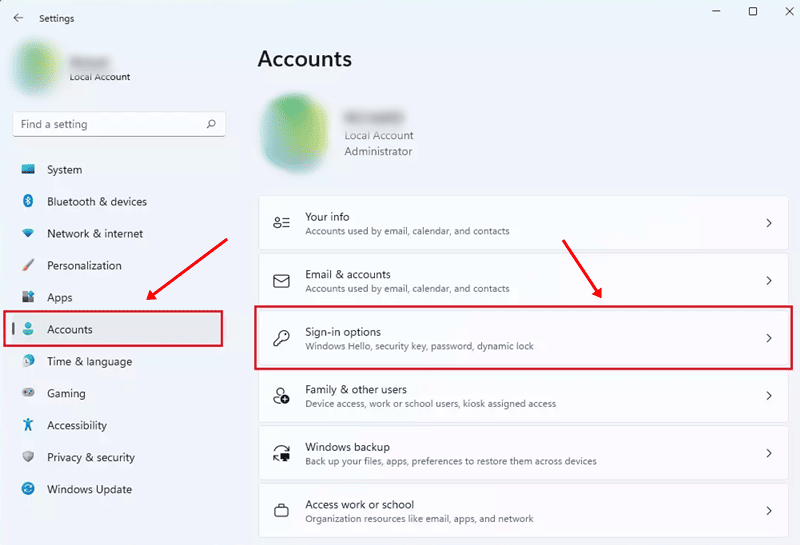
- Firstly go to the Start menu of Windows 11 and click on Settings. Alternatively, you can press the Windows + I button.

- Now on the left many select Accounts.
- Click the Sign-in options on the right pane of the Accounts menu.

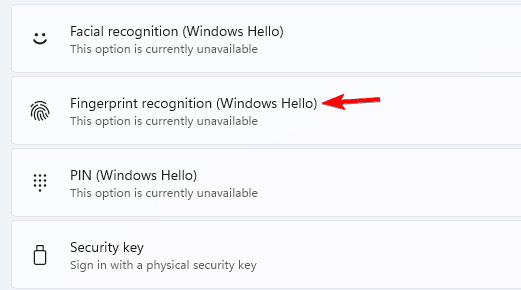
- After that expand the Fingerprint recognition options where you have the option to remove or add new fingerprints. Click on the Add a finger button.

- Follow the instruction from your screen and try to log in with newly added fingerprints.

Related- Remove Fingerprint Recognition Sign-in with Windows 11
2. Uninstall and Reinstall Drivers
- Press Windows + R button to open a Run dialog box and type devmgmt.msc and hit enter.

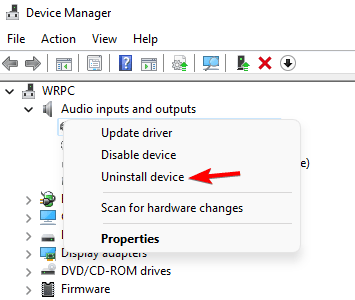
- Now you can see your device manager is opened. Locate Biometric devices and expand that option.
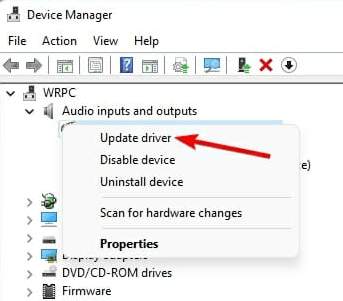
- Now from the below list of Biometric devices, you need to right-click on that specific device and click on Uninstall device.

- Click on Uninstall button on the confirmation window and restart your computer.
- On the restart, windows will automatically detect and install fresh drivers on your Windows 11.

NOTE- If your windows do not automatically install drivers we recommend you to use driver updater tools that can detect your hardware and install suitable drivers for your computer.
3. Update Biometric Drivers
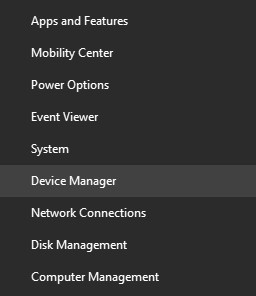
- Press Windows + X key to open the start menu options and select Device Manager.

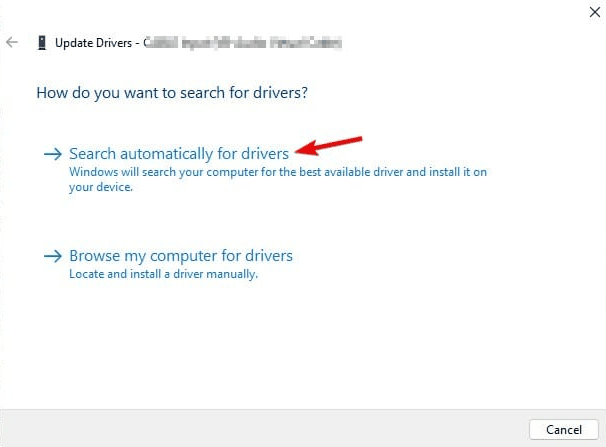
- Locate Biometric devices and expand that option and right-click on the device and click on Update driver.

- On the next screen, you need to select Search automatically for drivers option.

- After that follow the on-screen instruction to update your Biometric Drivers.
4. Check for Windows Updates
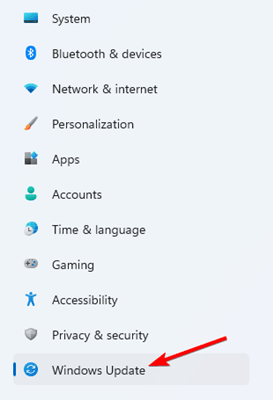
- Click on the start menu and select settings.
- On the left menu click on Windows Update in the last option.

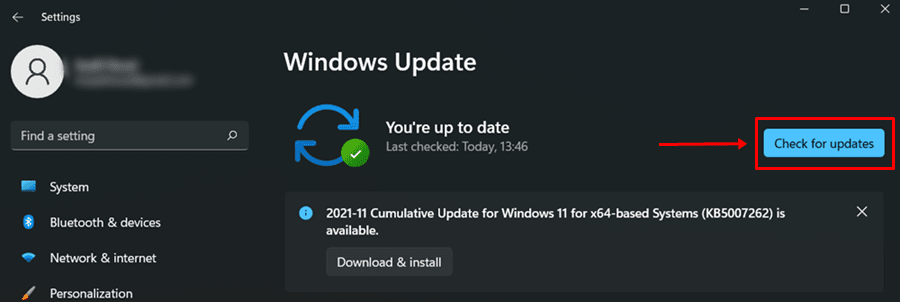
- Now you can see the windows updates available for your PC. You can also click on Check for updates.

- If there is any latest update available for your windows 11 pc they can fetch and show in this option.
Conclusion
Above are the most common and technical ways to fix Fingerprint Sensor Not Working in Windows 11. You can start fixing fingerprint problems from the basic method. If that can solve your problem, it’s awesome; otherwise, you can go for advanced fixes. If you have more fixes to solve this issue or have any doubt about this article, let me know in the comment section.


