What can be worse than facing a blue screen error on your Windows PC? Many users have reported facing BSOD error on their PC with the error message- PAGE FAULT IN NONPAGED AREA STOP 0×00000050 intelppm.sys.
There can be various reasons behind facing the issue. You can encounter this issue due to corrupted drivers, outdated Windows, corrupted system files, etc.
If you are facing this issue, then this article will help you fix it. This article lists various troubleshooting steps to help fix intelppm.sys BSOD error on Windows 11/10.
Best Ways to Fix intelppm.sys BSOD Error in Windows 11/10
If you are looking for troubleshooting steps to fix intelppm.sys BSOD error, then you can follow the steps given below-
1. Reinstall Driver
Another method is to uninstall the problematic driver from the device due to the error. For that user need to follow the steps mentioned below-
- Go to the Start menu, search for the Device Manager and open it.
- Look out for the driver causing the issue. Right-click on the driver, and then click on Uninstall Device. Confirm uninstalling the driver.

- Once done, restart your device, which will reinstall the driver on your PC.
- This should most probably fix the issue.

2. Tweak Registry
If the above method does not work, the user can try making changes to the Registry. This method is surely going to fix the intelppm.sys BSOD error. To do so, follow the steps given below-
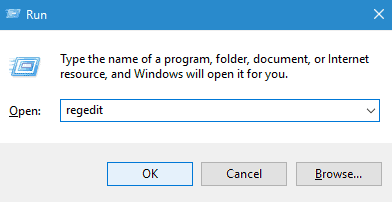
- Press the Windows + R key combo, type regedit, and click on OK to open Registry Editor.

- Navigate the following path-
-
HKEY_LOCAL_MACHINE\SYSTEM\CurrentControlSet\Services\Processor
-
- Double-click on Start DWORD on the right side to edit it.
- Set Value Data to 4 and click on OK.
- Now head to the following path in the Registry Editor.
-
HKEY_LOCAL_MACHINE\SYSTEM\CurrentControlSet\Services\Intelppm
-
- Here, double-click on Start DWORD to edit it. Set the Value Data to 4 and click on OK to save the changes.
- Close Registry Editor and restart your PC. Once done, the issue should no longer be encountered.
3. Run System File Checker
The intelppm.sys BSOD error can be fixed by running the SFC scan on the device. You are likely to encounter intelppm.sys BSOD error due to corrupted system files.
SFC is the in-built tool in Windows PC to scan and fix corrupted system files. To run the SFC scan, follow the steps given below-
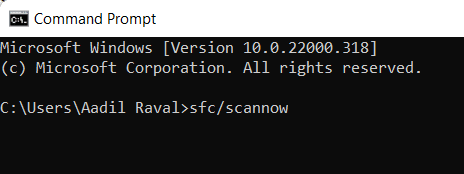
- Go to the Start menu, search for Command Prompt and run it with administrative privileges.
- Then type the following command and hit Enter to execute it-

-
sfc /scannow
-
- This will scan your PC for corrupted files and fix them.
- Once the process is completed, close the Command Prompt window and restart your PC.
4. Update Windows to Latest Version
Outdated Windows may also cause the issue. Updating Windows to the latest version will most probably fix the issue. You can update Windows by following the steps given below-
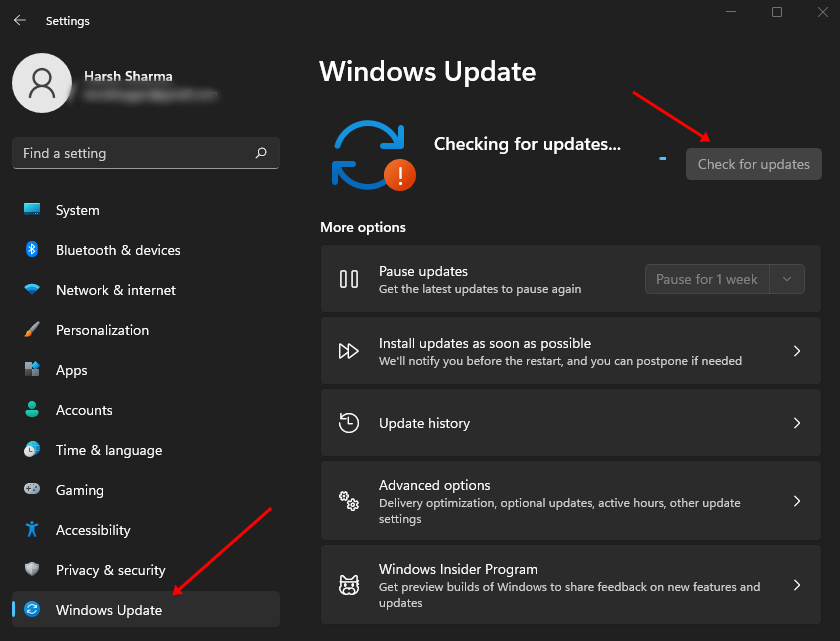
- Press the Windows key, search for Settings and open it.
- Under the Windows Update tab, click on Check for Updates button.

- Any updates available will be listed here. Download and install the update available.
- After the update has been installed, restart your PC.
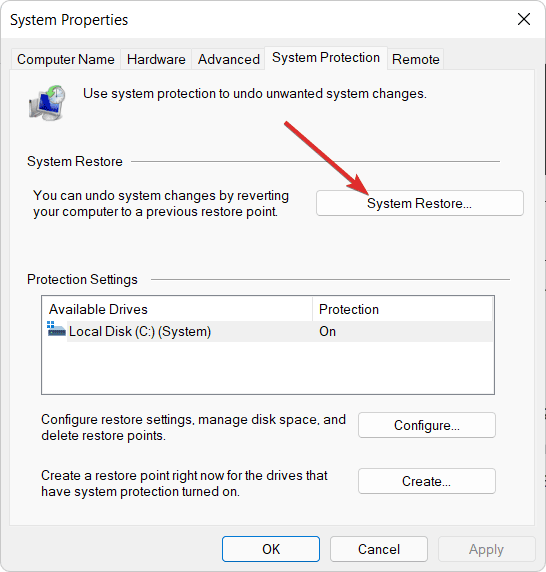
5. Perform System Restore
If you started facing this issue after installing an update, updating the driver, or due to third-party apps that you recently installed, then you should perform a system restore. Performing system restore will revert all the changes made to your system and fix your problem.
To perform a system restore, you will need a restore point created before the changes were made to the system. Follow the steps given below to perform a system restore, follow the steps given below-
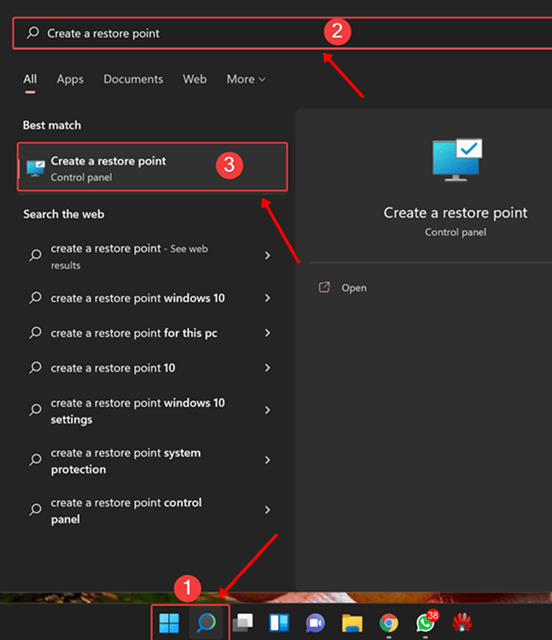
- Press the Windows key, type Create a restore point and click on it. This will take you to the System Protection tab in the System Properties.

- Here, click on the System Restore button. Click on the Next button to continue ahead.

- Now, select the appropriate restore point and click on Next. If you want to know what programs will be uninstalled or reinstalled, then click on Scan for affected programs option.
- Follow the on-screen instructions to perform a System Restore.
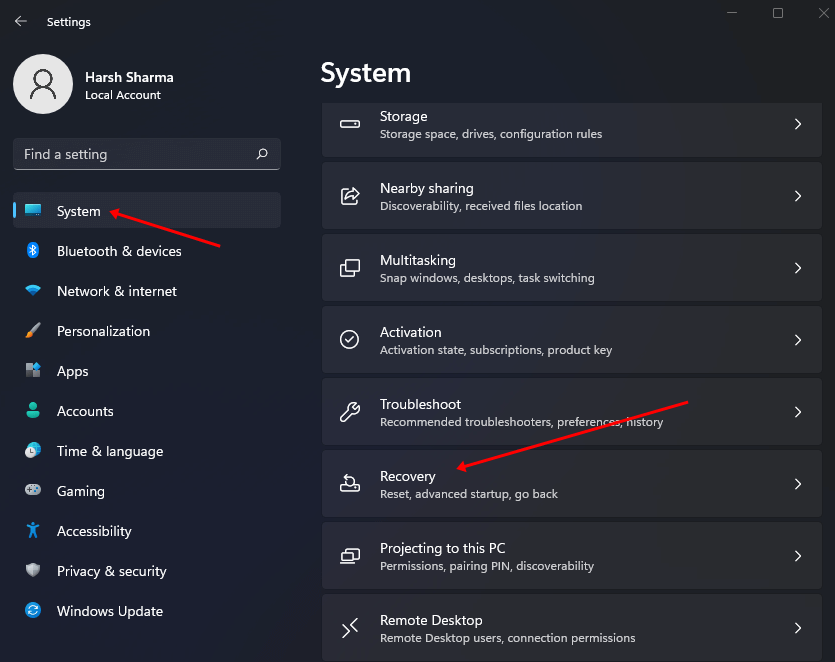
6. Reset Windows
The last troubleshooting method to fix the intelppm.sys BSOD error is resetting the Windows. If none of the above methods worked, you should follow this method.
Before you continue ahead, ensure you have a backup of files. To reset Windows, follow the steps given below-
- Go to the Start Menu, search for Settings and open it.
- Here, in the System tab, click on the Recovery option.

- Click on the Reset PC option.

- You will see two options now- Keep My Files and Remove Everything.
- Keep My Files- This will keep your files but will remove the settings and apps on your PC.
- Remove Everything- This will remove everything, including your files, apps, and settings.
- Select any options and then follow the on-screen instructions to reset Windows.
- Once done, set up your PC and the issue should be fixed.

Conclusion
That should fix intelppm.sys BSOD Error in Windows 11/10. Following the above steps should most probably fix the issue.
If you still encounter this issue, we recommend contacting the service center, as the issue may be caused due to hardware issues. The service center will fix the issue for you, and you will no longer encounter it.


